Rotting wood is an issue for most people, especially those with older homes. Decay from wood arises from surfaces exposed to moisture. This rotting may occur on both outdoor and indoor wood.
It is worth noting that most of the wood that appears rotten in your home may be found in high moisture areas such as near water pipes, door jams, decks, basements, fences, and attics.
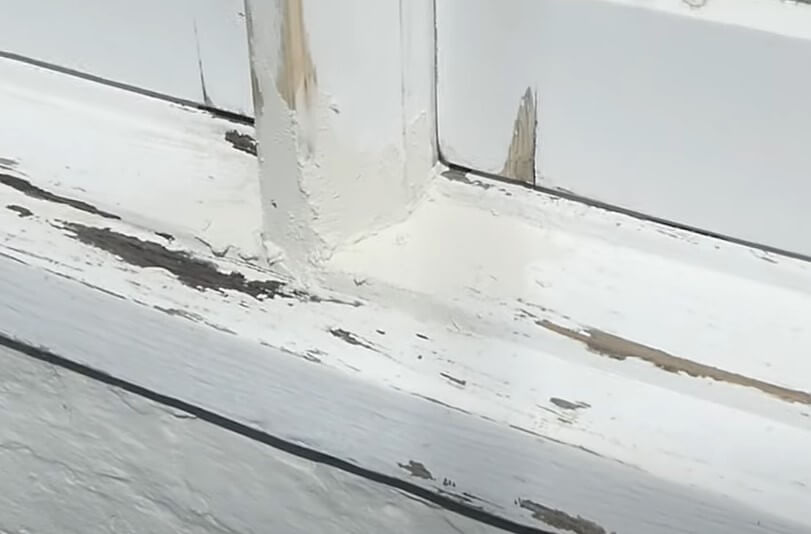
However, you do not need to waste much of your time and money replacing your rotting wood. Instead, you can just repair it. But identifying rot early is important. if you are not sure Below is a video on how to identify wood rot.
How to Repair Rotting Wood
The first thing is to inspect the part of your wood you think is rotten. This will help you see how much damage there is and the kind of repair required.
If the wood is not too rotten, then there’s no need to involve a professional. However, if more than half of the wood has been affected by decay, you will need the help of a professional or just replace the entire piece with a new one.
The next step is to determine what caused the rotting and prevent it from happening again. Ensure that you have sealed off all leaks and open spaces where a change of weather might affect the wood in the future. If the rotting wood piece is outdoors, ensure your gutters are correctly installed. Below are steps on how to fix the rot.
1. Identifying and cleaning the rot
Carefully and systematically, remove the decaying wood using a chisel and mallet or small hammer. Do not put too much pressure as it could ultimately damage your wood.
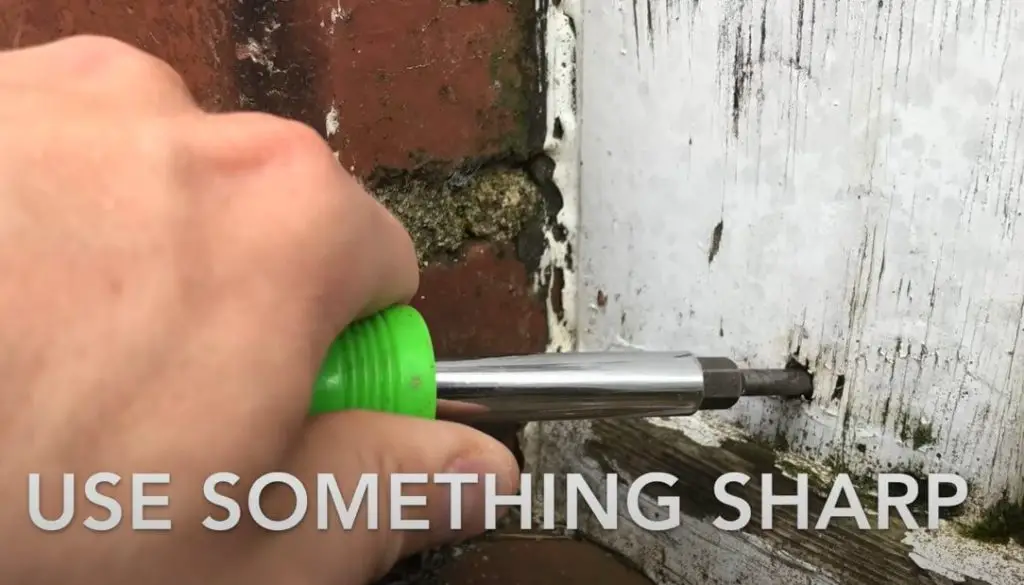
While using the chisel ensure the beveled edge lies on the wood to avoid removing huge chunks at once. Also, ensure that you have removed any weak spots around the wood rot. After that, clean the area to make sure there is no debris.
2. Applying a Wood Hardener
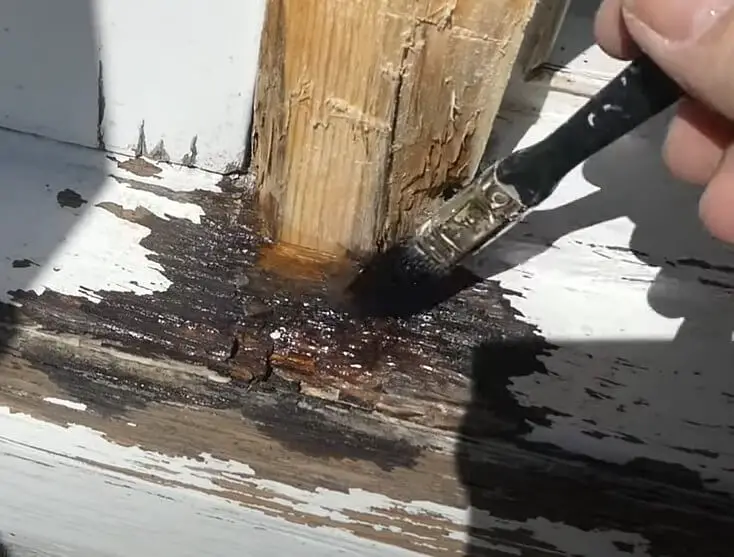
It is not hard to find a wood hardener. Take a walk to your nearest home improvement store, and they will give you a wood hardener at an affordable price. The hardener will penetrate your wood, creating a seal that helps prevent moisture from seeping in. apply the wood hardener on your wood using a small paintbrush and leave it to dry.
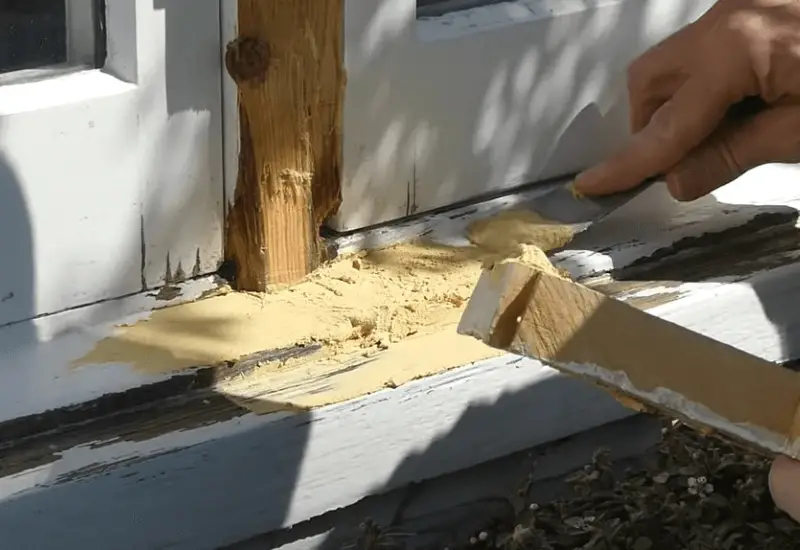
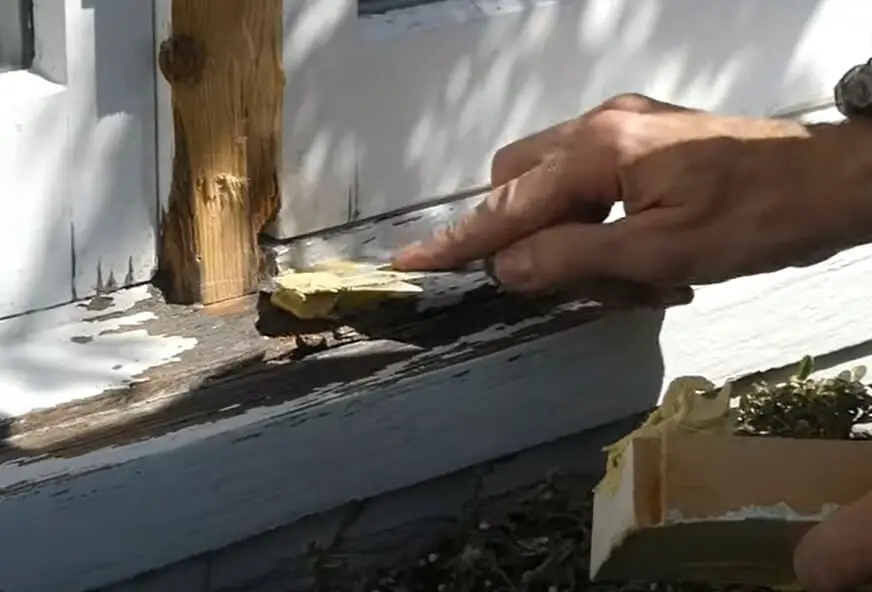
3. Applying Filler
Use wood putty or epoxy to fill the wood. Apply the filling agent to the areas needed using a putty knife. Ensure that the applied agent has a smooth surface by removing any excess filler before it dries. After that, leave it to dry completely, probably for around ten hours.
After letting the filler dry, sand it using a 120 grit sandpaper or sand block. Ensure you sand it to match the rest of the wood area. The next step is to clean the area using a dry rag and ensure there are no remnants of dust or wood on the surface.
4. finishing with a topcoat
If you plan to paint your wood after restoring it, you will need to use a primer to prime the fixed area. Apply the primer using a paintbrush and follow its instructions and allow it to dry completely.
The last step is to paint your finished work. Depending on how the surface appears, you will need to apply between one and three coats of paint. Make sure that each coat dries up before applying a new coat.
Other cool ways to repair rotting wood
1. Patching the area using epoxy
You can also repair your wood by using epoxy and using the following instructions.
Use a bonding agent to paint the wood. While doing so, use a wide paintbrush and ensure the entire coat is thin. The bonding agents help the epoxy adhere to the area effectively.
Using a putty knife, mix a 2-part epoxy on a non-porous surface. Be sure to dispense enough epoxy to fill the entire area, and mix both agents thoroughly until the color is uniform. Remember to work on the epoxy within 30 minutes after mixing it as it will dry out.
After applying the epoxy, shape it using a putty knife. The initial shape of the epoxy may not be satisfactory, and thus you need a putty knife to shape and make it have a uniform shape with your wood. You may also use a piece of wood to help you make flat edges. Also, clean off excess epoxy using the same putty knife. After you are done, leave the epoxy to dry overnight as epoxy takes about 24 hours to dry out completely. From there you can sand, prime, and paint the entire area, including the wood.
2. Making a wood patch using cedar and polyurethane glue
The first step for this procedure is to make a straight smooth cut in the wood using a saw. Do this by placing the saw in a position whereby the teeth that are closest to the handle touch the wood and move the saw while applying a little pressure. Repeat the move several times until you can remove the wood using your hand. For your work to be flawless, mark the line you intend to cut using a pencil to help you remain straight while cutting.
Trim the piece of cedar to fill the size of the patch you intend to fill. You will also need a saw to perform this procedure. Ensure the wood fits perfectly on the patching area. Cedar is used because it is resistant to rot and is, therefore, an ideal replacement, especially for areas that are most exposed to moisture.
Wipe the exposed wood using a wet rag to make it damp. The gum you will be using works perfectly when exposed to moisture. Therefore, ensure both points of contact are wet by wiping them using a wet rag.
Apply the glue and place the patch. The glue should be applied to the wood while spreading it to ensure it covers the whole exposed area. Press the patch against the exposed area to let the glue start to set.
Drill screws on the side of the cedar. Polyurethane glue is not strong enough to stand on its own. As such, you need to screw the patch on the baseboards. The next step is to sand off the excess glue prime and paint your surface for smooth surface.
Check out a step-by-step guide on how to clean a polyurethane finish.
Restore Rotting Wood – Conclusion
In conclusion, wood rot is a common thing in every American household. Nonetheless, the above-explained steps will help you reverse the adverse effects of moisture penetrating your wood. Any individual can easily follow the steps. Furthermore, the materials used are not costly. Furthermore, you can choose from the different procedures depending on the complexity and the area to be repaired.