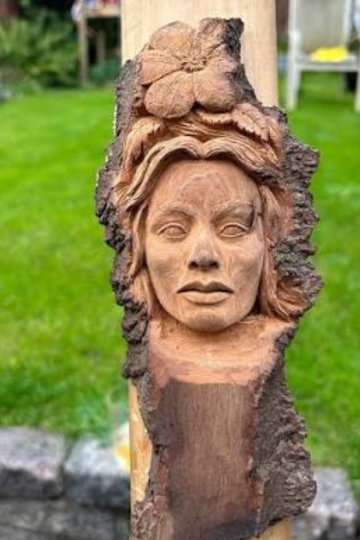
Whittling is one of those crafts that feels almost magical the first time you try it. You start with a block of wood that looks like nothing special, and within an hour or two, a tiny creature begins to emerge from the grain. The shavings curl away from your blade, the shape takes form under your fingertips, and suddenly you have created something that did not exist before. For many beginners, the appeal of whittling lies in this transformation, the quiet focus it demands, and the satisfying simplicity of working with just one tool.
The beauty of whittling lies in its accessibility. Unlike many woodworking disciplines that require expensive machinery and dedicated workshop spaces, whittling can be done anywhere, with just a sharp knife and a piece of wood. This is why simple animal whittling patterns are so popular among newcomers to the craft. Animals provide recognizable forms that are forgiving to carve, and they allow beginners to practice fundamental techniques like making stop cuts, creating curves, and understanding wood grain direction. The patterns themselves range from incredibly basic shapes to more detailed figures, offering a natural progression as your skills develop.
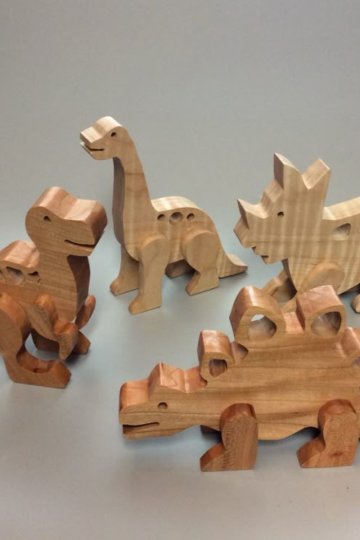
In this guide, we will explore a variety of beginner-friendly animal whittling patterns that you can complete with just a single knife. We will break down each pattern step by step, focusing on the essential cuts and techniques involved. We will also cover the best types of wood for beginners, how to keep your knife sharp, and safety practices that every whittler should follow. Whether you are looking for a relaxing hobby, a handmade gift idea, or a way to develop your carving skills, these animal patterns will get you started on the right foot.
9 Easy Animal Whittling Patterns for Beginners
Here are nine simple animal whittling patterns that are perfect for beginners. Each pattern focuses on basic shapes and fundamental knife techniques.
1. The Classic Owl
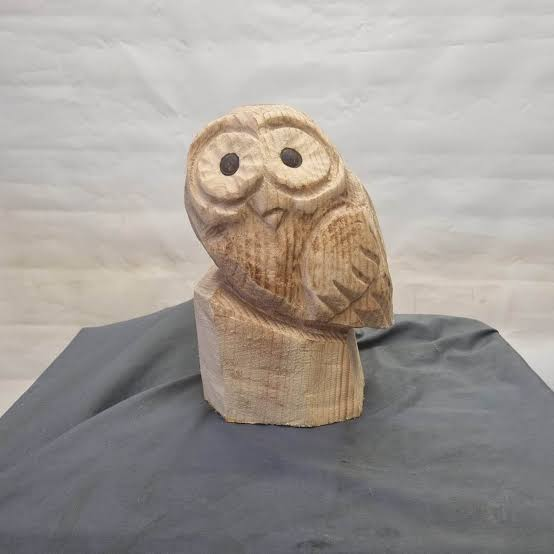
The owl is arguably the most popular beginner whittling project, and for good reason. Its round body, large eyes, and simple wing shapes make it incredibly forgiving to carve. Start with a small block of basswood and rough out the basic cylindrical shape. The key to a good owl is in the details: use a V-cut to define the feather texture on the belly and create deep stop cuts for the eyes. The beak is simply a small triangle carved at the front.
2. The Sitting Bear
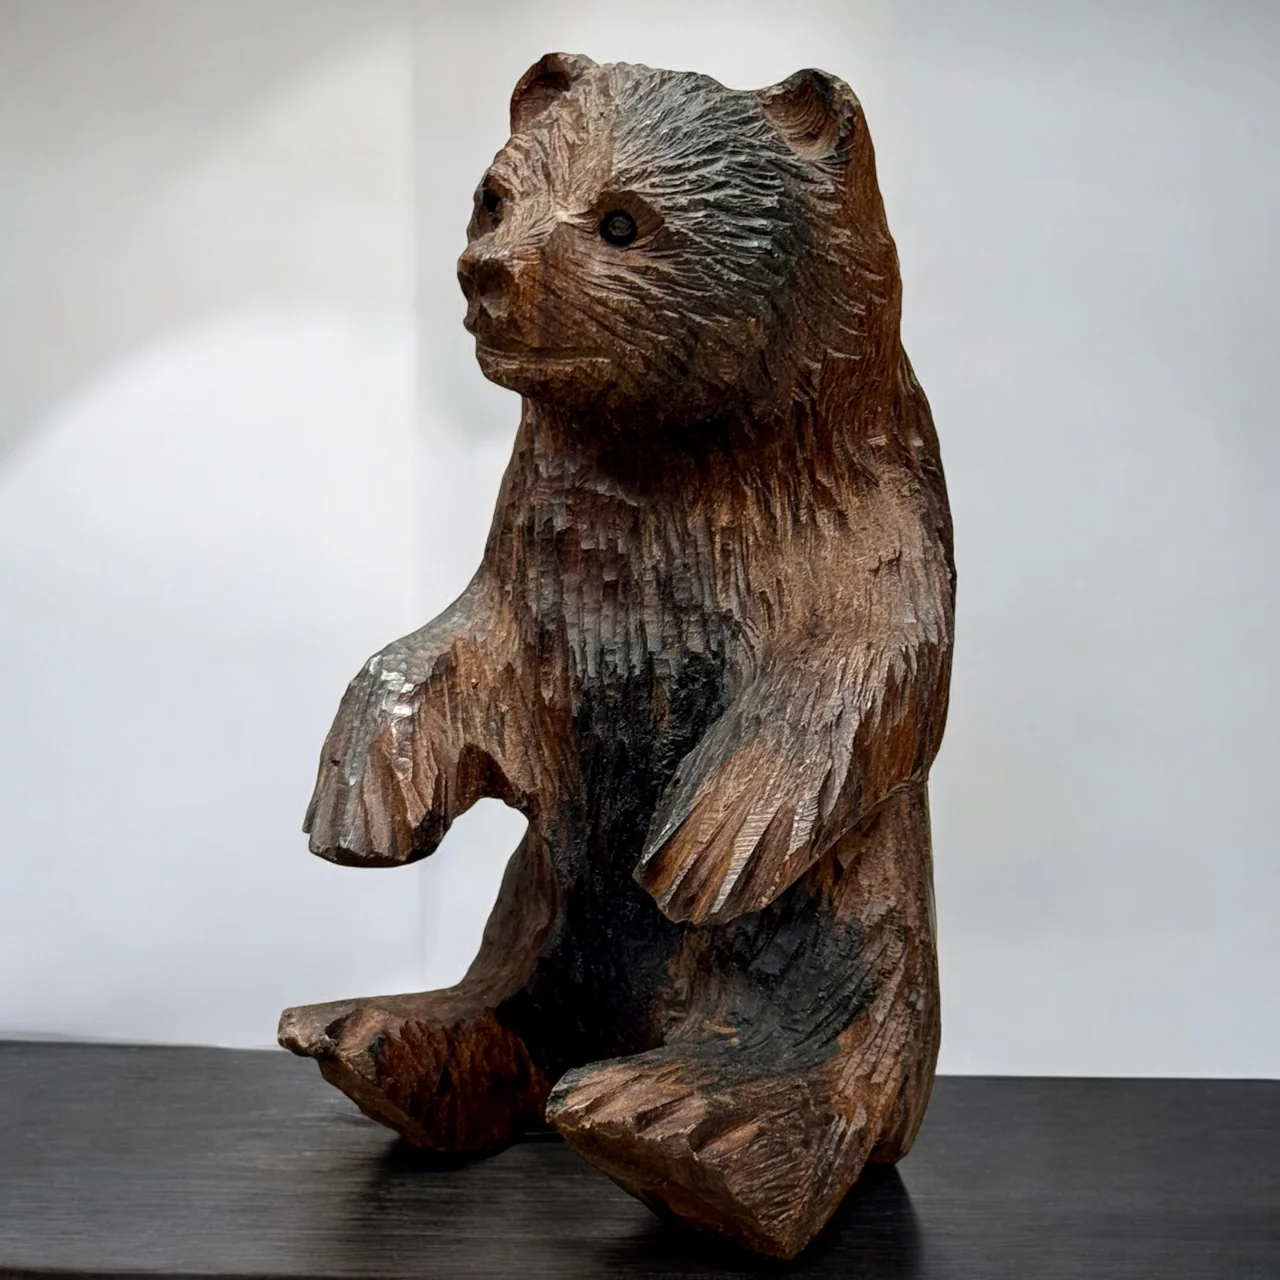
A sitting bear is another excellent starting point. The posture is natural and allows you to practice carving curves for the rounded back and the stubby legs. Begin by sketching a rough outline on your wood block. The bear's face is the most important feature; carve two small indentations for the eyes and a protruding snout. The ears are simple bumps on top of the head. The paws can be indicated with small notches using the tip of your knife.
3. The Simple Fox
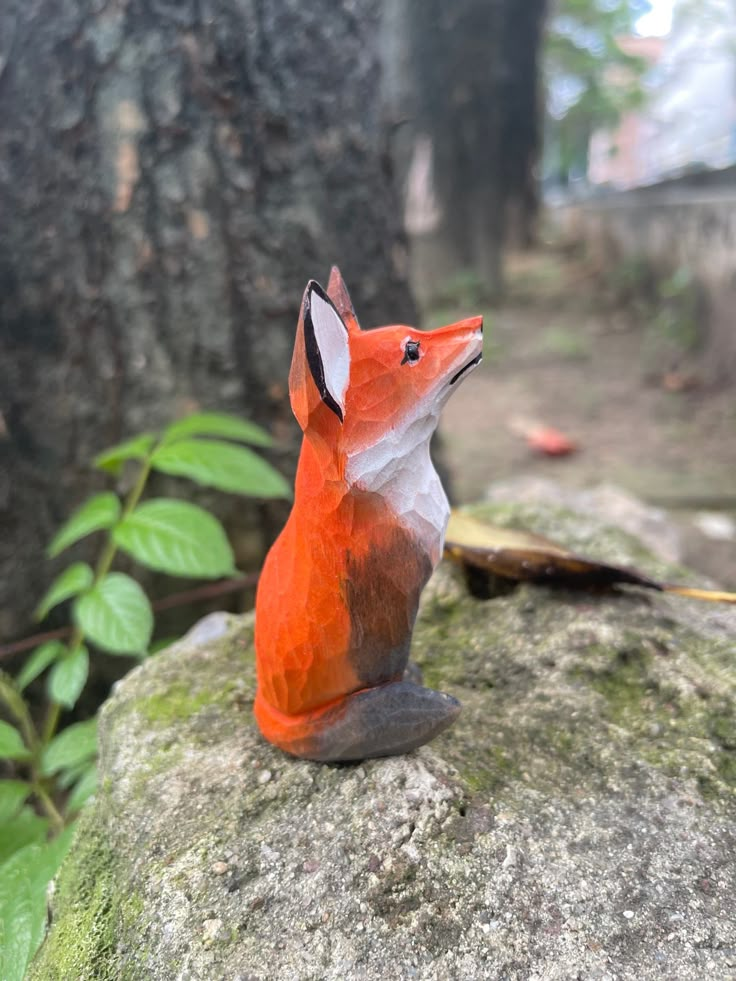
Foxes are sleek creatures that translate well into simple whittling patterns. The focus here is on the pointed snout and the triangular ears. The body can be carved as a smooth, flowing shape with a prominent tail that curves around the side. This pattern is excellent for practicing slicing cuts along the grain to create smooth surfaces. The pointed nose requires careful control of your knife tip to avoid breaking it off.
4. The Round Hedgehog
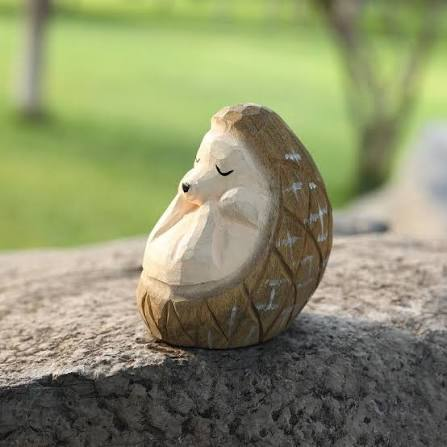
The hedgehog is a favorite among beginners because its defining feature is its texture. The body is carved into a simple dome shape, but the magic happens when you create dozens of small cuts all over the back to simulate the quills. This is a fantastic project for practicing repeated cuts and building consistency. The face is kept smooth, with a tiny carved nose and small indentations for the eyes.
5. The Whimsical Whale
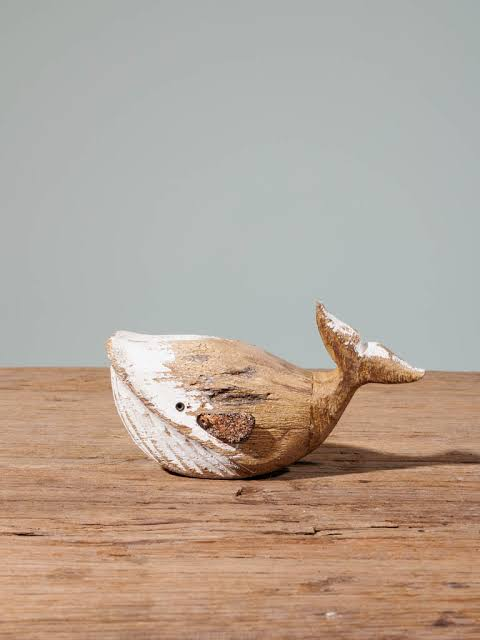
A whale is essentially a rounded tube with a tail, making it one of the simplest shapes to carve. Start with a block of wood and round off the top and bottom to form the body. The tail is carved at the back by making two cuts to form a fan shape. The mouth can be a simple line cut along the side, and the eye a small dot. You can also carve a small water spout on the top of the head for added character.
6. The Standing Penguin
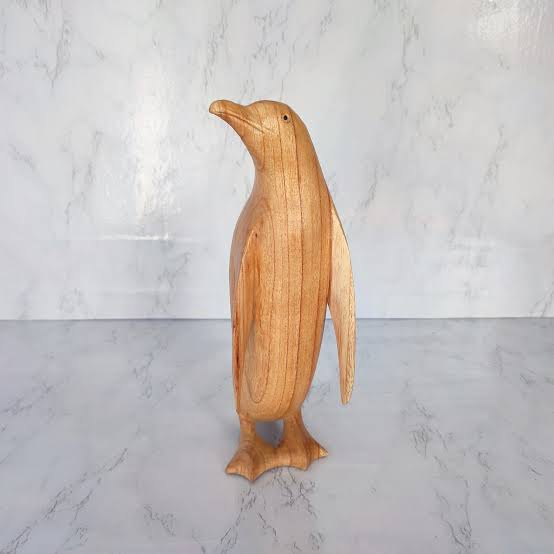
Penguins are naturally comical and easy to carve because they are upright and symmetrical. This is a great project for learning how to carve flat planes and sharp edges. The body is a simple cylinder, with the belly left flat or slightly convex. The flippers can be indicated by carving shallow lines down the sides. The beak is a small triangle, and the feet are two small bumps at the bottom.
7. The Sleeping Cat
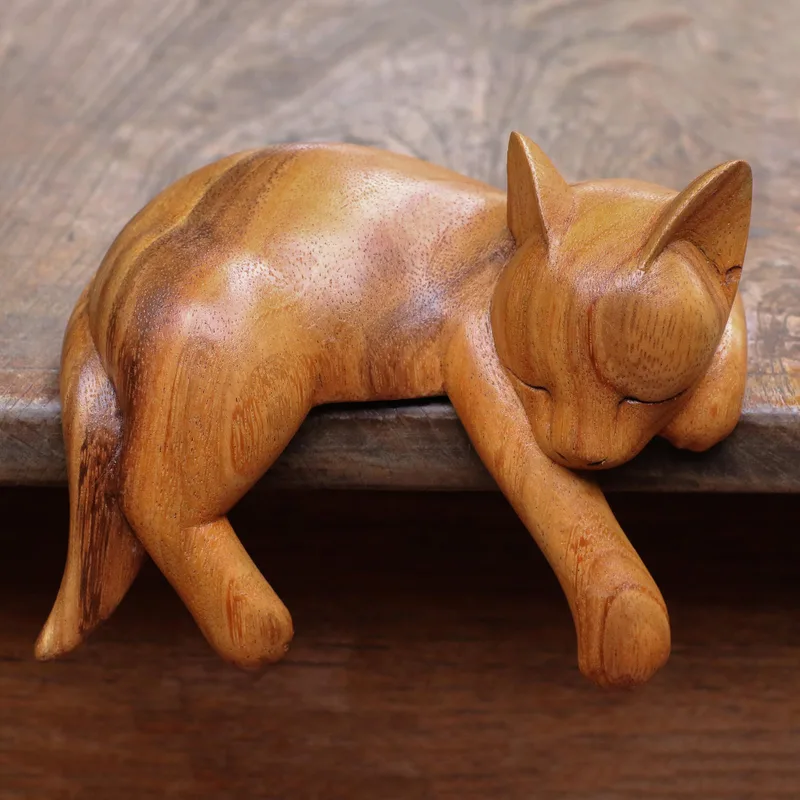
For this pattern, you carve a cat curled up in a ball or sleeping on its side. This shape is essentially a smooth oval with a few defining features. The ears are carved as two triangles on top of the head, and the tail wraps around the body. The face should be peaceful, with closed eyes indicated by small curved cuts. This project emphasizes creating smooth, flowing lines without sharp angles.
8. The Tiny Toad
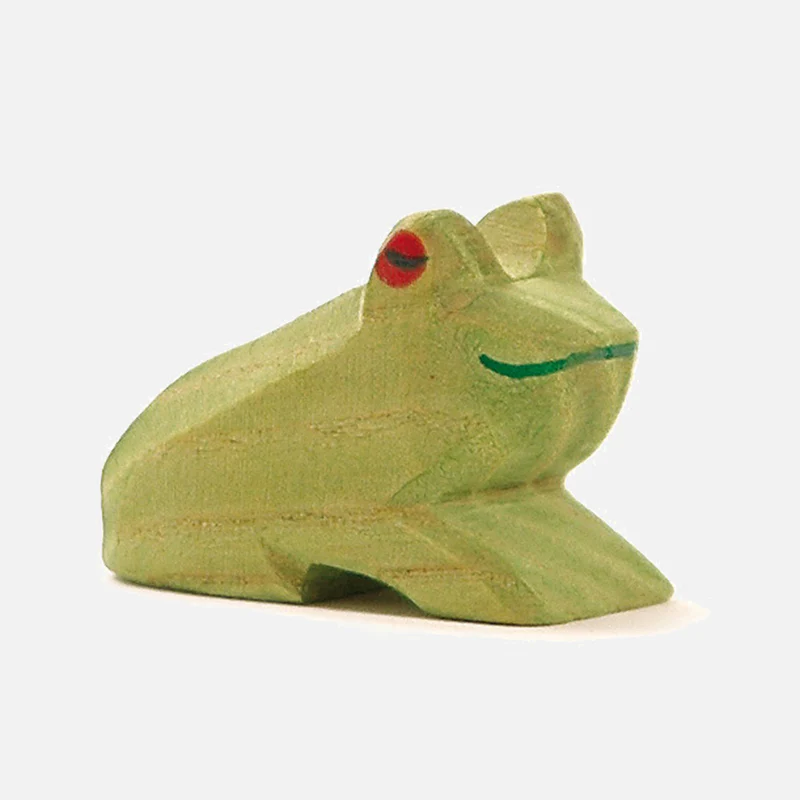
A toad sitting on a log or a flat base is a simple and charming carving. The body is a squat dome, and the legs are carved on the sides. The eyes are two distinct bumps on top of the head. The skin can be left smooth or textured with small dots. This is an excellent pattern for practicing working on a small scale while keeping the shapes simple and chunky.
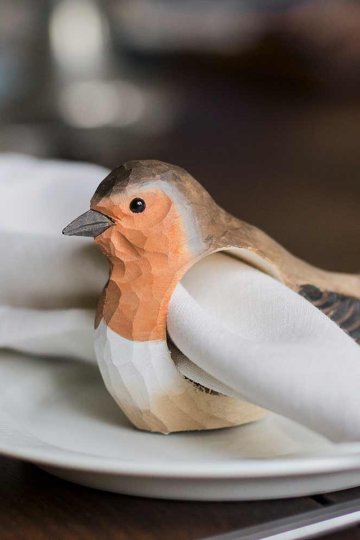
9. The Forest Bird
This is a generic bird shape that can be a robin, bluebird, or any small songbird. The body is a teardrop shape, and the head is a smaller ball attached to it. The beak is carved as a sharp wedge. The wings can be simply indicated with a V-cut on the side. This pattern teaches you how to transition smoothly between the head and the body without creating a distinct neck, which is a common challenge for beginners.
Essential Tools and Materials for Your First Carvings
Before you start your first project, it is helpful to understand what you need and what to look for in your materials.
Choosing the right wood is one of the most critical decisions for a beginner. Basswood is the undisputed champion for whittling. It has a tight, straight grain that holds details beautifully and is soft enough to cut easily with a sharp knife, reducing hand fatigue. It is also relatively inexpensive and widely available at craft stores and online. Avoid hardwoods like oak or maple, as they are difficult to carve and will quickly dull your knife, leading to frustration and potential accidents.
Your knife is your most important tool. While you can find specialty whittling knives, a simple, high-quality folding knife with a locking blade that you can keep razor-sharp works perfectly. The blade should be short, around 1.5 to 2 inches, as this gives you better control. The most important rule of whittling is to keep your knife sharp. A dull knife requires more force, making it slip more easily and causing accidents. Invest in a good sharpening stone or strop and learn how to maintain your edge.
Safety cannot be overstated. Always wear a cut-resistant glove on the hand holding the wood. This simple piece of equipment will save you from countless nicks and cuts. Many whittlers also wear a thumb guard on their knife hand. Establish a safe carving zone and make sure you are never cutting toward any part of your body. Always be mindful of where your knife will go if it slips through the wood.
Frequently Asked Questions About Animal Whittling
What is the easiest animal to whittle for a complete beginner?
The owl and the hedgehog are widely considered the easiest animals to whittle. The owl has simple, rounded shapes, while the hedgehog's texture requires many small cuts that are forgiving and help build confidence.
What kind of wood is best for whittling animals?
Basswood is the best choice for beginners. It is soft, has a fine, straight grain that takes detail well, and is easy to cut. Butternut is another good option, though it is often harder to find.
Do I need special tools to whittle animals?
No, you do not need a full set of carving tools. A single sharp knife with a short blade (around 1.5 to 2 inches) is all you need to complete the patterns listed here.
How do I keep my whittling knife sharp?
You will need a sharpening stone or a leather strop with polishing compound. Regularly stropping your knife after each use and periodically honing it on a stone will keep it razor-sharp and safe to use.
What safety equipment should I use?
A cut-resistant glove is essential. Wear it on the hand that holds the wood. Many also recommend a thumb guard for the hand holding the knife to protect against slips.
How long does it take to whittle a simple animal?
A simple pattern like a hedgehog or owl can take anywhere from 1 to 3 hours for a beginner, depending on the level of detail. As you become more comfortable with the knife, your speed will naturally increase.
Conclusion
Embarking on your whittling journey with simple animal patterns is a rewarding and relaxing way to develop a new skill. The projects outlined above provide a perfect starting point, allowing you to practice fundamental knife techniques while creating charming, tangible results. Remember that the key to successful whittling lies in patience, a sharp knife, and a willingness to learn from each cut.
Start with the basics, focus on safety, and do not be discouraged by imperfections. Each carving you complete will teach you something new about the wood, your tools, and your own abilities. With practice, you will find yourself progressing to more complex patterns and developing your unique style. Pick up a block of basswood and your knife, and see what creature you can bring to life.