Wolves have long captured our imagination—symbols of wilderness, loyalty, and untamed spirit. For woodcarvers, they offer the perfect subject matter: recognizable yet forgiving, detailed but not fussy, and endlessly expressive. Whether you're drawn to the haunting howl of a timber wolf or the watchful gaze of an Arctic wolf, these creatures translate beautifully into wood.
In this article, we'll explore 20 wolf carving ideas organized by skill level, complete with project descriptions, tool recommendations, and tips to bring these magnificent animals to life. From simple silhouette projects perfect for a rainy afternoon to intricate masterpieces that will challenge your finest detail work, there's a wolf here waiting for your knife.
Why Carve Wolves?
Wolf carvings hold special appeal for woodcarvers for several reasons:
- Emotional connection: Wolves evoke powerful feelings—freedom, family, wildness
- Fur texture practice: Learning to suggest fur without carving every hair
- Expression work: Wolves communicate so much through eyes, ears, and muzzle position
- Anatomy fundamentals: Wolf anatomy translates directly to other four-legged creatures
- Market demand: Wolf carvings consistently find homes with nature lovers
- Cultural significance: From Native American symbolism to modern wildlife art
Understanding Wolf Anatomy for Carvers
Before you pick up your knife, understanding basic wolf anatomy will make your carvings more convincing.
Key Physical Characteristics
| Feature | Description | Carving Consideration |
|---|---|---|
| Head Shape | Broad skull, strong muzzle, slightly rounded ears | Muzzle should be about 40% of head length |
| Eyes | Almond-shaped, slightly angled, amber/yellow in life | Set at slight forward angle, not flat on face |
| Ears | Triangular, rounded tips, mobile | Thick enough to not break, can be carved separately and attached |
| Neck | Thick, powerful, ruff of fur (scruff) | Creates opportunity for fur texture transition |
| Body | Deep chest, sloping back, powerful shoulders | Wolves are leaner than huskies—avoid making them too bulky |
| Legs | Long, powerful, large paws | Front legs straight, hind legs angled for power |
| Tail | Bushy, usually carried down (unlike dogs) | Great for fur practice, helps balance composition |
Wolf vs. Dog: What to Watch For
Many carvers accidentally make wolves that look like huskies or German shepherds. Key differences:
- Wolves have broader heads and shorter ears proportionally
- Wolf eyes are more angled (less round)
- Wolves have longer legs relative to body
- Wolf tails are straighter and carried lower
- Wolves have less fluff around the cheeks and jowls
Essential Tools for Wolf Carving
Beginner's Toolkit
- Carving knife: Quality fixed-blade (#2 or #3 detail knife)
- Strop and compound: Sharp tools are essential for fur texture
- V-tool: 3mm or 6mm for fur texture and definition
- Gouges: #3 sweep in 6mm and 12mm for shaping
- Safety gear: Cut-resistant gloves and thumb guard
- Pencil and pattern paper: For sketching and transferring designs
Intermediate Additions
- Micro gouges: For detailed fur work around face
- Reciprocating carver: For faster material removal
- Wood burning tool: For adding depth to fur texture
- Detail knives: Assorted shapes for tight spaces
- Calipers: For maintaining proportions
Advanced Toolkit
- Flexcut tools: For fine detail in hard-to-reach areas
- Power carving setup: For deep relief and life-size work
- Specialty gouges: Back-bent for hollow areas
- Airbrush equipment: For realistic coloring
Wood Selection Guide for Wolf Carvings
| Wood Type | Best For | Characteristics |
|---|---|---|
| Basswood | Beginners, all skill levels | Soft, consistent grain, takes fine detail |
| Butternut | Intermediate | Carves like walnut, beautiful color for wolves |
| Black Walnut | Advanced | Dark color suits gray wolves naturally |
| Cherry | Advanced | Warms to reddish-brown like some wolf coats |
| Aspen | Intermediate | Light color, good for painting/coloring |
| Tupelo | Detailed carvings | Excellent for fine fur texture |
| Juniper | Small carvings | Aromatic, interesting grain patterns |
| White Pine | Practice carvings | Inexpensive but watch for tear-out |
Wood Sourcing Tips
- Look for clear, knot-free blocks for wolf heads
- Consider butt ends for full-body carvings (interesting grain)
- Seasoned wood is essential—green wood will crack
- Size matters: A life-size wolf head needs 8"×8"×12" minimum
Wolf Carving Ideas
1. The Pocket Alpha (Miniature Head Study)
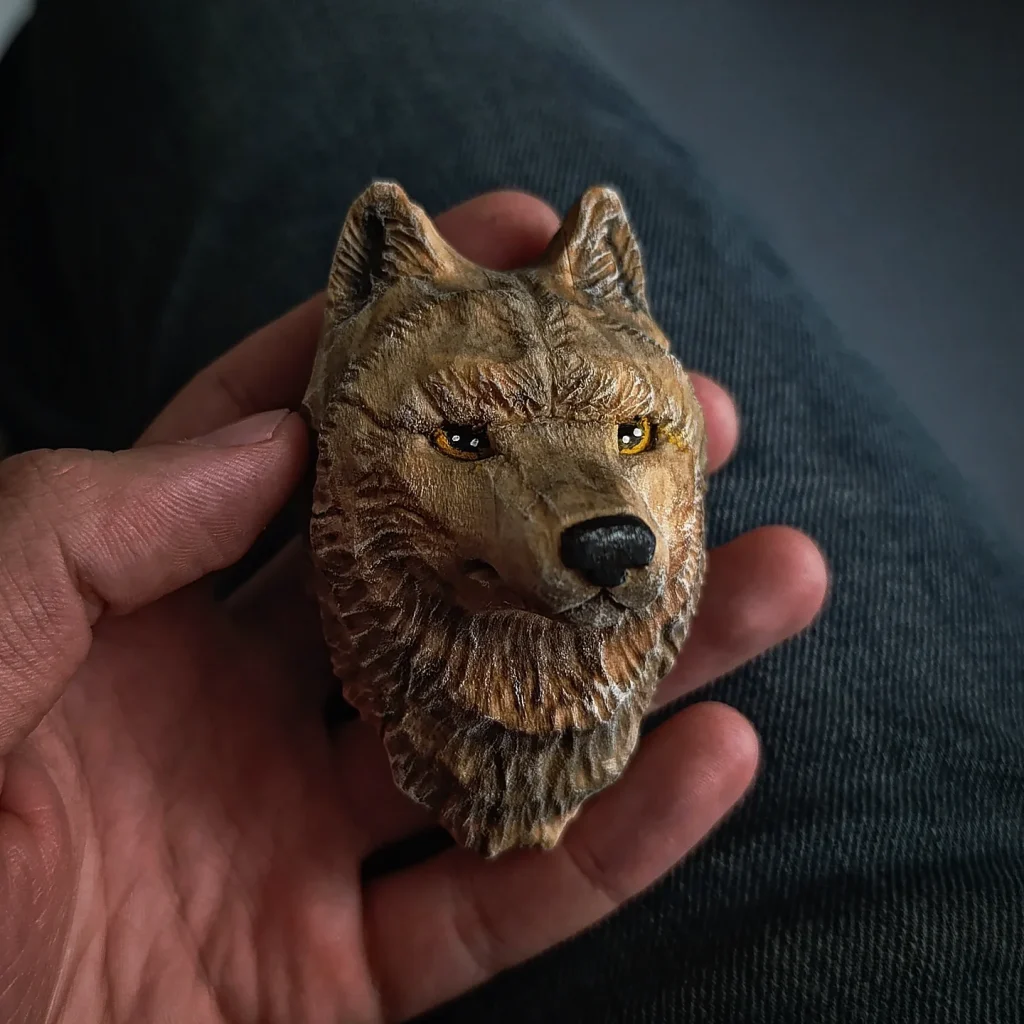
- Description: This project is a masterclass in packing maximum detail into a miniature scale. Carved to fit comfortably in the palm of a hand, this wolf head features an incredibly dense network of fine-line fur textures and highly expressive, amber-painted eyes. The muzzle is precisely tapered to a dark, textured nose, and the ears are deeply hollowed to give the piece a lifelike, alert presence.
- Skill Focus: Micro-Detailing and Paint Layering. This project challenges carvers to use fine-point detail knives or micro-gouges for the fur, followed by a multi-layered painting technique to make the eyes "glow" and the fur appear natural.
2. The Whimsical "Alpha" Bust
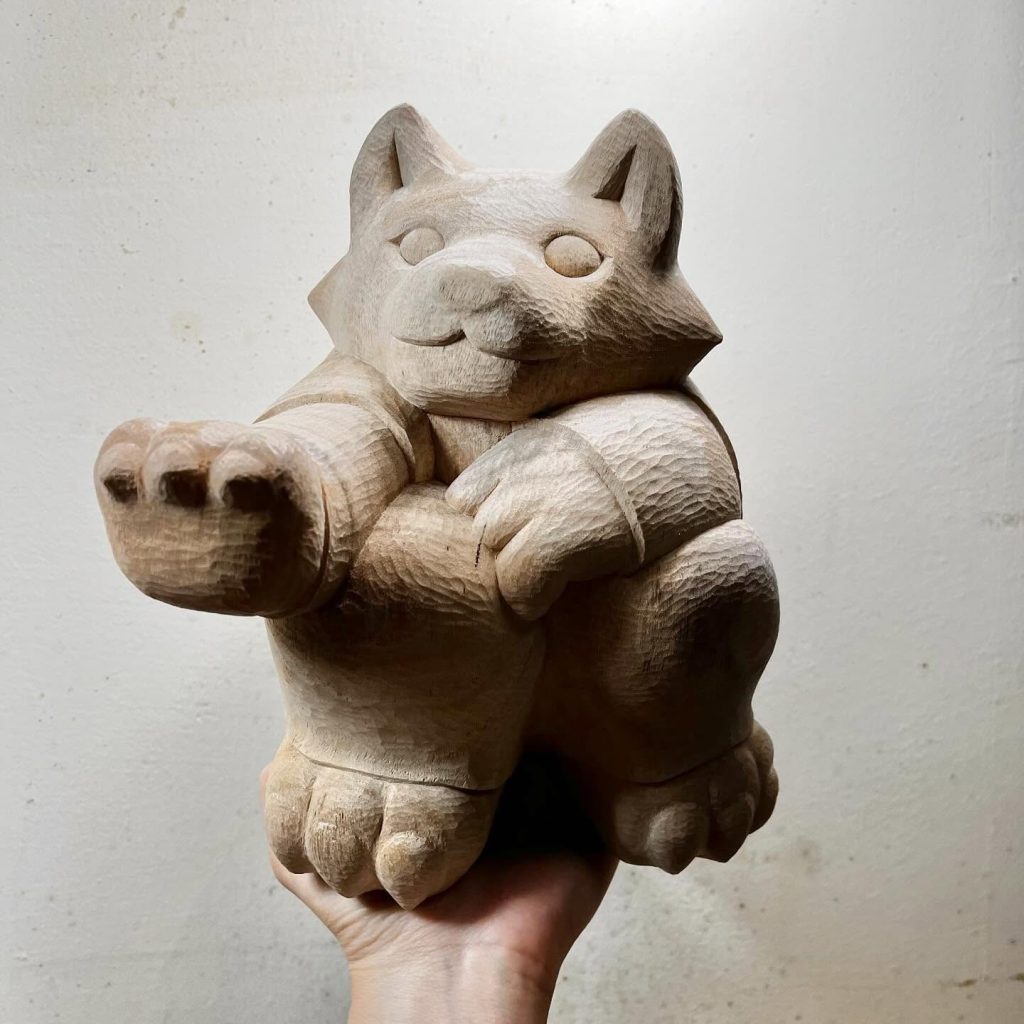
- Description: This project moves away from hyper-realism into the world of character and personality. The carving features exaggerated, friendly eyes and a soft, rounded muzzle that gives the wolf a warm, approachable "companion" feel. It is an excellent project for practicing soft facial transitions and expressive ear placement.
- Skill Focus: Character Design. Learning to simplify features to create a specific "mood" or personality in the wood.
3. The Filigree Guardian Mask
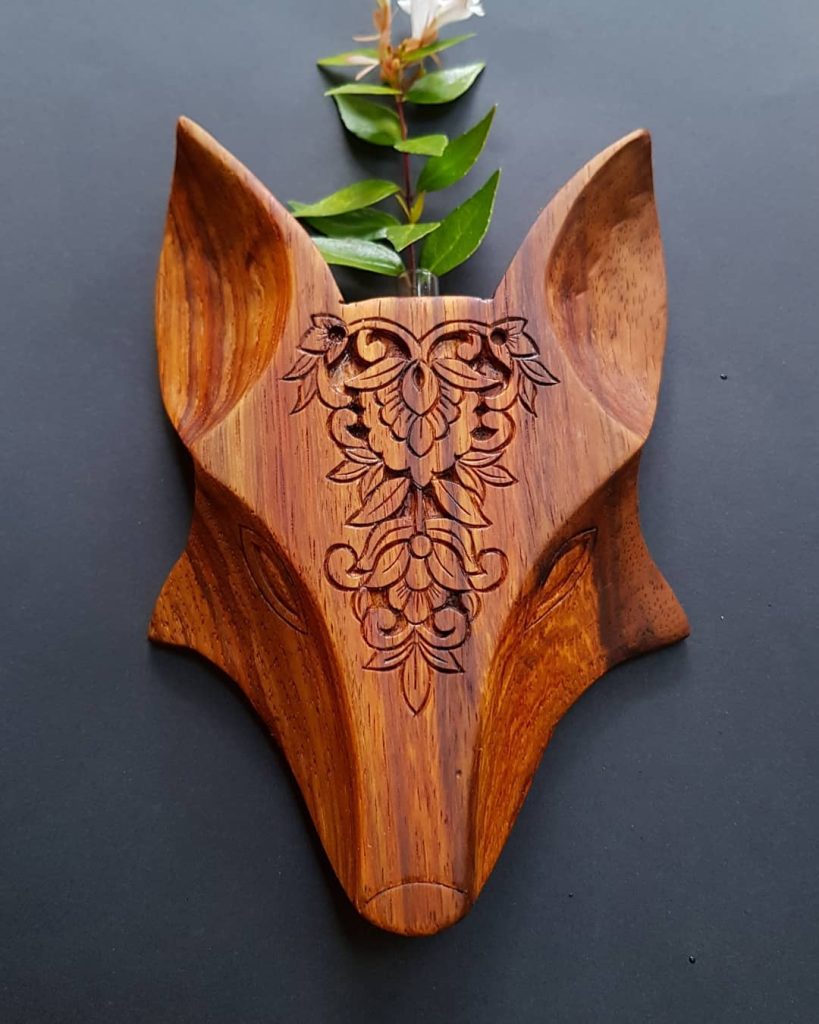
- Description: This stunning piece merges animal anatomy with floral filigree. The center of the "face" is adorned with a deeply carved scrollwork pattern, transforming a simple animal bust into something mystical and ornamental. For a wolf carver, this technique can be used to add "ancient" or "magical" markings to a wolf forehead or chest plates.
- Skill Focus: Ornamental Relief. Practicing intricate, symmetrical patterns within the organic contours of a creature's face.
4. The "Rough-Out" Stage (The Blueprint)
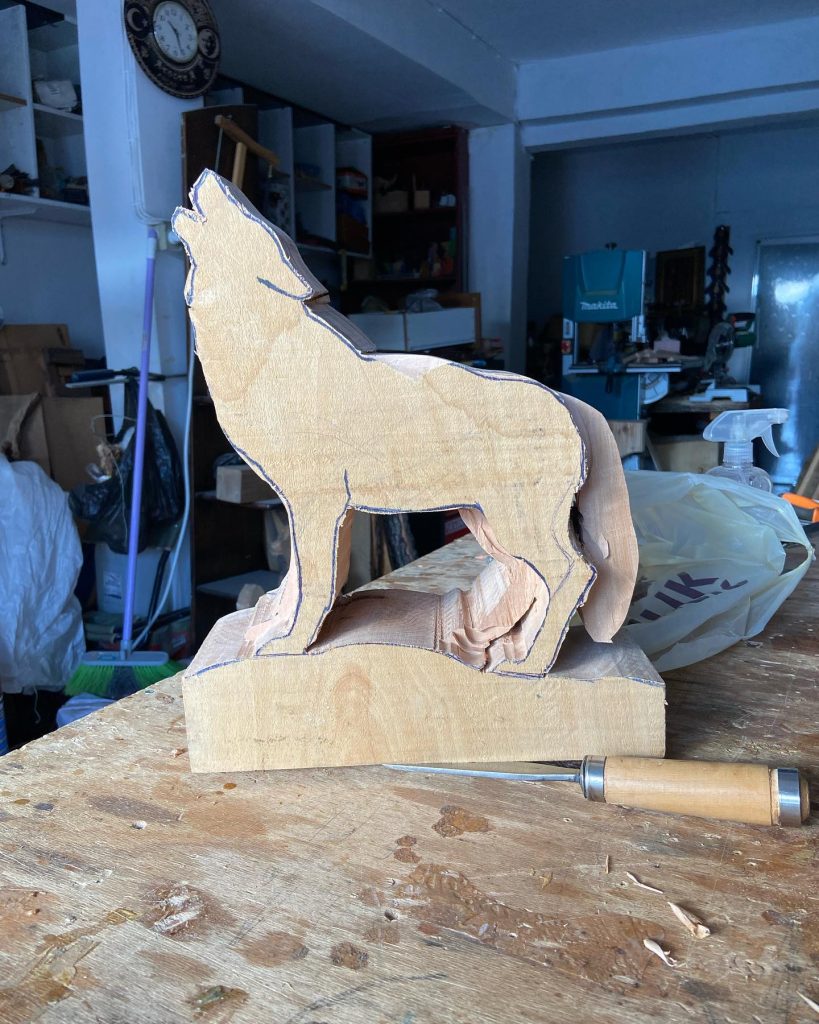
- Description: Every great wolf begins just like this: a rough-cut silhouette on a block of wood. This stage is about bulk material removal. By using a bandsaw or a heavy gouge to "block out" the basic shape, you save hours of fine-knife work. It’s the best time to check your proportions—making sure the neck is thick enough to support the head and the base is sturdy enough for the fours.
- Skill Focus: Blank Preparation and Visualization. Learning to see the finished creature hiding inside the rectangular block.
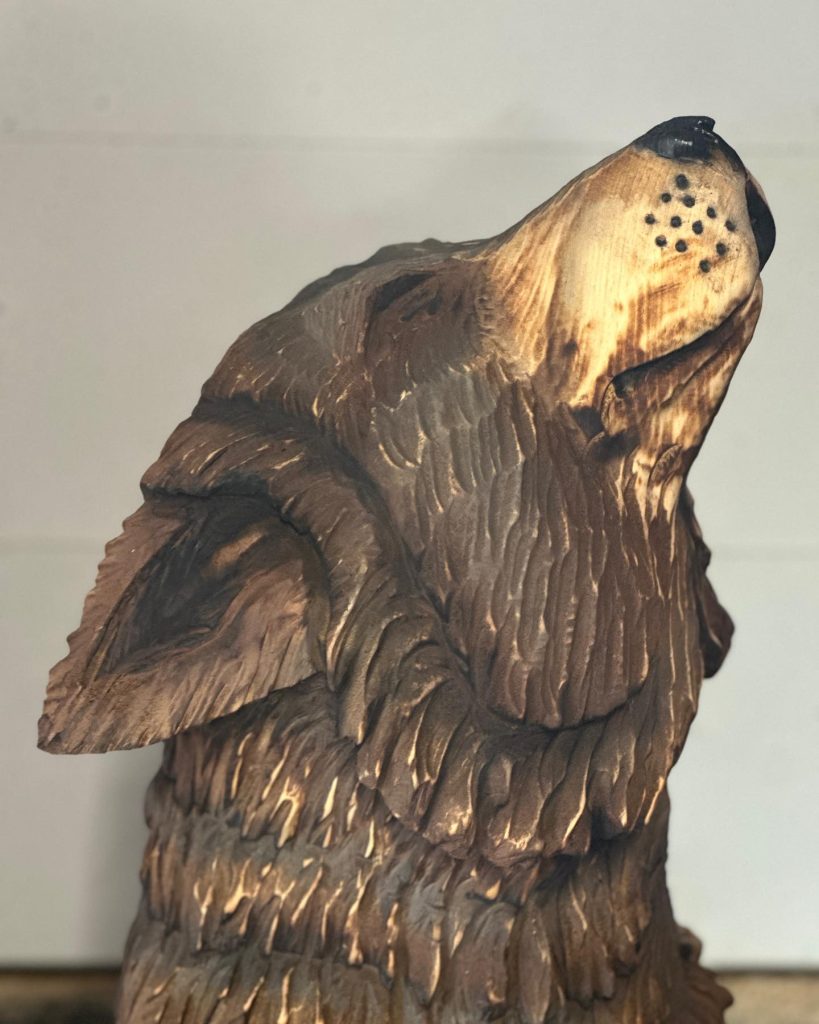
5. The Polished Minimalist
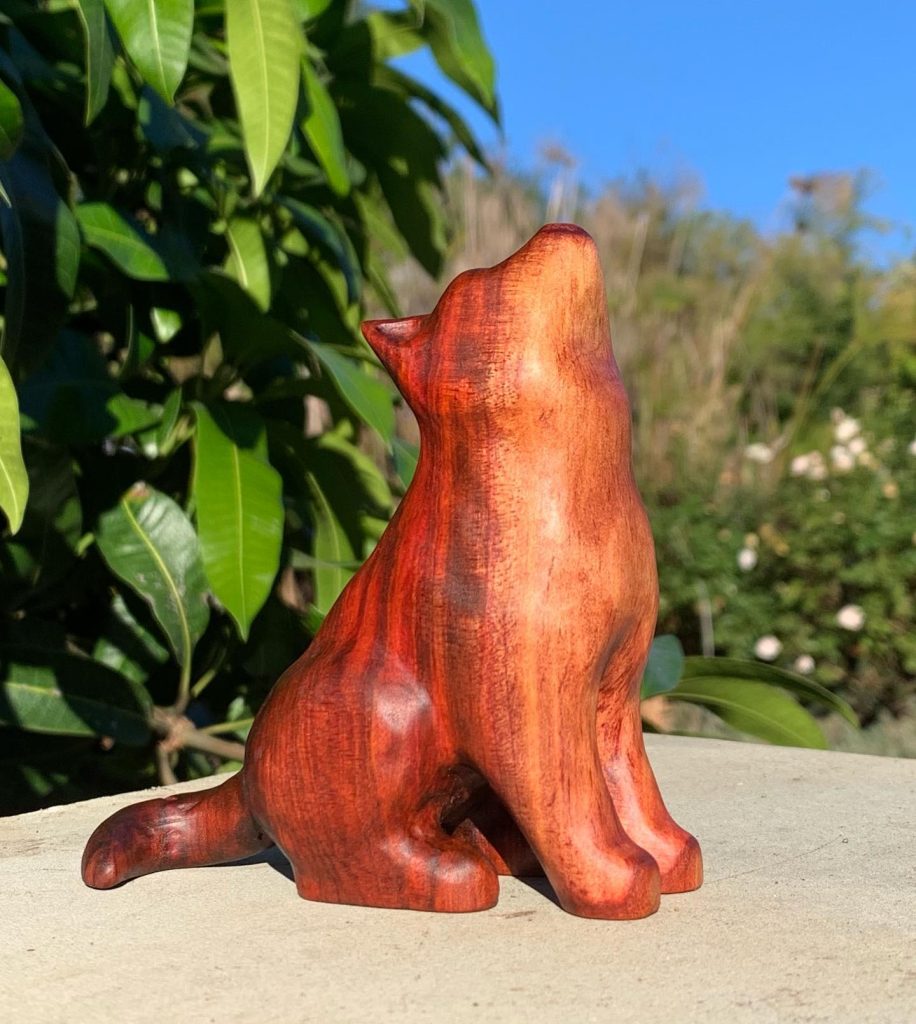
- Description: This version of the "Howling Guardian" proves that you don’t need a million scales to make a piece look professional. By focusing on smooth, sanded planes and a rich, warm stain, the carver lets the natural grain of the wood do the heavy lifting. This is a perfect approach for beginners who want a clean, modern aesthetic for their desk or bookshelf.
- Skill Focus: Sanding and Finishing. Mastering the transition between grits to achieve a "liquid" wood finish that feels amazing in the hand.
6. The Textured Realist
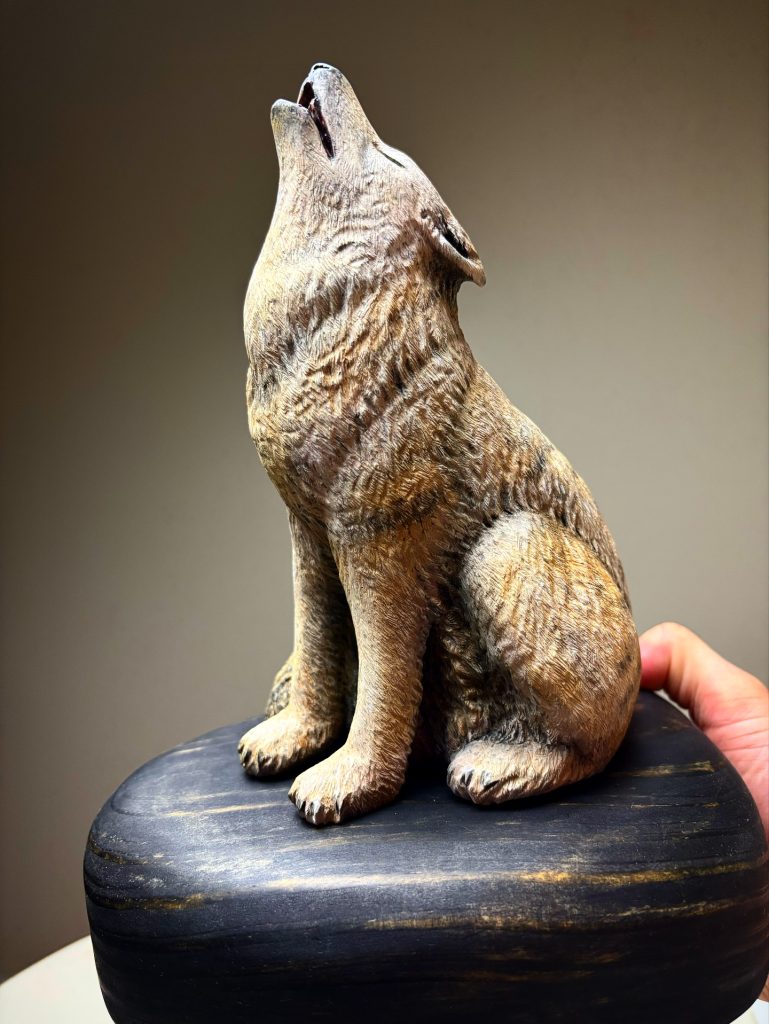
- Description: Here we see the "howling" pose taken to the intermediate level with surface texture. By using short, directional cuts, the carver adds a layer of realism that catches the light beautifully. The addition of a charred or dark-painted base provides a "heavy" foundation that makes the lighter wood of the sculpture stand out.
- Skill Focus: Light and Shadow. Understanding how surface texture creates depth and makes a sculpture feel "alive" rather than static.
7. The Rustic "Chainsaw-Cut" Aesthetic
- Description: This piece demonstrates the beauty of bold, heavy texturing. Instead of trying to sand away every knife mark, the carver uses deep, rhythmic gouge strokes to create a rugged, weathered look. For a wolf, this technique is perfect for "ancient" or "mountain" drakes where you want the ruff to look like jagged stone or thick, matted fur.
- Skill Focus: Intentional Tool Marks. Learning to use the natural "facet" of the tool to create texture without over-refining the surface.
8. High-Relief Portraiture
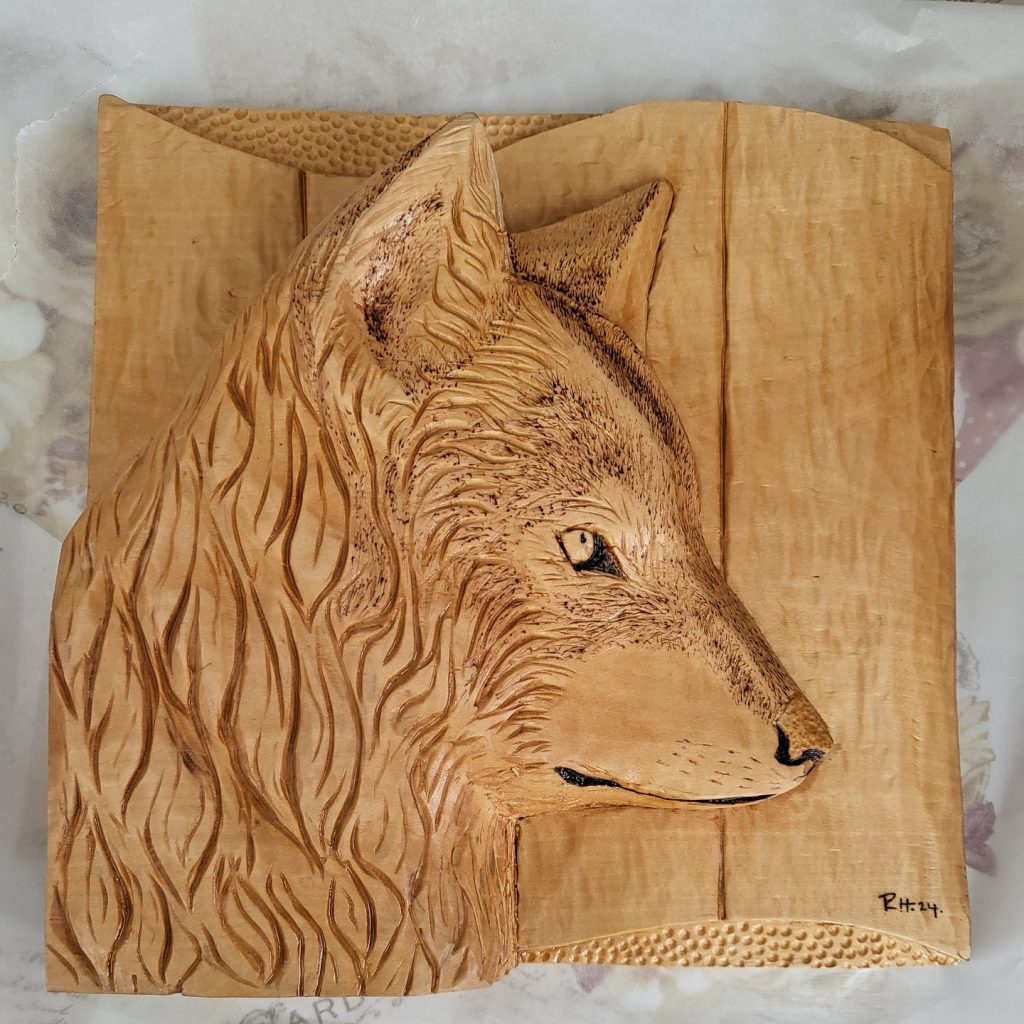
- Description: This is an excellent example of carving from a flat panel. The creature’s head emerges from the wood, blending high-relief (the snout and ears) with shallow-relief (the neck and background). Notice how the "background" wood is given a textured, stippled finish to make the smooth subject stand out. This is a classic technique for creating wolf plaques or decorative doors.
- Skill Focus: Foreground and Background Separation. Practicing "stippling" or texturing the negative space to create visual contrast.
9. The Miniature "Pocket" Totem
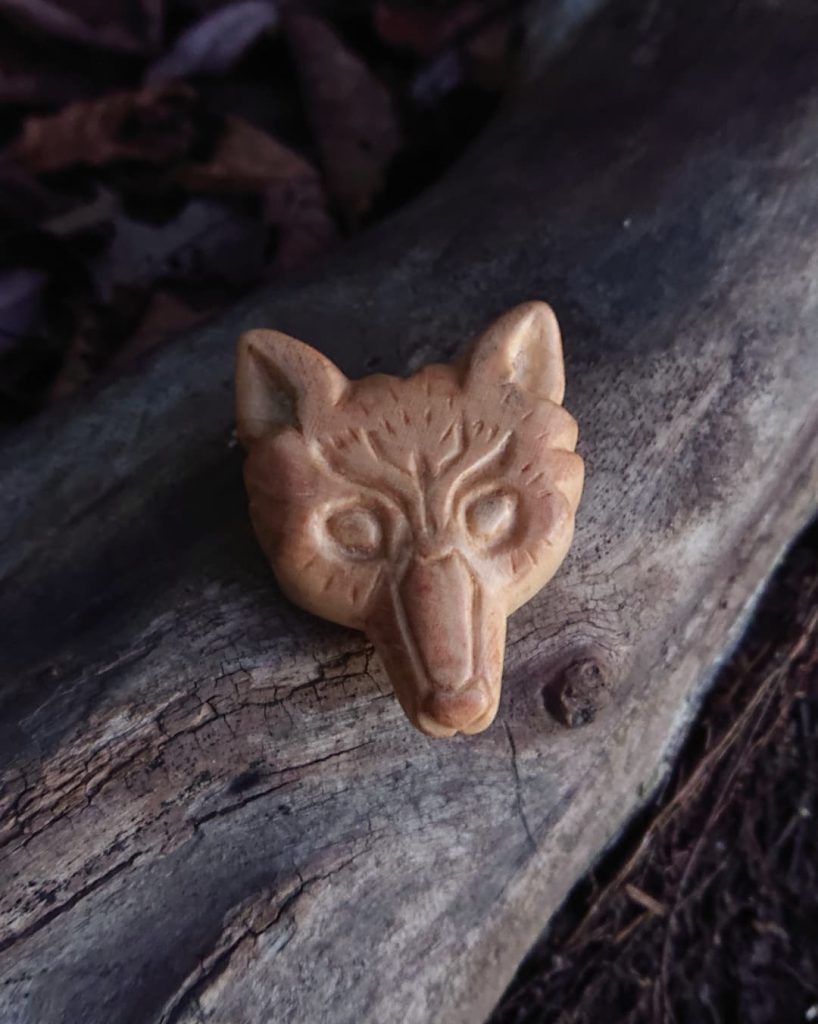
- Description: This tiny, simplified face carving by reducing the creature to its most essential features—bulging eyes, a simple bridge for the nose, and large ears—you can create a "worry stone" or a small charm. This is the ideal way for a beginner to practice wolf faces without the pressure of a large, expensive piece of wood.
- Skill Focus: Micro-Proportions. Mastering the art of making a small piece feel substantial through deep, clean cuts on a tiny surface.
10. The Obsidian Silhouette
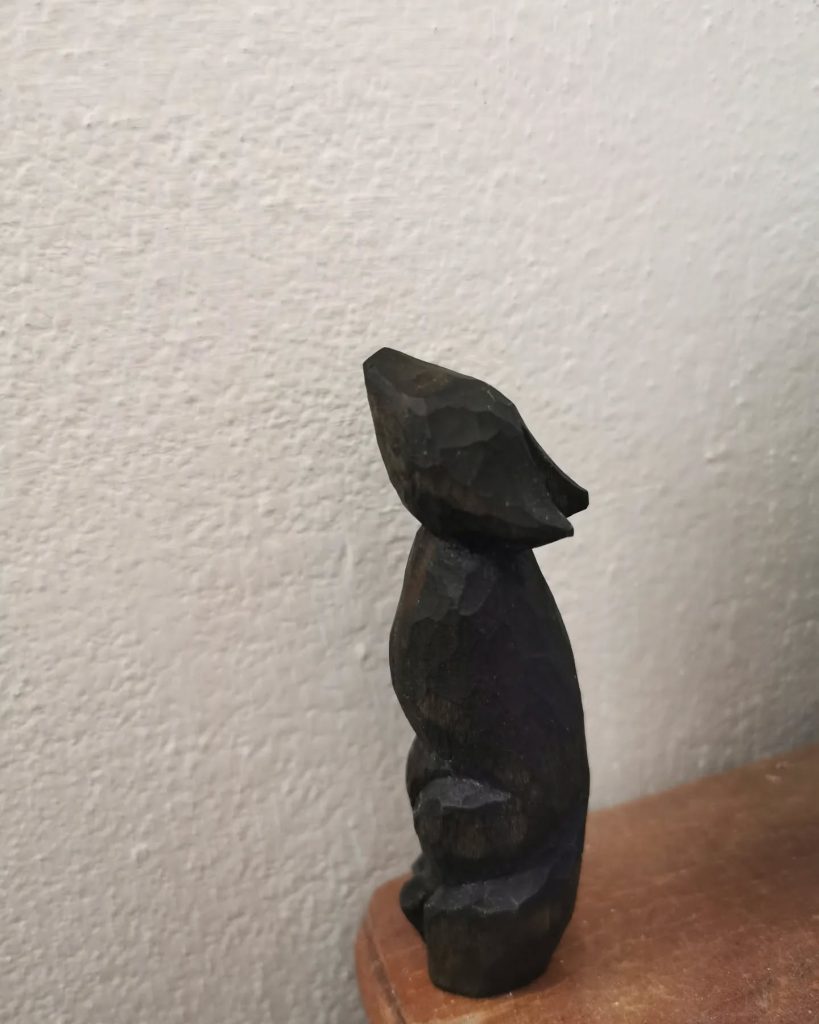
- Description: This project is a study in pure form and minimalist geometry. By ebonizing the wood or using a deep, matte-black stain, you remove the distraction of grain and focus entirely on the "S-curve" of the animal's seated profile. The surface is left with bold, visible "micro-facets" from the carving knife, creating a rugged, crystalline texture that catches the light in a unique way.
- Skill Focus: Silhouette and Contour. It challenges carvers to convey the essence of a howling wolf through its outline and bold planes rather than relying on intricate fur detailing. Form. Learning how to make a creature recognizable and powerful through its outline alone.
11. The Sculpted Briar Pipe
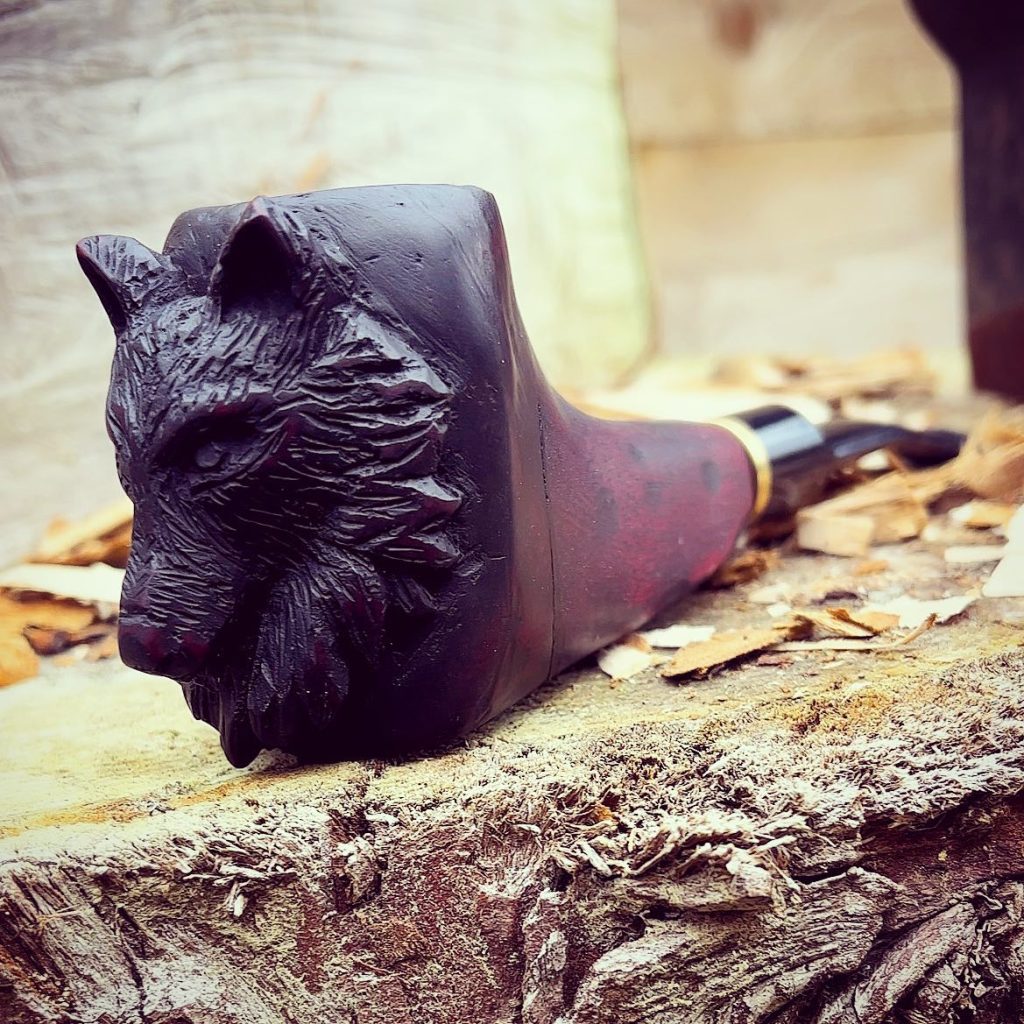
- Description: This is the pinnacle of functional detail. Carving a wolf head into a pipe bowl or a tool handle requires a deep understanding of the wood’s structural integrity. This project uses deep, layered textures for the mane and a piercing gaze. Because it will be handled often, the carver must ensure there are no "snag points" while maintaining sharp, aggressive features.
- Skill Focus: Compact Detailing. Mastering the art of high-relief carving in a very small, high-use area.
12. The Two-Tone Tapered Guardian
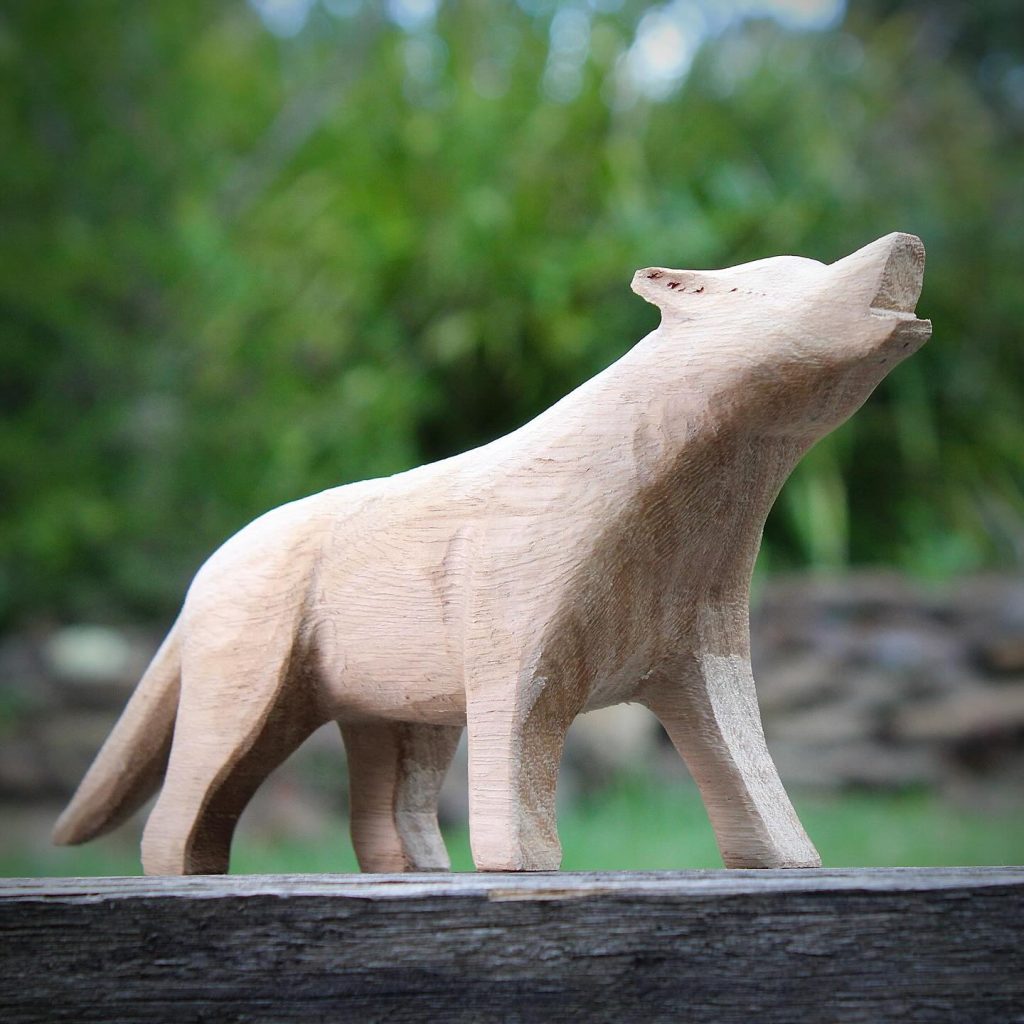
- Description: This is a project that emphasizes anatomical tension. This howling pose uses a light, natural wood to show off the muscle structure in the legs and the stretch of the neck. By leaving the wood unpainted but finely sanded, you invite the viewer to touch the piece. It’s a perfect design for a "desk companion" dragon that looks toward the sky.
- Skill Focus: Dynamic Posing. Learning how to carve "tension" into the wood to make the creature look like it’s in the middle of a movement.
22. The Polished Naturalist
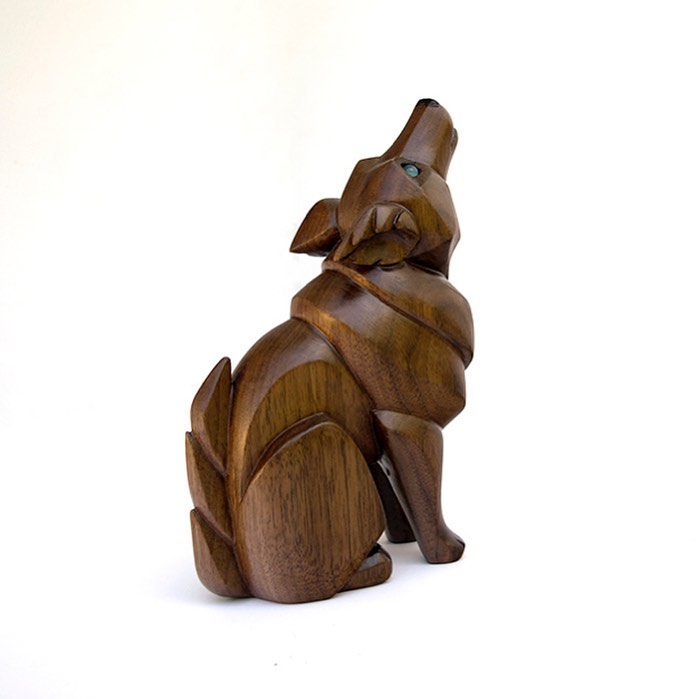
- Description: Standing in contrast to the faceted look, this seated wolf emphasizes smooth, sweeping curves and the natural beauty of the wood grain. The highly polished finish and simplified anatomy—such as the streamlined ears and tail—give it a sophisticated, contemporary feel.
- Skill Focus: Sanding and Finishing. Perfecting the art of progressive sanding to achieve a glass-like finish while maintaining the crisp lines of the anatomical transitions.
23. The Rough-Out "Desk Companion"
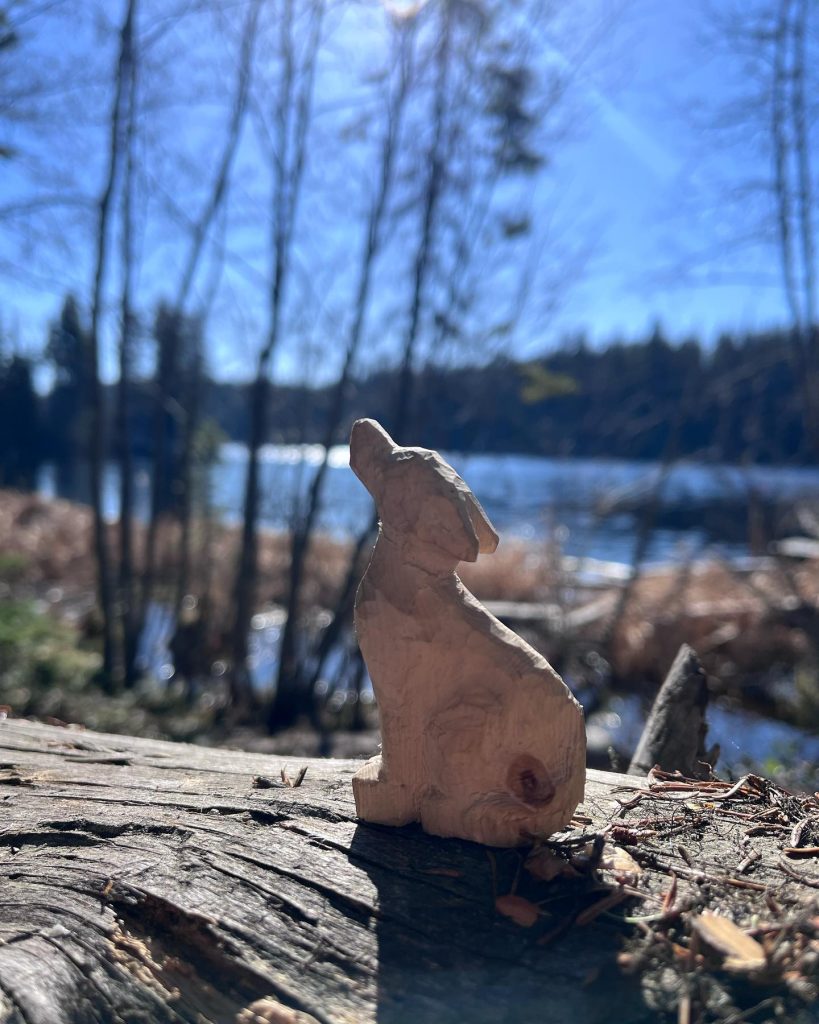
- Description: Sometimes the beauty is in the process. This small-scale project shows a wolf in a simple seated pose, left in a "rough-out" state with visible tool marks. It captures the alert, upward-reaching energy of a wolf without the pressure of finalized detailing, making it an ideal practice piece or "desk guardian".
- Skill Focus: Visualization. Learning how to block out core anatomical volumes quickly from a small wood scrap.
24. The Hyper-Realistic Alpha Trophy
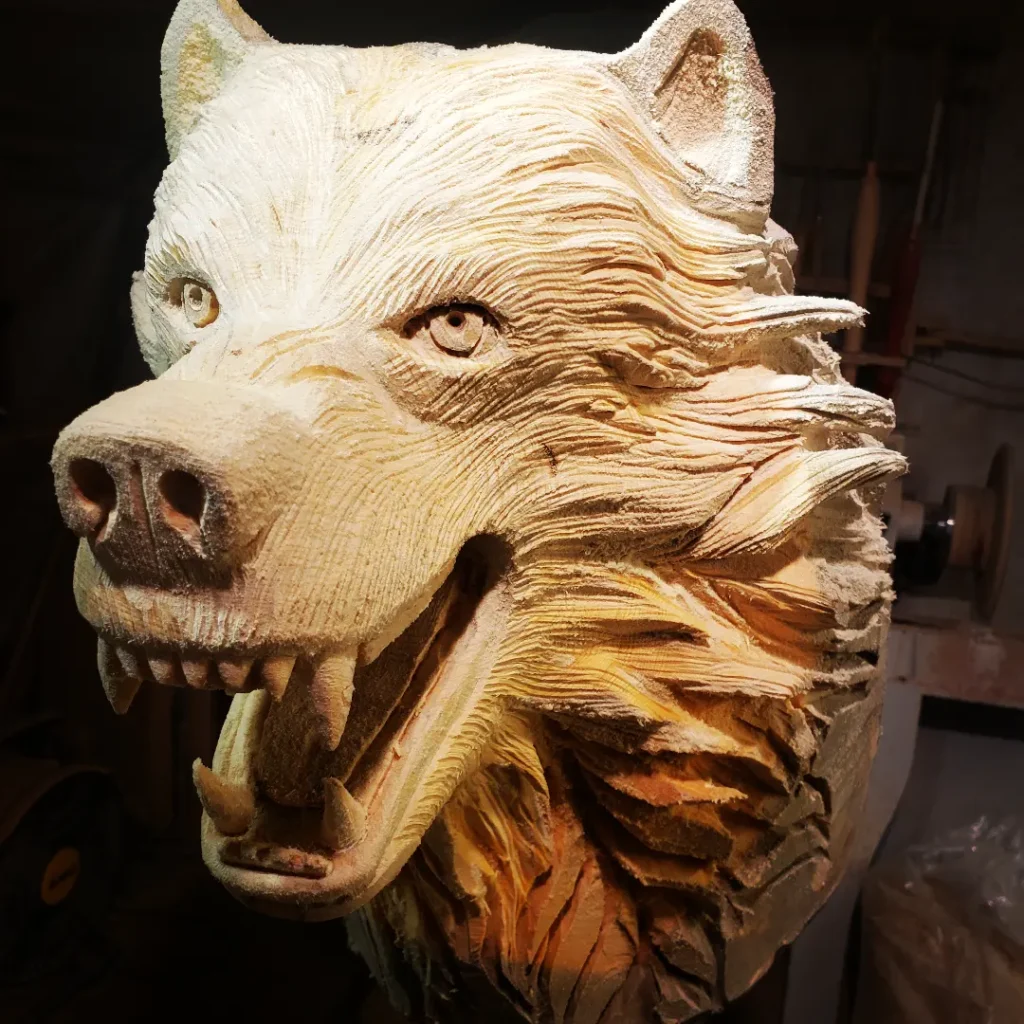
- Description: This large-scale, life-size head study represents the pinnacle of anatomical precision. It captures a fierce, snarling expression, requiring meticulous attention to the wrinkled muzzle, individual teeth, and layered "clumps" of fur that suggest a thick, wild mane.
- Skill Focus: Aggressive Expression. Mastering the complex planes of a snarling face and using depth of cut to create dramatic shadows within the mouth and around the eyes.
Fur Texture Techniques for Wolves
Wolves are defined by their coats. Here's how to suggest fur effectively:
Method 1: V-Tool Fur
Use a small V-tool (3mm or 6mm) to create lines suggesting fur direction. Work in layers:
- Establish direction (follow the body contours)
- Add secondary lines (overlapping at different angles)
- Soften with sanding or wood burning
Method 2: Stippled Fur
Create texture by stippling (dots) with a sharp point or wood burner. Good for short, dense fur like on faces.
Method 3: Combination Approach
- Face: Stippled or very fine lines
- Body: Longer V-tool strokes
- Ruff (neck): Deeper, more pronounced texture
- Tail: Flowing lines with occasional deeper accents
Fur Direction Guide
- Face: Radiating from nose, flowing back toward ears
- Neck: Downward and back, with ruff circling
- Shoulders: Back and slightly down
- Back: Straight back from shoulders to tail
- Belly: Softer, shorter, often upward direction
- Legs: Downward on upper leg, shorter on lower leg
- Tail: Flowing with the shape, often bushier at tip
Eye Carving Tutorial (The Soul of the Wolf)
The eyes make or break a wolf carving. Here's a step-by-step approach:
- Mark position: Place eyes at slight forward angle, not flat on sides of head
- Rough shape: Create almond-shaped sockets with slight forward tilt
- Eyeball: The visible part is round but partially hidden by lids
- Upper lid: Slightly curved, often shaded by brow ridge
- Lower lid: Less prominent, follows eyeball curve
- Pupil/iris: If painting, pupil is round, iris often amber/yellow
- Highlight: A tiny highlight makes eyes alive—preserve a tiny unpainted spot or add with white paint
For inlaid eyes (advanced): Drill sockets, insert glass or stone eyes, carve surrounding lids to fit.
Painting and Finishing Wolves
Natural Finish Options
- Danish oil: Enhances grain while protecting
- Tung oil: Durable, subtle sheen
- Wax: Soft luster, pleasant feel
- Leave natural: Some woods (walnut, cherry) need no color
Painted Finishes
- Realistic: Acrylics in grays, whites, tans, with black accents
- Washes: Diluted paint allows grain to show through
- Dry brushing: White or light gray over dark base for winter coats
- Airbrushing: Smooth gradients for realistic coloring
Color Recipes
| Wolf Type | Base Color | Undertones | Accents |
|---|---|---|---|
| Timber/Gray | Gray | Brownish-gray | Black tips, lighter belly |
| Arctic | Off-white | Very pale gray | Pure white highlights |
| Red Wolf | Reddish-tan | Gray mixed | Dark back, light belly |
| Black Wolf | Dark gray | Not pure black | Silver guard hairs |
Eye Color
- Most wolves: Amber/yellow to golden
- Arctic wolves: Often lighter, sometimes blue-gray as pups
- Pupils: Always round (not slit like cats)
Troubleshooting Common Wolf Carving Challenges
"My wolf looks like a dog"
- Solution: Study wolf photos obsessively. Make the head broader, ears shorter, legs longer, tail straighter. Wolves have "fiercer" expressions—less friendly than dogs.
"The fur looks like scales or feathers"
- Solution: Fur flows in directions, following the body. Scales are repetitive; fur has variation. Use reference photos and vary stroke length and depth.
"The ears broke off"
- Solution: Carve ears with the grain when possible. If not, consider carving separately and attaching with dowels or epoxy. Make ears slightly thicker than you think necessary.
"The expression isn't right"
- Solution: Eyes and mouth position control expression. Relaxed: soft eyes, mouth closed. Alert: eyes forward, ears up. Aggressive: wrinkled muzzle, teeth showing. Howling: head back, mouth open in O shape.
"The proportions are off"
- Solution: Use calipers and reference measurements. Wolf proportions:
- Body length (nose to tail base) ≈ 1.5× height at shoulder
- Leg length ≈ height at shoulder
- Head length ≈ shoulder width
Display and Photography Tips
Display Considerations
- Eye level: Mount or place carvings at viewer's eye level
- Lighting: Side lighting emphasizes fur texture
- Background: Neutral or nature-themed (rock, wood, subtle forest)
- Grouping: Display related carvings together (pack mentality!)
- Bases: Natural wood, slate, or artificial rock complements wolves
Photography for Social Media
- Natural light: Overcast days are perfect—no harsh shadows
- Detail shots: Include close-ups of eyes and fur texture
- Scale reference: Show size with hand or common object
- Multiple angles: Front, profile, three-quarter, and detail
- Process shots: Document your carving journey for engagement
Beyond the 20 Ideas: Developing Your Own Wolf Designs
Once you've tried several of these projects, you'll have the skills to create original wolf carvings. Consider:
- Your own wolf photos as reference material
- Local subspecies (your region's wolves look different)
- Seasonal variations (winter coats vs. summer)
- Behavioral moments (yawning, scratching, scent-marking)
- Environmental elements (prey, forest, moon, snow)
- Cultural interpretations (Native American spirit wolves, Norse mythology)
Wolf Carving Resources
Reference Material
- Books: "Wolves: Behavior, Ecology, and Conservation"
- Photography: Follow wildlife photographers on Instagram
- Documentaries: Any National Geographic or BBC wolf film
- Zoos and sanctuaries: Visit for live observation (sketch!)
- Taxidermy studies: If available, study form up close
Online Communities
- Woodcarving Illustrated forums: Wolf carving threads
- Wildlife art groups: Feedback from fellow artists
- Instagram: #wolfcarving #wildlifewoodcarving
Next Steps: Your Wolf Carving Journey
Wolves offer an endless subject for woodcarvers. Each carving teaches you something new about anatomy, texture, or expression. Start with the beginner projects to build confidence, then challenge yourself with intermediate and advanced work. Remember that every master carver started with simple shapes and gradually added complexity.
The wolf you carve today will be better than the one you carved last month, and the one next year will be better still. That's the beauty of this craft—continuous improvement, endless fascination.
Which wolf project speaks to you? Are you drawn to the howling pose, the watchful gaze, or the challenge of a full pack? Let us know in the comments!
Quick Reference: 20 Wolf Carving Ideas by Skill Level
| Level | Projects |
|---|---|
| Beginner (6) | Silhouette Ornament, Paw Print, Head Coaster, Howling Whistle, Walking Stick Topper, Track Boundary Marker |
| Intermediate (7) | Timber Wolf Bookend, Howling Moon Plaque, Head Study, Wolf and Pup, Running Wolf, Head Box, Arctic Wolf |
| Advanced (7) | Full Body Howling, Pack Hierarchy, High Relief, Life-Size Head, Wolf and Ravens, Driftwood Wolf, Moon Clock |
Answering the Call of the Wild
Carving a wolf is more than just a woodworking project; it is a journey into the heart of the wilderness. Whether you are just starting with a simple Silhouette Ornament or ready to tackle a Life-Size Masterpiece, every chip of wood you remove brings you closer to capturing the untamed spirit of these magnificent creatures.
The beauty of wolf carving lies in its versatility. You can focus on the sleek, modern lines of a minimalist study or get lost in the intricate, meditative process of adding realistic fur textures. As your skills grow, you’ll find that the techniques learned here—mastering anatomy, creating dynamic poses, and perfecting expressive features—will serve you in every future carving endeavor.
So, pick up your knife, choose your wood, and let the wolf within guide your hands. The forest is waiting, and there is a story in every grain of wood just waiting for you to unleash it.
What’s Your Next Project?
We’d love to see your progress! Are you planning a solo "Obsidian" study or a full pack hierarchy? Share your photos with our community and let us know which of these 20 ideas sparked your imagination. Happy carving!
What's your experience level with wildlife carving? Have you carved wolves before? Share your questions and successes below!