Staining is arguably the most challenging wood finishing technique. But with a little know-how, staining and the techniques related to staining are not so complex. If you are wondering whether to strip off all varnish or just stain on top of the varnish, Then this post is for you and will help you make a decision you won't regret later on.
Do I have to remove the varnish before staining?
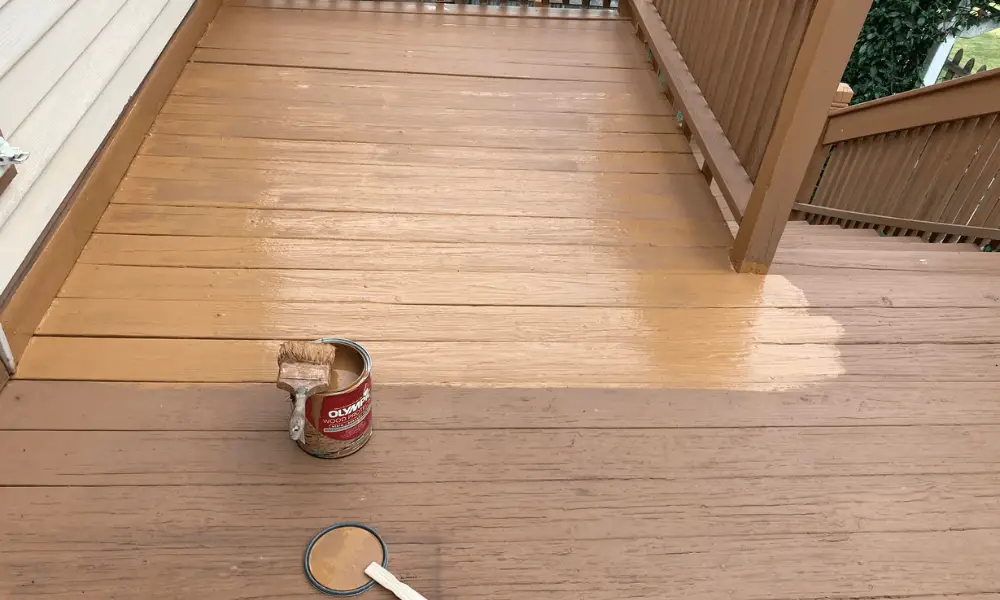
It depends on the condition of the varnish and the staining technique you are going for. For instance, when answering " Can you stain over varnish," we recommended glazing, a technique with two layers of a clear coat sandwiching the stain film.
In the glazing technique, the stain is applied to the wood, then a coat of varnish is applied, followed by a stain, then more varnish. This series is repeated to satisfaction.
You may have to sand off the varnish coat to stain the wood directly for old wood furniture with a varnish top coat. Also, the varnish may be in bad condition with scratches and imperfections that may be magnified if stained without sanding.
An easy hack to strip off varnish
Read Next: Staining and Finishing Tips
- Can You Stain Over Varnish?
- Best Stain for Pine
- Types of Wood Stains
- Can You Stain Over Shellac?
- Can You Paint Over Stained Wood?
- How to Paint Wood Step by Step
An easy hack to strip off varnish is by using a chemical stripper. There are various types of chemical strippers available in the market, so be sure to choose one that is suitable for your specific needs. Before starting the process, make sure to work in a well-ventilated area and wear protective gloves and eyewear.
Here's a step-by-step guide on using a chemical stripper to remove varnish:
- Prepare the work area: Lay down a drop cloth or newspaper to protect the surrounding area from any potential spills or drips.
- Apply the stripper: Using a brush or a cloth, apply a generous amount of the chemical stripper onto the varnished surface. Make sure to follow the manufacturer's instructions regarding the application and drying time.
- Let it sit: Allow the chemical stripper to sit on the varnish for the recommended amount of time. This typically ranges from a few minutes to several hours, depending on the product and the thickness of the varnish.
- Scrape off the varnish: After the recommended waiting time, use a scraper or a putty knife to gently scrape off the softened varnish. Be careful not to gouge or damage the wood underneath. If necessary, you can repeat the process with another layer of a stripper for stubborn or multiple layers of varnish.
- Remove residue: Once you have removed the varnish, wipe down the surface with a clean cloth dampened with mineral spirits or a suitable solvent recommended by the manufacturer. This will help remove any leftover residue from the stripping process.
- Sand the wood: After the surface has dried completely, lightly sand the wood using fine-grit sandpaper to smoothen any remaining imperfections or roughness. Sanding also prepares the surface for staining.
- Clean the surface: Use a tack cloth or a damp cloth to remove any dust or debris from sanding, ensuring a clean surface for staining.
Now that the varnish has been stripped off, you can proceed with the staining process if desired. Follow the staining instructions and techniques that best suit your project, whether it's glazing, layering, or simply applying a single coat of stain.
Remember to always test the stain on a small, inconspicuous area of the wood before applying it to the entire surface. This will help you determine the color and appearance of the stain and ensure you achieve the desired results.
Summary
Depending on the situation, there are two ways to do this. If the varnish is in a bad state, it may ruin the staining; therefore, stripping it off may be a good idea. On the other hand, if the varnish is in good condition, then you can skip stripping it off and just stain it on top of it.
However, it may be a good idea to sand lightly with grit 400 to create a rough surface that the top coat would sit on after staining.