If you're a curious woodworker, you have probably come across a well-drilled hole and wondered, "How did they do that?" Well, friends, you're about to discover one of woodworking's best-kept secrets: drilling tapered holes. It's a skill that can make your woodworking projects pop with a professional flair. However, there is neither much information nor enough people to really show you how to drill one.
Therefore, we have taken the responsibility to show you everything from an introduction to the concept of tapered holes in woodworking to their purpose and the step-by-step guide to drilling them. We want to make sure you excel in this art, as it should be. So, roll up your sleeves, and let's dive into the intricate world of drilling tapered holes!
Introduction to Tapered Holes
If you're wondering what a tapered hole is, let's break it down. Picture a spot where one end is wider than the other, like a cone. That's a tapered hole. It's not a primary, cylindrical hole but fine-tuned into a sloping interior. It may seem somewhat challenging initially, but once you get the hang of it, you'll find it intriguing and fun.
The Purpose of Tapered Holes
In the intricate world of woodworking, tapered holes serve a distinct and integral function that enhances the utility and beauty of your projects.
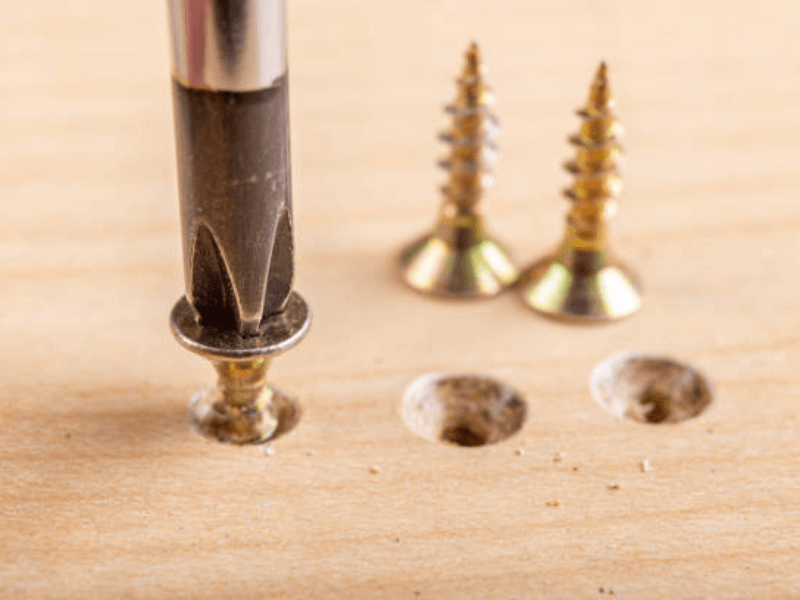
Firstly, tapered holes are primarily used for countersinking screws. This style of countersinking means that the screw's head, after installation, is flush with or slightly below the surface of the wood. Therefore, countersinking allows for a seamless appearance and a smooth finish to your woodwork, making it visually pleasing but also practical and safe. Imagine running your hand along a sleek wooden surface with no surprise bumps, no sharp edges, and no unsightly screws sticking out.
Secondly, tapered holes also accommodate specific types of joints, such as dovetail or mortise and tenon joints. Besides providing a snug fit, these holes allow for an expanded gluing area, resulting in a more durable connection.
Furthermore, tapered holes can be used to insert wooden plugs. They are the way to go if you're looking to hide screw holes for an aesthetically pleasing look.
In summary, tapered holes increase functionality, enhance visual appeal, aid in creating complex joinery, and enable ledges for additional adhesion. Whatever the woodworking project, having the skill to drill tapered holes is undoubtedly a huge advantage.
Essential Tools for Drilling Tapered Holes
You can only drill a tapered hole with the right equipment. Let's get acquainted with them:
Different Types of Drill Bits
Drill bits are the indispensable stars of the show regarding drilling holes. However, not all drill bits are created equal. There are specific types that are designed for drilling tapered holes. Here's what to look for:
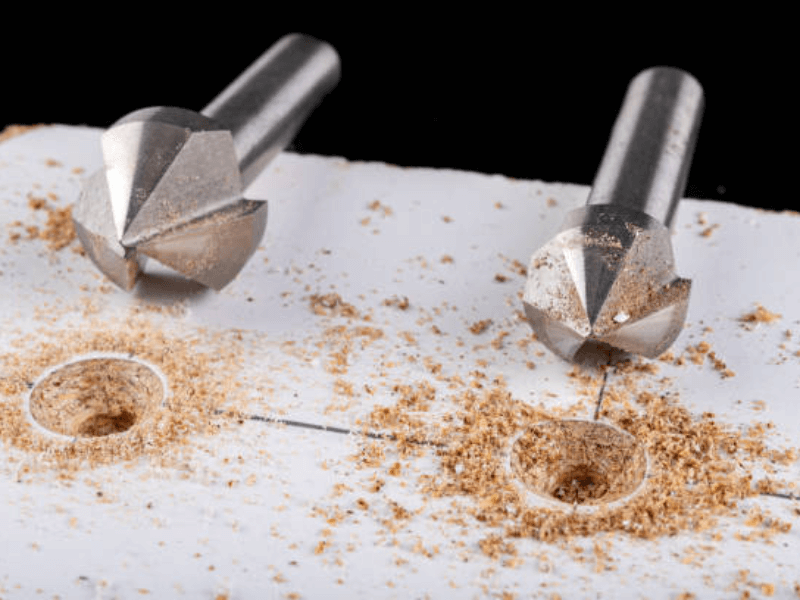
- Countersink Drill Bits: These bits are perfect for drilling clean, precise, tapered holes. They come with an attached stop to ensure you get the proper depth every time.
- Step Drill Bits: With their stepped design, these bits are also suitable for drilling tapered holes. They allow you to drill multiple-sized holes with the same bit simply by altering the depth of the drill.
Power Drill
A good quality power drill is another must-have tool for any woodworker. Choose one that feels comfortable in your hand, has enough power for your tasks, and offers variable speed control for maximum precision.
Drill Press
A drill press is an excellent investment for precise, controlled, and consistent tapered drilling. However, it's optional for beginners. Nevertheless, opt for a model with a depth-stop feature if you get one. This model will allow you to control the depth of your holes.
Step-by-Step Guide to Drilling a Tapered Hole
It's essential to follow a precise routine to achieve the best results. Without further ado, explore this step-by-step process.
Step 1: Setting Up Your Wood Piece
Begin by securing your wood piece in place using a clamp. Securing it tight will ensure the wood stays immovable during drilling, preventing unwanted accidents or damage to the wooden surface.
Read Next
• Hand Saws for Woodworking
• Woodworking Measuring Tools
• Essential Woodworking Shop Machines
• A Beginner’s Guide to Skew Chisels
• Hand Plane for Beginners
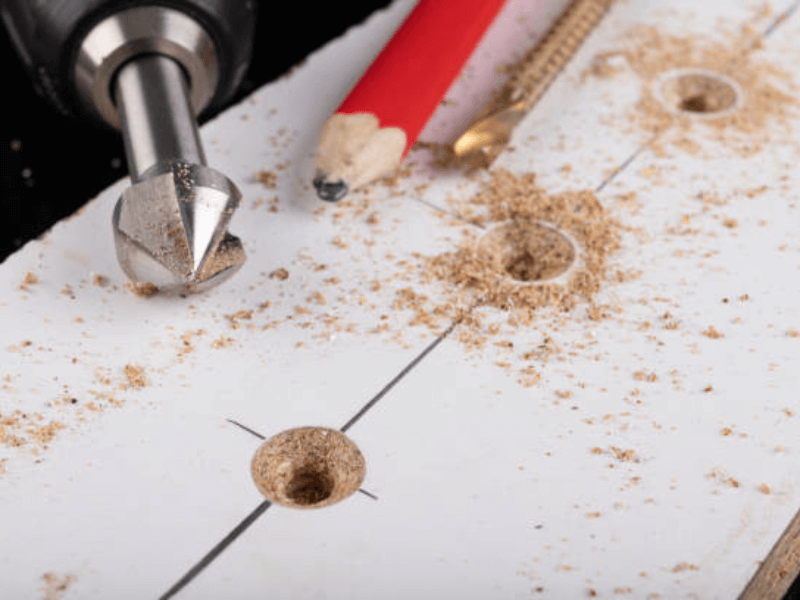
Step 2: Mark Your Spot
Using your marking tool, mark the spot on the wood where you aim to drill the tapered hole. Make sure you mark correctly; correct marking will provide an accurate target and ensure you drill in the right spot.
Step 3: Align Your Drill Bit
Now, position your taper drill bit on the marked spot. Double-check your alignment. You want to ensure it's perpendicular to the surface to avoid inaccuracies.
Step 4: Begin Drilling
Start drilling at a slow pace with your power drill or drill press. Remember to keep the bit straight and maintain a slow, steady speed. Drilling at a fast pace can cause the bit to overheat or the wood to split. Patience is key!
Step 5: Monitor the Hole
As you're drilling, keep an eye on the hole. Watch the progression of the tapered shape taking form. If you notice the hole seems off, stop immediately to reassess.
Step 6: Clean Up
Once you've successfully drilled the tapered hole, remove any remaining wood chips in and around the hole using a dusting brush. A clean hole provides a smoother fit when inserting objects.
Remember to practice and experiment with different types of wood and taper drill bit sizes. That's the best way to perfect your drilling of tapered holes.
Exploring Different Types of Tapered Holes
Now that you're familiar with the basics of drilling tapered holes, let's broaden our perspective and delve into the types of tapered holes you might encounter in woodworking projects. These variations often involve alterations in the angling and dimension of the holes, and each comes with its own unique application and purpose.
Countersink Holes
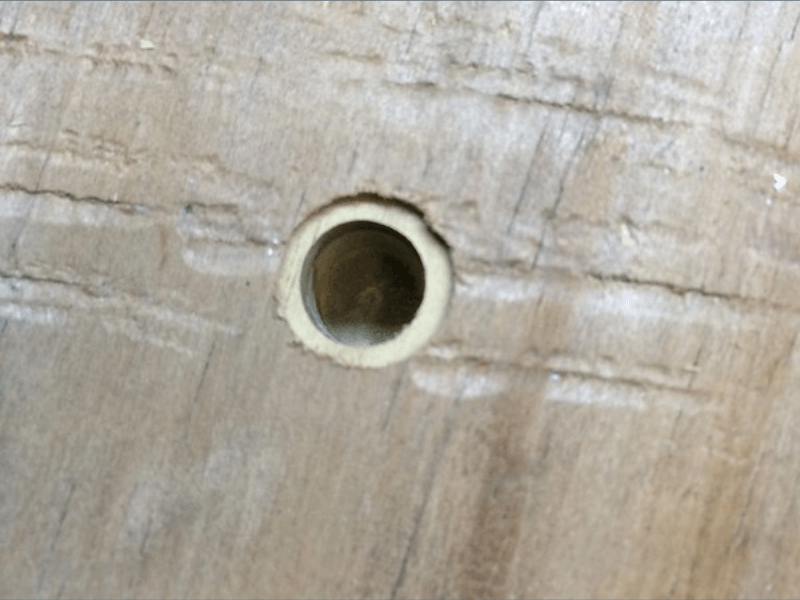
This type of tapered hole is primarily designed to accommodate the cone-shaped head of a screw or bolt. A countersunk hole typically has a conical shape with a wider opening on the top and a narrower bottom. The angle often corresponds with the conical head of a specific fastener, providing a flush finish when the screw or bolt is driven into the wood.
Counterbore Holes
Counterbore holes differ from countersink holes in their structure. This type of hole is crafted with a larger, cylindrical upper section and a smaller, deeper section to house the main body and head of the screw or bolt, respectively. A counterbore has more holding strength compared to a countersink because the force applied by the screw or bolt is distributed evenly over a larger surface area.
For this type, the fastener doesn't sit flush with the surface but instead dips into the cylindrical part of the hole, concealed with a plug or dowel for a neat finish.
Pilot Holes
Pilot holes are essential in many woodworking projects, especially with hardwood. It's a relatively smaller and straightforward hole drilled into the wood to guide the larger screw, preventing it from splitting the wood. Although it's not necessarily tapered, it can be if the following screw is tapered. So, it's worthy of note in this context.
Through Taper Holes
Sometimes, woodworking demands a tapered hole that runs entirely through the workpiece. Such a hole starts with a wider opening on one side and tapers to a smaller exit point on the opposite side. Generally, this is useful in decorative applications or where a unique joinery system is required.
Blind Taper Holes
Unlike through taper holes, blind taper holes have one opening. This type of hole begins broad at the surface and then narrows down as it delves into the wood, but it does not go through the entire thickness of the piece. The depth of a blind hole can vary based on your specific needs.
Understanding these types of tapered holes and their applications will significantly enhance your woodworking skills. You can now manipulate the hole-drilling process to create custom joinery, gorgeous decorations, and efficient fastener accommodations, thereby elevating your projects to a whole new level.
Conclusions
In conclusion, drilling tapered holes in wood is a versatile and essential skill for any woodworker. Understanding the science behind this technique is just as crucial as mastering the practical elements. From choosing the right tools to anticipating potential issues and applying the knowledge to create a range of different tapered hole types, making this technique your own opens up a world of possibilities.