Before applying the best color paint on your interior walls, we recommend applying a suitable primer. But it also involves taking into account how long it will take the primer to dry so you can start painting.
On wood, most latex primers take 30 minutes to an hour to dry to the touch. Nevertheless, some primers may require upto 3 hours to completely dry before painting. Generally, the majority of manufacturers suggest waiting at least an hour before painting over the primer coat.
However, this can vary greatly depending on a number of factors including:
- The type of primer you use.
- The room temperature
- Humidity level
- The surface
- Application technique
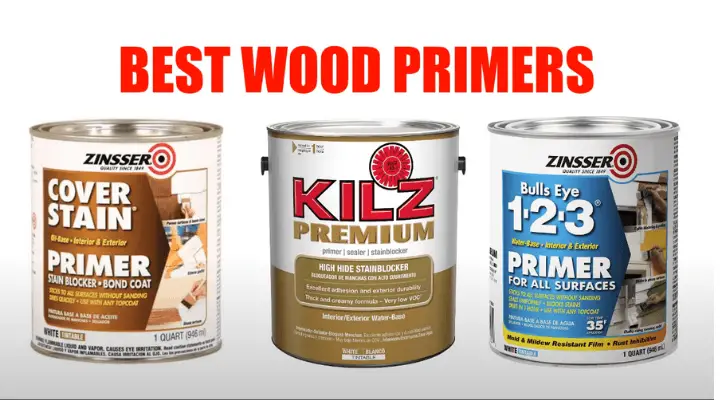
Actual Drying Times of Popular Primers
| Primer | Drying Time | Recoat Time | Notes |
|---|---|---|---|
| KILZ 2 ALL-PURPOSE Primer | 30 minutes | 1 hour | 50% relative humidity |
| Zinsser Bull’s Eye 1 2 3 primer | 5 minutes | 30 minutes | Let dry for at least one night before using strong solvent-based topcoats |
| Kilz Mold and Mildew | 30 minutes | 1 hour | - |
| Valspar primer | 60 minutes | 2 hours | Allow primer to dry completely before painting |
| zinsser mold killing primer | 30 minutes | 1 hour | Apply topcoat within 72 hours for maximum protection, wait at least 7 days for full adherence and hardness to develop |
Read Next
- Best Primers for Wood Trim
- How to Paint Wood: Step-by-Step Guide
- Can You Paint Over Stain - A closer look at stains and paints
- Understanding Polyurethane Drying and Curing Times
- Gloss vs Semi-Gloss vs Satin: Understanding Sheen levels
Types of primers and their drying time
| primer type | Drying time |
| Oil-based primer | They take between 30 minutes to 4 hours to dry |
| shellac | Takes between 30 and 60 minutes |
| Self-priming paint | Takes an hour to dry |
| Latex primer | They usually take less than 1 hour |
Primer drying times on different surfaces
| Surface | Oil-based primer | Latex primer | Epoxy primer | Acrylic primer | Vinyl primer |
| Wood | 4+ | 1-4 | 6-8 | 1-2 | 1-4 |
| Drywall | 4+ | 1-2 | 4-6 | 1-2 | 1-3 |
| Metal | 8+ | 1-4 | 12-24 | 1-2 | 1-3 |
| Masonry | 8+ | 2-4 | 24 | 2-4 | 1-4 |
| Plastic | 24 | 1-4 | 24 | 1 | 1-2 |
Note: the actual drying time may vary depending on several factors such as the quality of the primer, the thickness of the coat applied, the temperature, humidity, and ventilation of the environment, and the condition of the surface being primed. All these factor are discussed below
Factors Affecting the Time It Takes for Primer to Dry
Below are factors that determine the drying time of primers.
1. Temperature
The ideal temperature for a primer to dry is about 25 degrees Celsius, or 77 degrees Fahrenheit. Lower temperatures increase the drying time of primers. Therefore, the temperature must be maintained at or close to the recommended level.
2. Humidity
Like temperature, humidity should also be maintained at a specific desired value. When the humidity is high, the primer is exposed to a lot of water vapor, which means the time for the primer to dry is longer as the water content takes longer to evaporate.
Lower humidity, on the other hand, reduces drying time. The ideal relative humidity level is frequently around 15%. You can use a dehumidifier to control humidity and achieve this level.
3. The type of primer that is being used
Different primers from different manufacturers have varying drying times. If the manufacturer uses oil instead of water, the primer takes longer to dry. Therefore, water-based primers take less time to dry than oil-based ones, which is why they're a good choice if you want your paint job finished quickly.
4. Primer application technique
To achieve faster drying times, apply your primer with a paint sprayer, which results in a thinner coat. However, applying a primer using a brush results in a thicker coat that takes relatively longer to dry.
5. Whether it's an indoor or outdoor project
When the primer application is carried out outside, you have less control of the conditions. Mostly, the drying time is at the mercy of the elements. When the humidity is high, the primer will take longer to dry. Similarly, a wet day will see longer dry times. Therefore, when applying a primer outside the house, choosing a day with favorable conditions is essential to ensure fast drying.
6. Ventilation status
The ventilation in your room can lower and increase the drying time of your primer. For fast drying times, ensure the windows are open and use a dehumidifier, or fans, to increase air circulation, which gets rid of any humidity and increases the drying rate. Additionally, dust and particles in the air should be removed as they attach to the primer when drying.
Tips on how to make primer dry faster
If you're looking for ways to make primer dry faster, there are several steps you can take.
Pick a first drying primer
Firstly, choosing a primer that dries quickly is a great way to save time and hassle. as evident from our table above, not all primers dry at the same rate, so it's essential to select the right one for your project. For instance, if you're short on time, you may want to opt for an epoxy or polymer-modified acrylic latex primer that dries fast.
Application technique
Another way to speed up the drying time is by applying thinner coats of primer. A light coat typically dries in an hour, while a thick coat can take up to 24 hours. Additionally, the mode of application can also affect drying time, so consider rolling or brushing the primer on a day with good airflow to help it dry faster.
Something on air circulation
Improving air circulation is also crucial for a quick-drying primer. Ensure that the painted surfaces won't touch any objects or furniture that won't be painted, as this can slow down drying time. Keep doors and windows open as much as possible to allow fresh air to circulate throughout your workspace. This will not only help your primer dry faster but also prevent overspray from settling on objects and furniture in your home.
Work in low-humidity spaces
Maintaining a low humidity level is another essential factor in the drying process. High humidity levels can not only cause the primer to dry slowly but can also affect your health. Use a dehumidifier or air conditioning to keep humidity levels low, and avoid painting in high-humidity locations if possible.
Don't forget the weatherman's report
Lastly, be mindful of weather conditions such as temperature and humidity, which can also affect drying time. Choose a day with little wind and good weather if painting outside, and plan your painting days around the forecasted conditions in your area. Remember that these conditions can change, so always be prepared to adjust your timeline accordingly.
Frequently Asked Questions
what happens if you paint over primer too soon
When you apply primer to a surface, it creates a protective layer that helps paint adhere better and prevents it from chipping or peeling. However, if you paint over the primer before it's fully dry, it can cause problems.
One issue is that the primer can become lumpy and peel off. This can happen because the moisture in the air can soften the primer, causing it to liquefy. To avoid this, it's important to increase ventilation in your workspace. You can do this by setting up a fan or air conditioner to decrease humidity levels and speed up the drying time.
Another way to prevent issues is to use a spray-on primer instead of a brush-on one. This type of primer creates a more even and thick coating, reducing the chances of errors and ensuring a smooth finish. If you paint over the primer too soon, you might also create bubbles on the surface of the paint or streaks in its finish.
What will happen If you skip a step in painting prep and try to paint over bare drywall?
Nothing happens if you skip a step in painting prep and try to paint over bare drywall. You'll be disappointed when your nice, new coat of paint doesn't stick, but at least you won't damage your walls in any way.
However, if you skip priming and go straight for a topcoat without letting that primer dry entirely first, there's a chance that some of your new paint will peel off with it.
Although relatively rare, it does happen! Remember that a good primer takes longer to dry than just about anything else on your wall—but once it is up to snuff, you're ready for whatever comes next. Now get out there and repaint something!
Conclusion: How long does primer take to dry?
In conclusion, there are good options for the type of primer one would require depending on the wood project at hand, even when the consideration is the period necessary for the primer to dry to apply paint.
The drying time of a primer also depends on other factors such as humidity or the type of wood. Therefore, it is advisable to maintain the other conditions as suitable as possible to achieve swift drying.