Woodcarving is a craft that requires you to use a specialized number of tools to get the work done. As a carver, we expect you to use sharp tools; therefore, you are responsible for ensuring that you care for all your devices. The aim is to preserve them (tools) from damage and deterioration that come with carelessness. One way to safeguard the tools is by giving them proper storage. Storing the tools well will protect them from harm, such as rust and dullness. Therefore, our article examines the best ways to keep your tools safe.
Reasons for storing Wood Carving tools
Safety
When it comes to using woodcarving tools, the first thing every woodcarver should think about is safety. It would be useless if you had to injure yourself every time you wanted to carve. That is why properly storing your carving tools is one way to ensure your safety and the safety of others. You should keep Sharp carving tools such as chisels, knives, and gouges out of the reach of children, who may not know the dangers of carelessly handling them.
Increased durability
Who doesn’t want their bladed tools to last longer? Nobody, of course. Storing your carving tools is one way to ensure that they last longer.
Though complex and fancy storage systems may be out of your price range, and some people may prefer ready-made solutions, you can build your handmade store that suits your personal preferences and helps keep your blade tools safe. The handmade store also extends the life of your blade tools by preventing them from becoming blunt, dull, or chipped by other materials.
Accessibility
It is always irritating when you start working on a new project, and when you partially complete it, you realize that you cannot find the tools you need. Keeping your tools in one place ensures you can easily access them when needed.
Organization
Storage spaces always give your tools an organized look. Apart from that, it also helps you to easily reach out to any given tool in your storage space without wasting time.
Gorgeousness
Storing your tools properly constantly improves your workbench’s overall look. A clean workspace is more attractive and motivates you to continue with your unfinished projects.
Read Next
- Wood Carving Tips for Beginners
- The Ultimate Beginner’s Guide to Woodcarving Gouges
- Best Chip Carving Knives for Detailed Work
- How to Sharpen Your Carving Knives
- Selecting the Right Woods for Carving
- Protecting Carvings from Splitting
wood carving tool storage ideas
There are various ways to store wood carving tools, all of which aim to keep them secure and accessible when needed. Each technique listed below best organizes your specific assortment of carving tools.
Storing your tools depends on the type of tools you use and the number of tools you have. Below is a list of ways to keep your wood carving tools clean.
Chisel storage ideas
Use of tool roll
This method for storing and transporting carving tools has been around for a long time and has proven effective. You arrange the handles of the tools in rows of pockets, with each row holding the handles of the tools in an alternating pattern. By positioning it in that manner, you ensure that you nest the blades of the tools on one side between the handles of the tools on the opposite side.
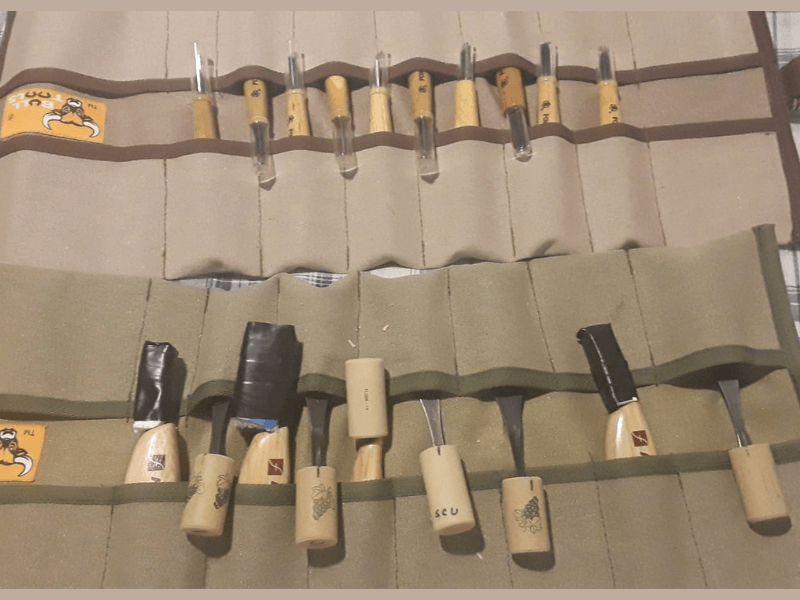
The handles of the tools provide support for the blades and edges. When you roll up the tools, you keep them from hitting each other. If you want to protect the tools from dampness, using materials such as felt, canvas, or linen is your best go-to method. You can wash the materials to remove any dressing or impurities that may cause damage to the tools.
For people who don’t have a set work area, storing woodcarving tools in fabric rolls has a significant advantage. The big advantage of the roll is that you can keep it wherever it is most convenient, like in a wooden box with other equipment, such as a carpenter’s toolbox. This way, the tools are always accessible and can quickly move around as needed.
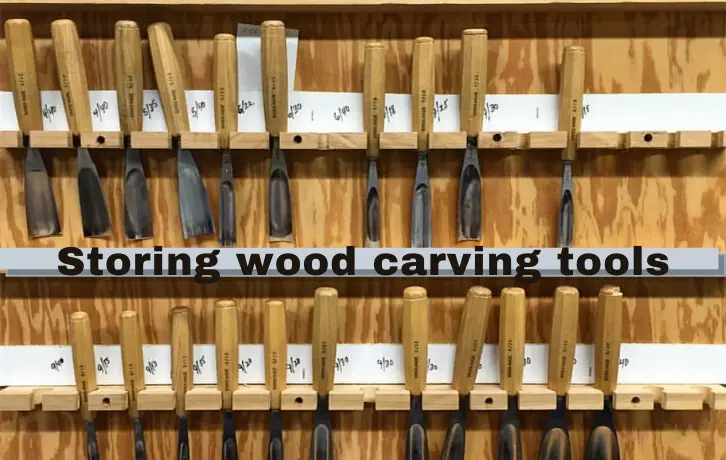
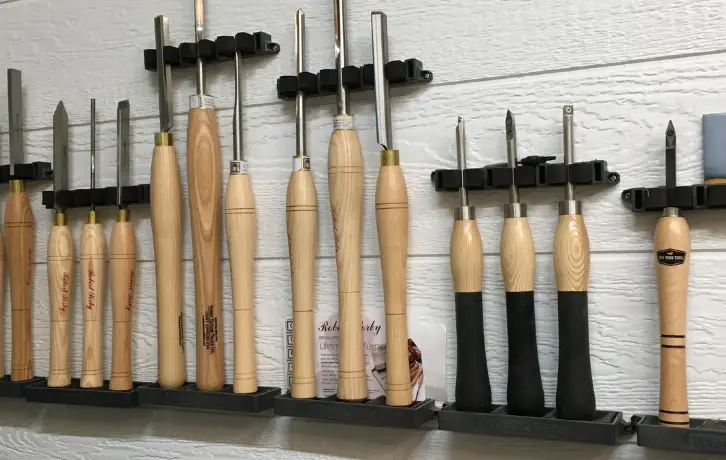
Using Racks
This method of storing carving tools can be beneficial, mainly because The tools are conveniently accessible and returnable after usage. The bench will be less crowded, and the tools at your disposal will be more visible.
Two types of racks we frequently use are:
- Loops of material
- wooden shelf
Loops of material
Leather strips or an old car seat belt are nailed down regularly along the board at the back of the bench. The tool is then supported by its handle as you insert the blades with their edges pointed downward. However, there are some issues since the tool handle needs to be broader than the blade for this rack form to function appropriately; otherwise, the tool will fall through the loop. Depending on the size of the handles, this restricts the size of tools to less than or equal to around 1 inch (25mm).
The blades must also be heavier than the handles for the tools to hang straight. Due to their small size and lightweight nature, some blades’ handles frequently run into and over others. The edges below can then come into contact with one another or collide, perhaps causing injury. Therefore, consider adding a cork to the end of some tools with sharp edges that are sensitive to wear, such as fishtails and skew chisels.
Wooden Shelf
Using a wooden shelf instead of loops is an alternative. You can do this by drilling and making various-sized holes and notches into a wooden frame. The notches will grip the blade by the shank, and the holes will be for instruments with more prominent edges than the handle.
The wooden shelf is a firmer and safer arrangement than the loop method of holding tools. However, it is more challenging to customize. It is vital to make reasonable assumptions about the potential instruments you will possess and the holes, notches, and required space between blades. A shallow wall-mounted cabinet with racks inside and on the inside of the doors might be a more complex solution.
Storing them in Drawers
Drawers work very well as a storage method, especially if the drawers are part of the carving bench or close at hand. Use different drawers, or features of drawers, for particular sweeps or shapes of tools. Homemade
Drawers can be shallow boxes with simple butt joints and plywood bases. Alternatively, you can also use metal multi-drawer cabinets sold for office filing, which are precisely the right size for storing woodcarving tools.
However, please remember that such drawers need lining to protect the edges of the tools. Self-adhesive cork floor tiles are helpful; the unvanished ones are better for preserving the drawer’s contents from dampness. Nevertheless, ensure you are laying your tools neatly in one direction. The aim is to prevent the blades from clashing against each other when the drawer slides open and closed.
Finally, another alternative to the drawer is the traditional lockable wooden box, which has trays fitted above each other like a needlework box. It is easier to make than a set of drawers, but the problem is that it could be more convenient. It will force you to keep your favourite tools on the top layer.
Use of Protective caps
Protective caps are one of the most excellent methods of protecting your blade tools when not in use. In most cases, chisels, gouges, and knives have caps that fit them correctly and help prevent unnecessary accidents.
Storage Case
Storage cases may be wooden or plastic-style, specially designed to keep the tools safe and sound. It also helps you find the tools you need more quickly and prevents them from hitting each other. You can buy Storage cases either in stores or at workplaces.
Designing a Wall Storage
Though some may prefer to use tool storage solutions that are readily available in the market, it is always good to prepare a custom storage space for your wood carving tools. The advantage of making a custom space is that you can customize it to fit the type and number of wood carving tools you have.
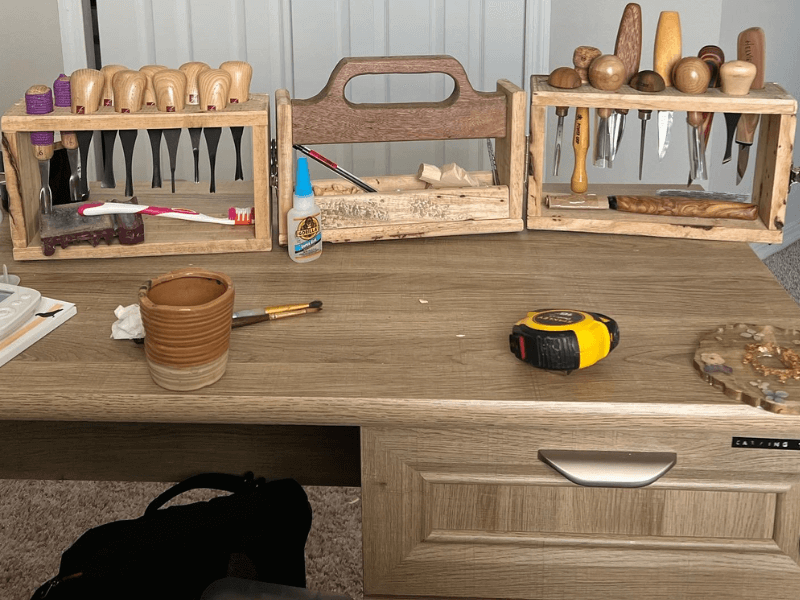
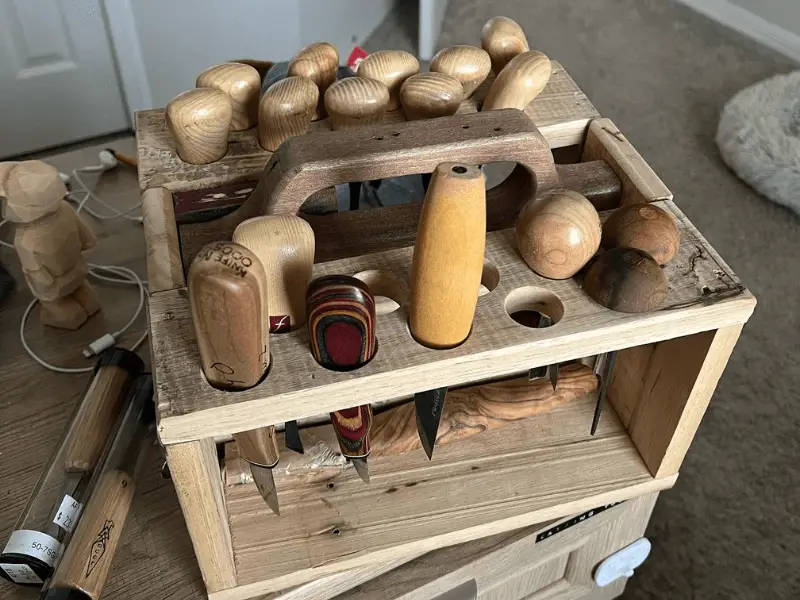
Making Wood Tool Holders
The idea might seem stupid, but it is the most beautiful if you implement it. We make Wood tool holders using a long piece of wood that can accommodate the number of tools you have. The wood is cut into slots, painted, and varnished to match the interior.
how to use wood carving tools
If you are getting into woodcarving, you should be aware that there are special tools that are mechanically made to be effective. Therefore, you must ensure you are familiarizing yourself with all the necessary tools for carving. In carving, we use both power tools and hand tools. For starters, it is recommended to begin with hand tools as you perfect your skills and confidence.
The first step to effectively using carving tools is to be aware of the different tasks performed by various tools. You also need to know how the blade’s shape is connected to its purpose. How the blade is made will tell you how and where to use that tool. Some you will use for gouging, cutting, adding details and texture, and creating the outline.
Can I leave my Work Tools on My Workbench?
Though storing your wood carving tools is essential, it is unnecessary. The goal of keeping your wood carving tools is to secure them. Sometimes tidying up your workbench may take time and effort, depending on the number of tools. You should always keep your tools clean if you have such a challenge.
Always do tool cleaning according to the manufacturer’s instructions. You can also use the steps below to clean your tools.
Steps To Cleaning Your Wood Carving Tools
- Put enough linseed oil on a piece of cloth to make it dump.
- Wipe the dumped piece of cloth over the tool.
- Leave the tool on for almost 20 minutes.
- Using a scrub brush, scrape off all the rust and dust from the tool.
- Put a few drops of liquid dishwashing soap on another clean piece of cloth to remove linseed oil and the remaining dirt from the tool.
- Rinse it with a lot of clean water and dry it with another clean cloth.
Besides cleaning your tools to increase their lifespan, it would be best to keep your blades sharp, which will help you produce clean cuts on your wood projects and prevent bodily injury.
Final Thoughts
Storing your wood carving tools in a safe place is advantageous as it helps you prevent unnecessary accidents, extends the lifespan of the tools, and makes it easy to access them when needed. It would help if you remembered carefully handling your tools per the manufacturer’s instructions.