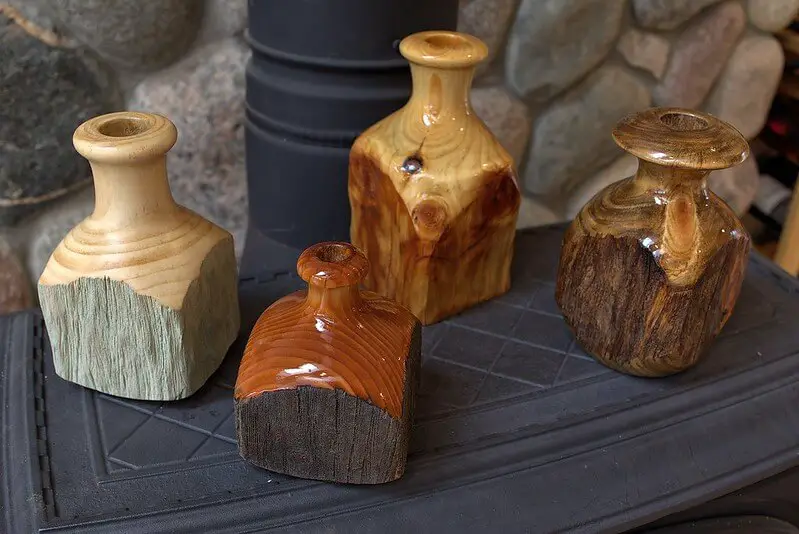
Finishing woodcarving can be a daunting task, but fear not! In this comprehensive guide, we'll take you through essential tips and techniques to help you achieve a flawless finish on your next woodcarving project. From selecting the right products to expert application methods, we'll cover all the intricacies you need to know. Discover the best finishes for wood carving, learn how to enhance the details, and protect your artwork for years to come.
How to Finish Woodcarving: 5 Tips for a Perfect Finish
Finishing woodwork is the most important step in the process. A good finish will make your work look professional, and can even save you time and money down the road. Today we're going to walk through five tips on how to get your perfect finish.
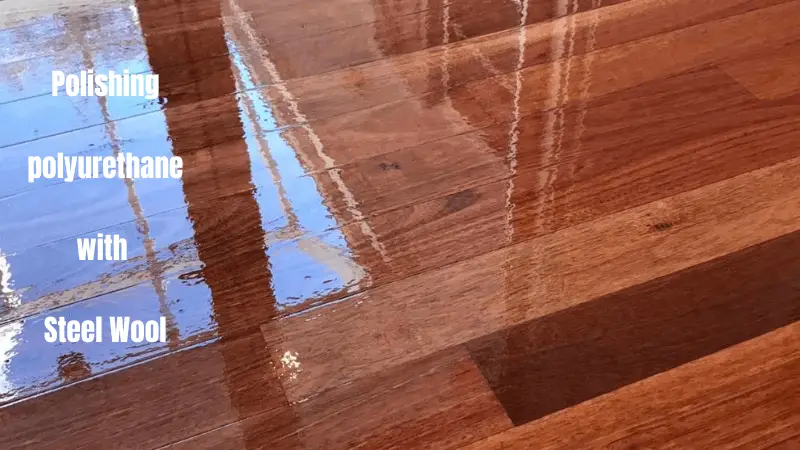
Polyurethane topcoats
Once you've completed your wood carving, it's time to seal the wood with a protective finish. Polyurethane is an excellent choice for sealing and adding a layer of protection to your woodcarving. Whether you've applied a stain or left the wood unstained, applying polyurethane will help safeguard your piece from moisture and other potential damage.
In addition to protection, applying polyurethane can also contribute to a smoother surface, preventing dirt and dust from collecting on your sculpture. To achieve the best results, apply an even coat of polyurethane and allow it to dry before adding subsequent coats. The number of coats required may vary based on the wood's porosity, so it's important to assess the absorption of the polyurethane into the wood. However, be mindful not to overapply, as excessive coats can result in a thick build-up that may impact the overall appearance of your artwork.
The Minwax 13333 Clear Polycrylic is a clear, water-based protective finish designed to protect and enhance the beauty of interior wood surfaces. It offers a protective and durable coating that resists scratches, abrasion, and household chemicals. The finish is quick-drying, low odor, and cleans up easily with soap and water. It provides a crystal-clear finish that does not yellow over time.

Valuable tips on the application of Polyurethane sealer
- When applying a sealer, ensure that the carving is smooth and clean. If you prefer sanding it, make sure it's way up to at least 220 grit sandpaper.
- After that, remove all the sanding dust using a soft brush or short bursts of canned air.
- Then apply your preferred sealer to your carving.
- Apply several coats of the sealer with daily intervals between each layer.
- Reapply the sealer regularly during the first year, only once per year after the initial twelve months.
It is important to note that softer woods will absorb the sealer easily, thus requiring a thicker sealer, whereas more complicated wood will need you to thin the sealer more.
Read Next
- How to Paint Basswood: A Beginner’s Guide
- Cool Crafts – How to Burn Designs on Wooden Spoons
- Can You Stain Over Polyurethane? Glazing Poly Explained
- How to Sharpen a Carving Knife
- Wood Carving Tips for Beginners
- Best Chip Carving Knives for Detailed Work
2. Using Beeswax wood finishes.
Beeswax wood finishes are natural and easy to apply. Beeswax finishes penetrate directly into the wood and eliminate dry, dull, moisture, and sun-damaged surfaces, leaving a great, warm, and shiny glow. It has the kind of shine that every home decorator wishes for.
Applying wax doesn't require tools. If you have time, rub it on gently with your hands to get an even coat; if you don't have time, use a cloth and rub it on in circular motions.
How to apply Beeswax wood:
- All you require is a soft cloth or rag.
- Then, scoop a small amount (begin with a dime) of the finish into the cloth and rub it on the wood carving.
- Allow the finish to dry for 10 to 20 minutes to get it ready to handle.
- When it has dried, you can apply a smooth and shiny gloss, making your art look great and allowing the wood grain to reveal its natural colors. Apart from the tremendous natural look, the beeswax finish will leave your sculpture feeling silky-smooth when touched.
Advantages of using Beewax
- It is natural
- safe to use in household carvings
- it is not expensive.
The disadvantage of using beeswax
- They are not heat resistant. If the piece of art is exposed to direct sunlight or kept in a warm place, the beeswax will get soft and tacky.
Therefore, when you choose to use beeswax, store the wood carving in a cool place away from direct sun, and there won't be any problems.
3. Using Tung oil finishes.
Another great option for caring for your wood carving is using oil finishes such as Tung oil finish.
Applying a tung oil finish not only protects your wood project from moisture but also helps it age gracefully. Tung oil is made from a resin extracted from nuts, so it's food-safe and water-resistant. Its popularity has surged in recent years because of its warm reddish hue and protective qualities. Like most finishes, you can apply a tung oil finish to bare wood or over a stain.
How to apply Tung oil:
- Apply as much as you need to cover the wood using a soft brush or cloth.
- Allow the oil to dry for like an hour and apply another coat.
- Do this several times until the oil penetrates the wood thoroughly.
- The oil will sit on the wood rather than sink in it to get the desired outcome.
They are also safe for use. Unlike other oils, Tung oil will naturally harden and create a protective layer on the wood.
Tung oil finishes penetrate deeply into the wood, and the surface cures hard over time, becoming scratch and water-resistant. In addition to that, as the finish ages, it will yellow slightly, creating a warmer look on the sculpture.
However, their only disadvantage is they take between 3 to 7 days to completely dry, and it is advisable you add 3 to 5 layers to get an excellent protective coating.
4. Using Danish oil wood finishes
Danish oil and other oil-based finishes are easy to apply, beautiful to look at, waterproof, resilient, and require little maintenance. What's more, they dry quickly.
Danish oil can be made from Tung oil or polymerized linseed oil, then mixed with solvents.
To apply Danish oil wood:
- Start by sanding wood surfaces with fine-grit sandpaper until they feel smooth, then wipe them down with a tack cloth to pick up any remaining particles.
- Apply a thin layer to the wood and sit for 5 minutes.
- After that, rub the oil into the wood with a soft cloth until the surface is dry.
- Allow it to dry for 4 to 8 hours.
Most kinds of Danish oil are all-natural and once dry, they create a non-toxic finish. In addition, Danish oil quickly penetrates the wood and hardens to provide a non-peeling protective layer resistant to moisture and chipping.
Moreover, it is essential to note that Danish oil doesn't have specific ingredients. Therefore, ensure that you read the ingredients on the oil by a particular manufacturer to ensure that it suits the wood you want to use it on.
5. Using Shellac
If you want to create a finish that makes your wood look shiny and new, shellac is your best bet. Shellac creates a tough, durable finish that's resistant to water damage and easy to clean. You can even buy pre-mixed shellac.
How to apply shellac
After you have completed your carving, apply a coat of shellac to protect it.
- Allow your wood carving to dry completely before applying a coat of shellac.
- Use a soft rag to rub a thin layer of shellac over your wood carving in small circles.
- Use more shellac as needed until there are no raised parts.
- After several coats, the oil will penetrate less and less as the wood becomes saturated.
- Leave for 10 minutes and then wipe off the excess with a cloth. Do not allow oil to stand in pools.
- As the oil dries, brush regularly to bring up the polished sheen. Keep a brush, especially for burnishing oiled finishes.
Storing the wood carving in a place away from direct sunlight protects it from excessive sunlight.
Light can make the carving appear dull, incredibly dyed, or colored.
Therefore, store the carving in a place with low levels of natural light. If possible, I would recommend you set up room or display lights only when the piece is being viewed or when there are people in the room.
The purpose of finishing wood carving
When it comes to woodcarving, people usually fall into two camps: those who finish the carvings and those who don't. However, there are many benefits to finishing your wood carvings, from their enhanced aesthetics to their increased resale value. Here are 6 reasons you should finish your carvings rather than leave them unfinished.
1. Protecting
Finishing your wood carving ensures an additional layer that is purposefully there to protect the wood beneath. It's, however, essential to note that some finish may conceal the wood underneath. If you desire to show the wood as part of the artistic appeal, make sure you use oil-based finishes. Such finishes can penetrate the grain, therefore, offering both protection and 'reveal.' A personal favorite is Linsheen. It's pretty easy to use and does an excellent job of both protection and giving the grain a good popping color.
2. Finishing enhances the wood grain
Finishing enhances and brings out all of your wood's natural beauty, making it an excellent choice for furniture. The more care you put into your finish, the more rewarding your piece will be! Use a high-quality finishing oil, such as tung oil or linseed oil; both are odorless, environmentally friendly, and provide a satin finish that preserves your wood grain.
3. Finishing strengthens your design
It doesn't matter how beautiful a piece of wood is—if it's unfinished, you might as well throw it in the fire. Unfinished wood is weak and often cracks under pressure. Finishing adds beauty to your design, protects it from moisture and bugs, adds shine, and preserves your art for generations to come. In addition, finishing provides a smooth surface: Whether you are carving with wood or creating intricate designs on furniture pieces, finishing allows you to create a smooth surface that looks amazing.
4. Finishing gives you control over how people see your piece
It's no fun to show someone a sanded piece and watch their face scrunch up in confusion. Finishing your work gives you control over how people see your piece, as it allows you to decide what color to make it, what type of finish will best suit your purpose, and which features you want to emphasize. Finishing is more than just a final step—it's an opportunity to take total control over how your pieces are viewed.
5. Finishing is your chance to share yourself with others
Your art can reach more people than almost any other artistic medium if you're a woodcarver. Your piece could hang on someone's wall, with their family members passing it down through generations. It might be used as a tabletop or a mantelpiece in someone's home. Finishing your wood carving is an opportunity to take pride in knowing that your work will continue to touch others long after you pass on, and that could mean more to you than anything else.
6. Finishing gives you the last chance to learn from your mistakes
Though you may have made many errors while creating your piece, think of finishing as a chance to hone your craft. Sometimes a little more sanding or staining can fix some of your biggest mistakes. This also gives you a chance to learn what kinds of errors you often make and how to avoid them in future projects. Finally, it's an opportunity to practice and create better pieces.
7. A finished carving takes on a life of its own
It is beautiful in its own right, but it also becomes a piece of art that can be added to a wall or displayed on a shelf. The best part of completing wood carving is seeing how different it looks after taking your tools to it. Once your wood carving is complete, you can display it proudly. Instead of seeing only a block of wood, now you see something that represents you and your efforts. This can inspire feelings of pride and accomplishment.
Factors to consider before finishing wood carving
When it comes to finishing a wood carving, there are many things you should first consider before you even come to the finishing products or techniques to apply. The essential things to consider are, for example, the type and the characteristics of the wood, the kind of carving, and the final look you want your carving to appear.
The final appearance of a carving will depend on a combination of:
- The surface texture of the carving is what gives it
- the color and quality of the wood itself.
- The type of finish that has been applied
A wood carving may be a one-of-a-kind piece of work, or it can be part of furniture you build yourself from scratch.
- The purpose of the carving will determine the factors influencing your decision on what type of finish to use. For example, if you will use a carving as a display piece in your home, it may not need any additional protection other than being polished or stained.
- However, if you plan to make gifts from wood carvings and sell them, finishing with a clear coating will provide additional protection and increase their value.
- In addition, when working with oak and mahogany, these woods tend to darken over time, so oil-based finishes improve their appearance over time by adding a warm glow rather than allowing them to turn darker over time.
- Given the various types and characteristics of wood, it is critical to know which wood the carving was made from, as some finishing may not work well with a particular wood. For example, extremely porous and softwoods, like basswood, that are notorious for not staining/dyeing evenly can be somewhat evened out with a sealer first.
- The final appearance of your carving will solely depend on you. Others may opt for a gloss finish, while others prefer a satin finish.
How long does wood carving last?
Moisture, lousy weather, and insects are all destructive wood agents. Furthermore, wood carving is a complex art form to master, so you may be wondering how long your wood carvings will last, given the difficulty of learning wood carving.
Worry not; wood carvings can last from a few decades to several lifetimes or more.
It is easy for woodcarvings to last several decades outdoors. They are kept away from direct sunlight and are frequently treated and sealed. In contrast, they will last indefinitely if they are indoors and sealed.
How to care for your wood carving to ensure it lasts
It is easy to take care of your wood carving if you want it to last. The ideal way to ensure that your wood carving is protected is by storing it in the right conditions away from direct sunlight, applying a wood finish to seal the wood from the elements, and adding a protective layer that guards the wood against direct damage.
Conclusion: The best finishes wood carving
To sum up, wood is constantly evolving, whether in life or death and so are wood carvings. Therefore, to ensure that your wood carving lasts for some decades, ensure that you choose the best kind of wood and follow the preservation measures above.