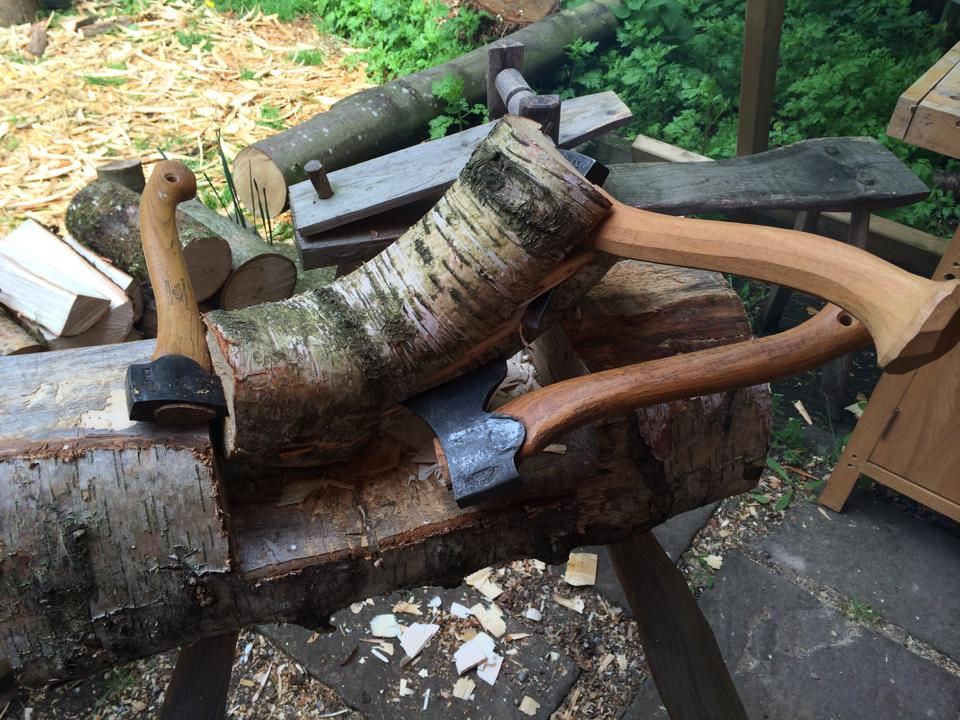
Of all the tools a woodcarver would need, none can compare to a gouge. Any sculpture consists of grooves in the form of notches and sharp or rounded rising edges between the tracks or channels. A gouge better does the job of producing concave and convex curves.
Of course, other types of tools come in handy. Powered tools such as chainsaws, bandsaws, and carvers' hand tools like the axe can significantly block out a rough image. But the fine final surface and detailing will be done by the gouge.
Read Next
- How to Select and Store Lumber
- Best Woods for Carving Using a Dremel
- Best Woods for Carving
- Woodcarving for Beginners
- Top Budget‑Friendly Chainsaws for Carving Projects
- Understanding Wood Moisture Meter Readings Before Carving
What is a woodcarving gouge tool?
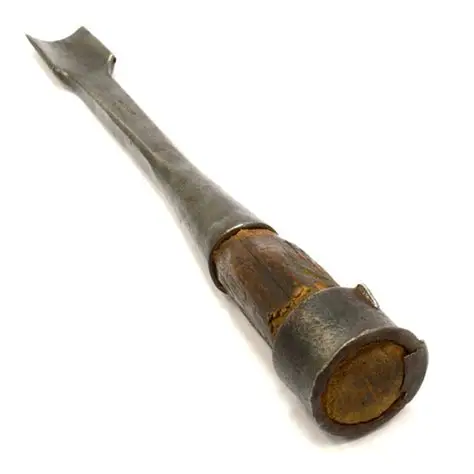
A woodcarving gouge can be defined as a special chisel, with a hollow or semicylindrical blade, for scooping or cutting holes, channels, or grooves in wood, stone, etc.; a similar instrument has a curved edge for turning wood.
Chisels and gouges have a long history, dating back to the days of carpentry and woodworking. These were most likely some of the first tools that humans used.
For instance, a carver or carpenter invented the planer by fixing a chisel on a wooden block. In other words, Gouges and chisels were used before a Jack plane existed. Gouges take two separate forms: inside the ground or scribing gouges and outside ground types.
Woodcarving gouges being forms of chisels, are made of solid blades which are equally suitable for pairing (pushing with the hand) or driving with a mallet.
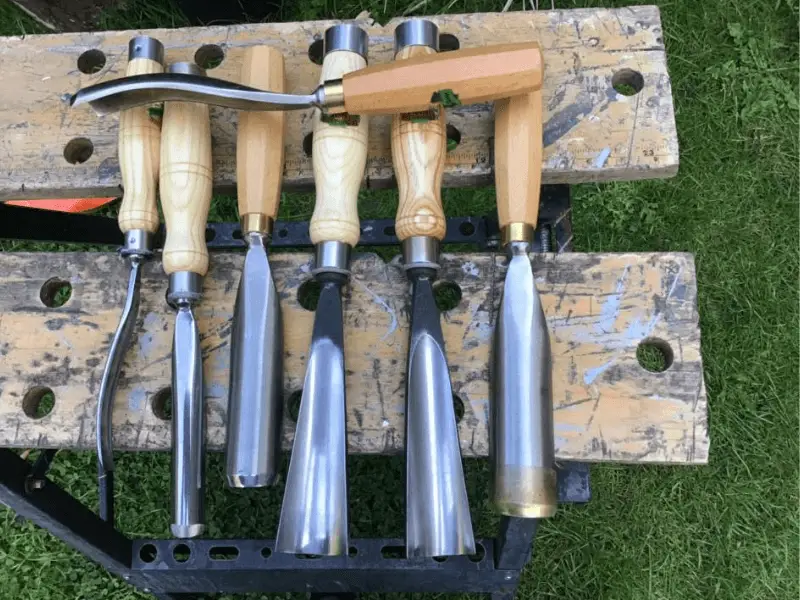
Gouges of either type are available in various widths and radii to suit the curvature of any piece of concave work.
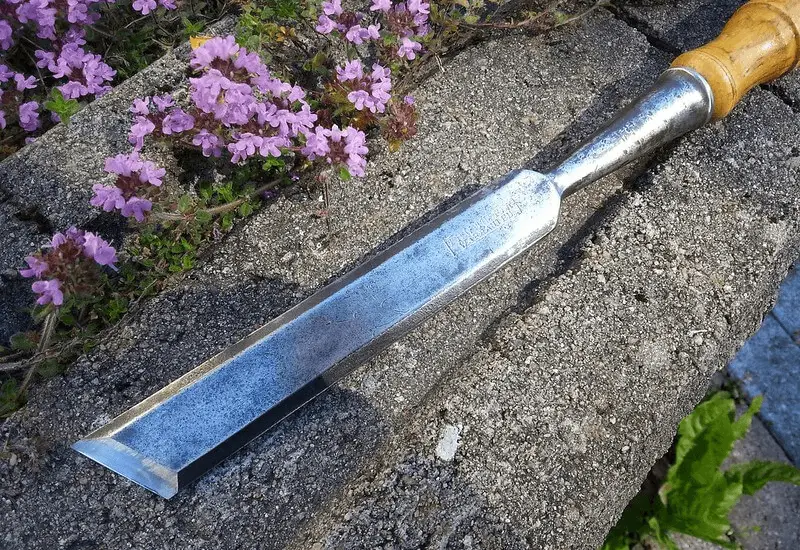
As with any wood-cutting tool, the steel blade must be made of the finest quality to obtain and hold a razor-sharp edge.
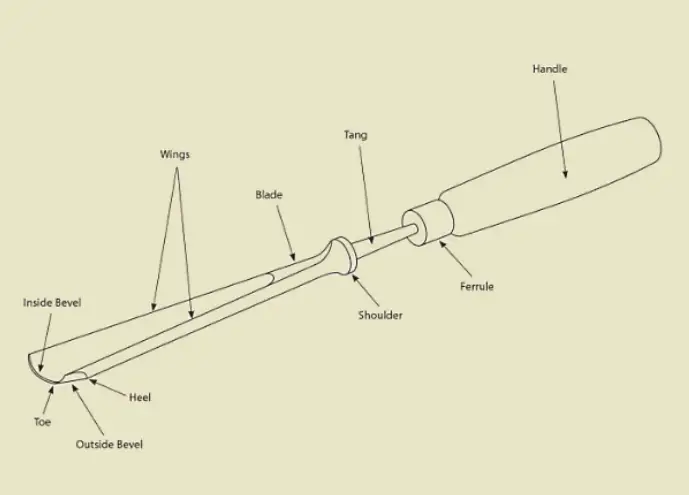
The tang, on the hand, needs a much softer temper so that it will not break under stress. The handle, generally of a carver' type, should be reinforced around the tang with a suitable ferrule made of either steel or brass.
The handles may be made of hardwood or plastic. The main criteria for a chisel handle are that it should be challenging, comfortable for the hand, and smooth so as not to cause blisters with prolonged use.
Now that you know what a woodcarving gouge is, you should read our article on woodcarving chisels to get started with them.
Woodcarving gouges vs Woodturning gouges
There are remarkable differences between Woodcarving and woodturning gouges. Being a frequent user of wood lathe machines, I will tell you handles differ significantly.
Woodturning chisels and Gouges must have longer, more prominent, and somewhat thicker handles for a firm grip to withstand the turning force of wood.
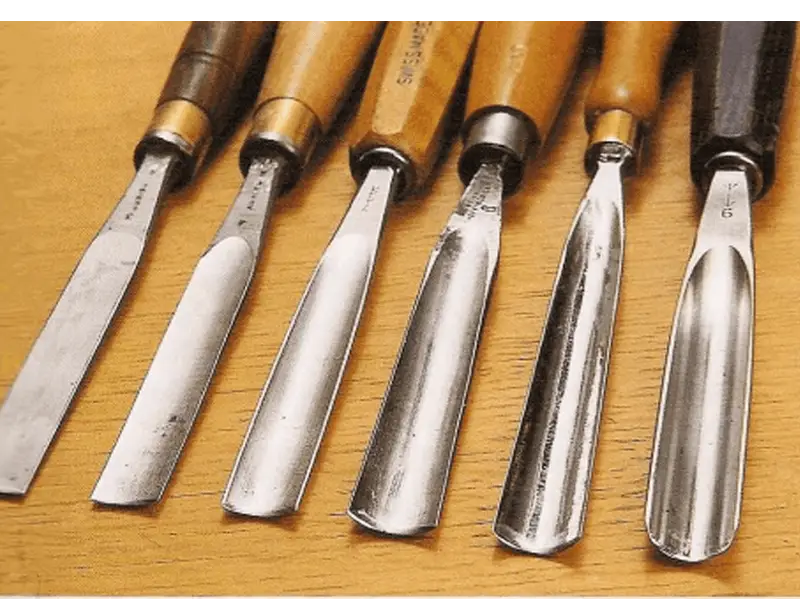
Another noticeable difference is the gauge of the blades. Woodturning gouges tend to have wider blades than those of woodcarving.
For woodcarving gouges to be more minor and have thinner blades yet effective and efficient, they must be made of high-quality steel. In addition, honing angles when sharpening the two types of gouges differ. The honing rise of woodcarving gouges tends to be more acute than woodturning gouges.
| Woodcarving Gouges | Woodturning Gouges | |
| Handle | Normal length | Extra-long |
| Blade | Thin | Thick |
| Honing | More acute(15-25)’ | Less acute(35-45)’ |
| Steel | Ordinary | Best quality |
Woodcarving gouges: How do you carve wood with a gouge?
Having learned more about Woodcarving gouges, what follows is acquiring skills in using gouges to carve wood. Carving is a learnable technique by whoever is interested and not so much about talent.
As long as one is determined, using woodcarving gouges or any other Woodcarving tool to carve is thrilling and accessible. The first step is to know the essential hand position with gouges.
Essential hand position with woodcarving gouges
There are four grips for using wood gouges. They include;
- The single-handed grip(or mallet grip).
- A double-handed grip
- The pencil grip
- The engraver's grip
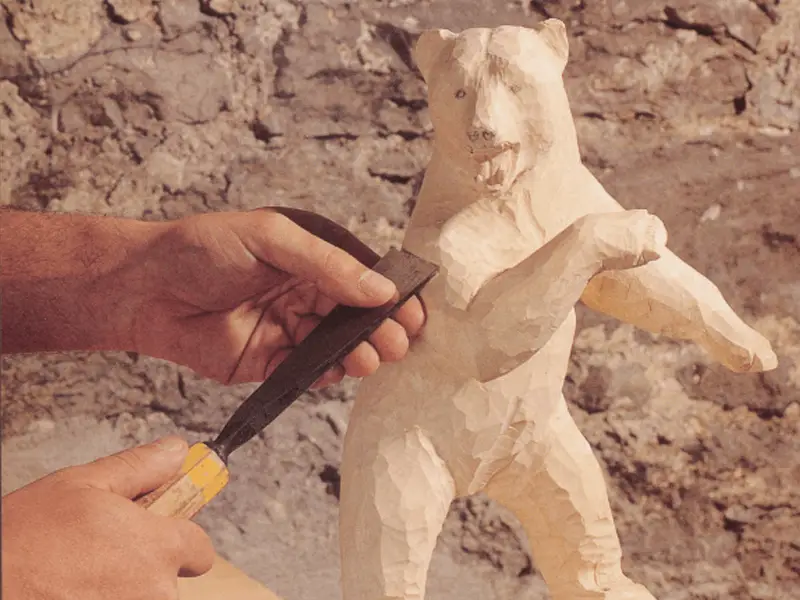
The single-handed grip (or mallet grip)
This position is used whenever the gouge is driven by striking with a mallet or Palm of the other hand.
Grasp the gouge either at or slightly below the midpoint(usually with the thumb covering the ferrule), somewhat like holding a dagger but with the thumb in line with the tool axis.
Place your gouge's cutting edge on the surface and strike the end of the handle with a mallet or hand. The angle of the tool to the surface will largely determine the appearance and depth of the cut.
A double-handed grip
It is used whenever the tool is pushed by one hand and guided by the other. Grasp the handle with your right hand (if you are right-handed) as though holding the butt end of a pointer or fish rod.
Grip the blade with the other hand as though holding a dagger, about 2 to 3 inches protecting below the hand. Place the cutting edge on the work, adjust to the desired angle, push with the upper hand and guide with the lower.
Variations in positions of the lower hand and fingers will occur naturally as one progresses. Occasionally, awkward spots may require an exchange of hand positions.
The pencil grip
It is helpful for fine detailing where minimal pressure is needed and for cleaning up or making final cuts. Simply hold the blade near the cutting edge as you would a pencil.
The engraver's grip.
It is essentially a one-handed grip in which the blade is held reasonably close to the tip, like a pointer or fishing rod.
Where a linoleum block tool or wood engraver's burin is used, the hand is short enough, and the end of the handle is tacked into the heel of the Palm.
The other hand holds the work and occasionally guides the tool's tip.
Basic cuts with woodcarving gouges
There are six basic cuts with gouges, namely;
- The stop cut
- The wedge cut
- The running cut
- The rocking cut
- The slicing cut
- The scraping cut
The stop cut
The stop cut is also referred to as the striking or outline cut. It is the most critical cut in carving. It is used as an initial limiting or outlining amount to prevent later scratches from splitting the wood.
The cut is made with the gouge held at right angles to the surface or a slight tilt from right angles to produce a sloping amount that will strengthen the cut edge where a vertically cut edge might chip.
The location and depth of a stop will help determine the final pattern at the spot. It's often wise to make the finish cut slightly to the waste side of the pattern outline to retain the pattern marks and allow for any finishing cuts.
Firmers or skews are used for cutting straight or nearly straight outlines. Curved lines are stop-cut by using a gouge and having a sweep closely matching the curve of the line.
The wedge cut
This cut most characteristic of a chisel. The mallet grip is used to hold the chisel, and the sharpened edge is driven into the wood by striking the end of the handle with a mallet or hand. The wedge shape of the edge cuts and splits the wood.
Wedge cuts must be made before outline cuts to avoid dangerous splits that can get out of hand and spoil the intended pattern.
The running cut
A running cut is a lightweight form of wedge cut whereby instead of the gouge being driven by hand or mallet strikes, the gouge is pushed through the wood with steady uninterrupted force.
The double-handed engraver's grip is used with complete and smaller tools. The cut is mainly for light to medium surface trims.
The cut also makes incisions and grooves with parting tools, flutes, and veiners.
Rocking cut
This cut is made by placing one corner of the cutting edge on the work, then rocking the tool along the length of the sharp edge as it is forced into the wood.
This cut is mainly used for;
- Making shortcuts when trimming to layout lines.
- Cutting across end-grain
- Cutting straight down into a surface
- Cutting along an edge
- Cutting at locations requiring more control than freehanded running cut
The slicing cut
The slicing cut is made by working the tool to perform the cutting edge from one end to the other as it is pushed into the wood.
The tool must be rotated while being pushed to achieve a slicing cut with a gouge. Skews tend to make slicing cuts naturally if allowed to slide sideways while going into the wood.
Firmers are moved from side-to-side movement while being driven, often with a fan-like action pivoting around the hand nearest the cutting edge.
The scraping cut
To make scraping cuts using gouges, a gouge is placed upside-down with the concave face against the surface, though this is not regarded as a good scraping cut.
Any chisel makes a good scraping cut by dragging the sharp edge over the wood surface. The tool edge should be held at a 60 to 90 degrees angle to the surface.
Scraping removes small quantities of material at a single pass, usually in hollowing or surface finishing operations.
Sharpening woodcarving gouges: How do I point my gouges for carving?
The process of tool sharpening may be broken down into four steps:
- Grinding- with gouges, the tool must be rocked or turned evenly during grinding.
- Whetting- even rocking or turning on a grinder fitted with Washita natural stone will produce proper whetting. Slip stones are used for sharpening the inner faces of gouges.
- Honing- best done on natural hard Arkansas stone, mainly to eliminate any wire edges.
- Stropping- all stropping or hand is performed with edge dragging against the abrasive.
Wrapping up on Woodcarving gouges
A woodcarving gouge is a chisel with a hollow or semicylindrical blade.
There are remarkable differences between woodcarving and woodturning gouges, mainly handles and blades.
There are four primary hand grips when using gouges.
There are six basic cuts made in carving with gouges
For quality work to be produced and to avoid accidents and material damage, gouges should be sharpened in at least four steps; grinding, whetting, honing, and stropping.
Walk into a world of Japanese woodworking with our Review of The Japanese woodworking tool set.