
Spoon carving is one of the most rewarding and accessible ways to get into traditional green woodworking. There is something deeply satisfying about taking a raw piece of a tree and transforming it into a functional piece of art for your kitchen using just a few hand tools.
If you are picking up a carving knife for the first time, this illustrated, step-by-step beginner's guide will take you through the entire process, from selecting your log to applying the final finish.
Step 1: Selecting the Right Spoon Wood
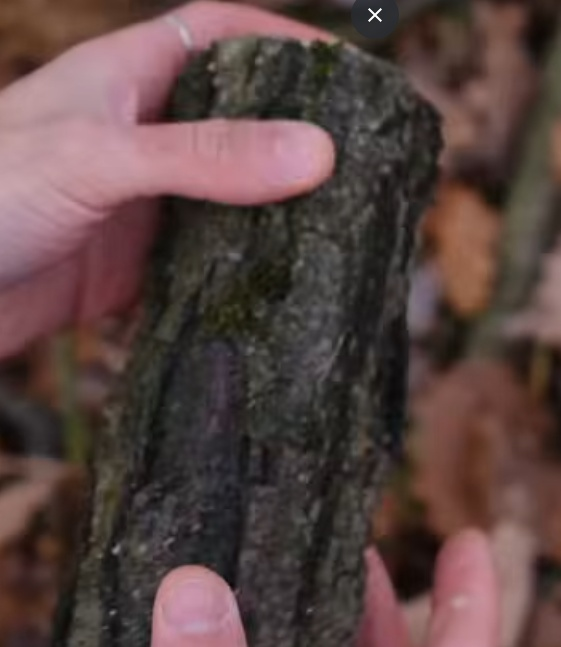
Before you strike your first piece of wood, you need to find the right material. For beginners, working with green wood (freshly cut wood that still contains moisture) is highly recommended. Green wood is significantly softer and easier to carve than seasoned lumber, making it much more forgiving on your hands and tools.
As seen inthe image, look for a small, straight-grained log segment or branch that is free of large knots. Excellent beginner-friendly species include:
- Basswood / Lime: Exceptionally soft with uniform grain.
- Birch: A classic traditional choice that carves beautifully and finishes smooth.
- Willow or Cherry: Great options if you want distinct grain patterns.
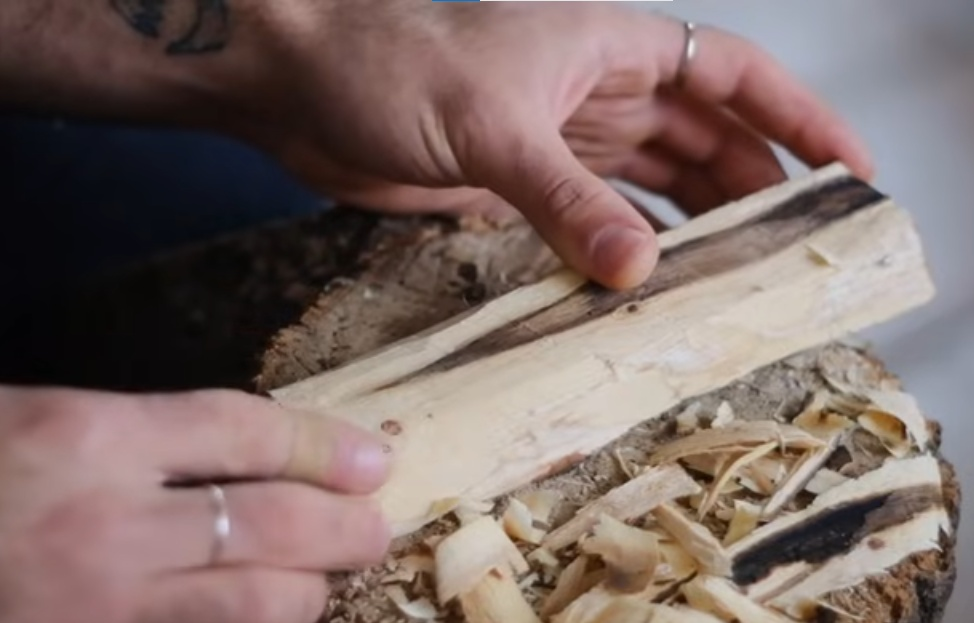
Step 2: Cleaving the Log into Spoon Blanks
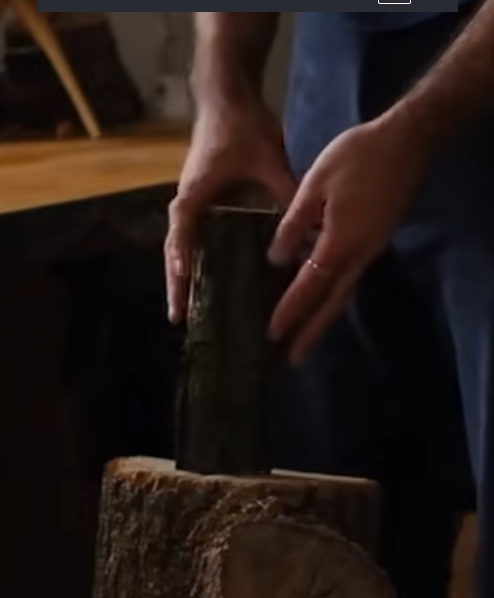
Once you have your log, you need to split it down the center to expose the inner grain and create a flat, workable surface.
As shown above, stand your log vertically on a sturdy chopping block. Position a sharp carving axe or a dedicated splitting froe directly across the center of the grain. With a controlled strike from a wooden mallet or another log, drive the axe downward.
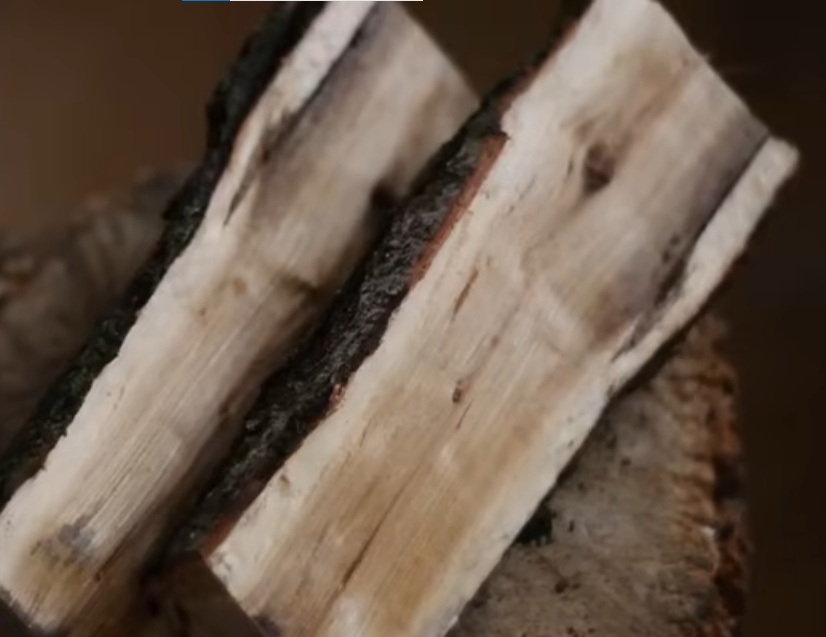
The result is two cleanly split wooden halves. This reveals the beautiful contrast between the outer sapwood and the dark heartwood inside, perfectly preparing your piece for the next phase.
Step 3: Roughing Out the Flat Profile
With your log halved, the goal is to flatten the face further and reduce the overall thickness of the wood so it is comfortable to work with.
A hand axe is used with precise, downward glancing blows. The trick here is to use the weight of the axe to shave away the bark and high spots rather than hacking into the wood. Periodically stop and evaluate the flattened surface by hand. You want to ensure the surface is flat enough to easily draw your spoon template onto.
Step 4: Outlining and Making Strategic Stop Cuts
Before doing any heavy axe work to narrow the handle, you must establish safe boundaries so you don't accidentally split off the bowl of your spoon.
First, use a pencil or marker to sketch your spoon template directly onto the flat face of the wood. Next, take a small hand saw and make perpendicular stop cuts right where the wide bowl transitions into the narrow handle.
Once your stop cuts are in place, you can confidently use your carving axe to cleave away the excess side material. The split wood will stop cleanly at your saw lines, safely roughing out the unmistakable silhouette of your spoon.
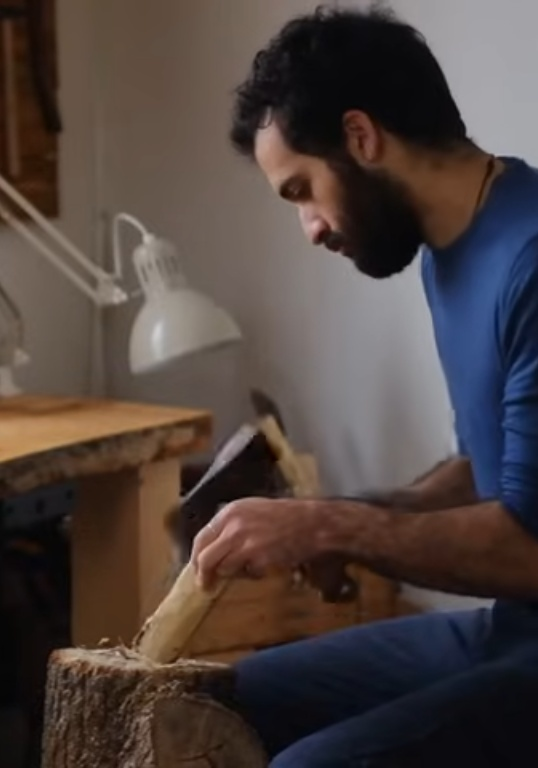
Step 5: Transitioning to Detail Knife Work
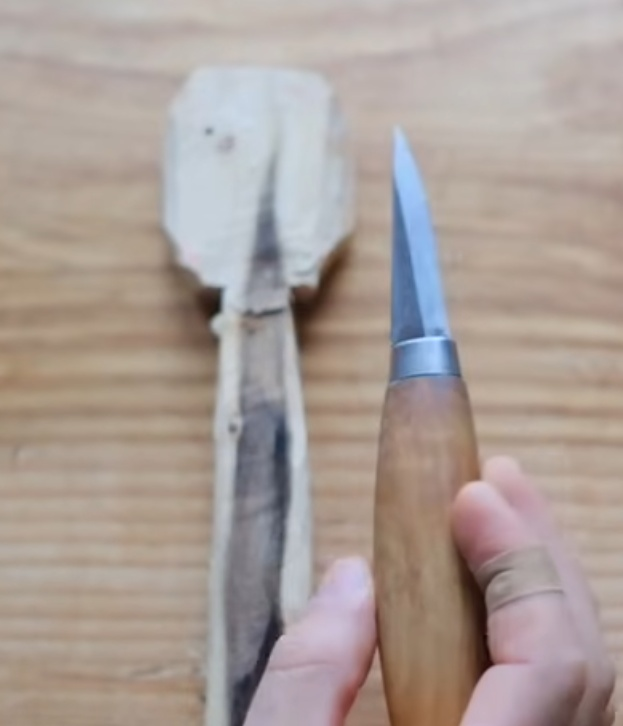
When the heavy bulk removal is complete, it is time to put away the axe and switch to a dedicated woodcarving knife, traditionally known as a sloyd knife.
As seen in the image, your spoon blank will still look quite blocky and angular at this stage. Hold your sloyd knife with a controlled grip to taper the handle, chamfer the sharp corners, and smooth out the transitions around the neck of the spoon. Focus on creating clean, deliberate geometric facets rather than rushing to make it perfectly round.
Step 6: Hollowing the Spoon Bowl
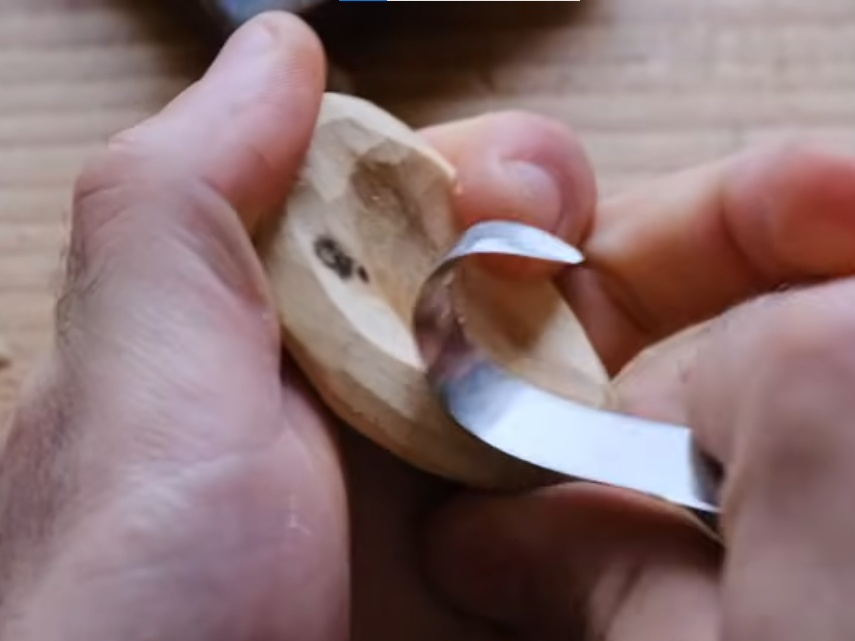
Hollowing out the bowl is often considered the trickiest part of spoon carving, but using the correct tool makes it incredibly satisfying. For this step, you will need a specialized curved blade called a hook knife (or spoon knife).
The proper beginner technique is put into practice. Hold the spoon blank firmly in your non-dominant hand (or secure it in a lap-grip). Draw the curved hook knife across the wood grain in a pivoting, sweeping motion, using your thumb as a lever for control. Avoid digging too deep too quickly; instead, slice away thin, curly shavings to gradually establish a smooth, functional hollow.
The Woodcarver's Choice: Sanding vs. Knife Finish
Once your bowl is hollowed, your spoon is structurally complete. At this stage, traditional carvers face a choice. If you prefer a rustic, heritage look, you can leave the clean, faceted tool marks left by your sharp knives as a testament to the handmade process.
However, if you want a perfectly uniform, smooth texture for eating, this is where you introduce sandpaper. Begin with a medium 120-grit sandpaper to blend out any rough ridges. Progressively move up to 220-grit and finish with a fine 320-grit.
Pro Tip: Wipe the sanded spoon down with a damp cloth to intentionally "raise the grain" (swell the loose wood fibers). Let it dry completely, then perform one final light sand with your highest grit for a satin-smooth finish.
Step 7: The Final Polish & Food-Safe Finish
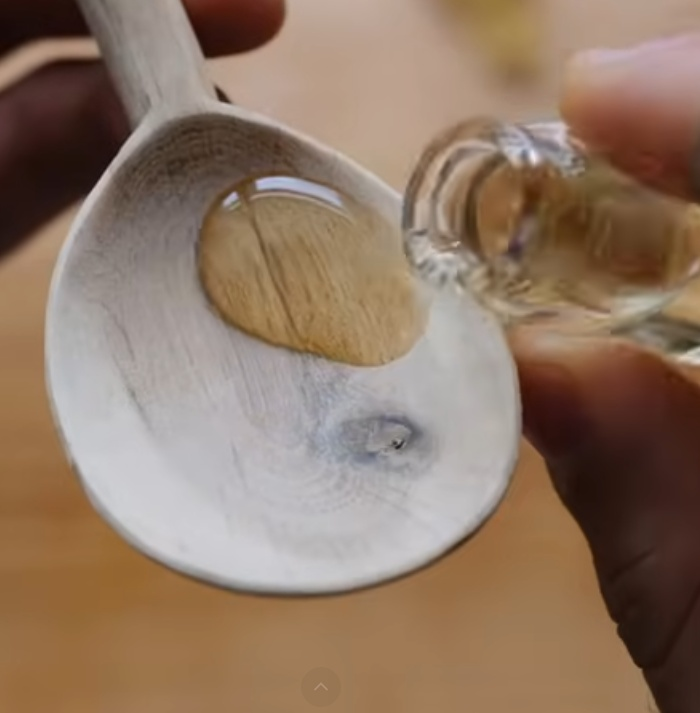
To protect your hard work from moisture and staining, you must apply a cure-able, food-safe oil. As captured in the this frame pour a small amount of oil—such as raw linseed oil, walnut oil, or pure tung oil—directly onto the spoon bowl. Use a clean cloth to rub the oil deeply into the wood fibers.
Watching the oil spread is the ultimate reward: it instantly darkens the wood, coaxes out the rich grain character, and seals your new, hand-carved kitchen utensil for a lifetime of use.
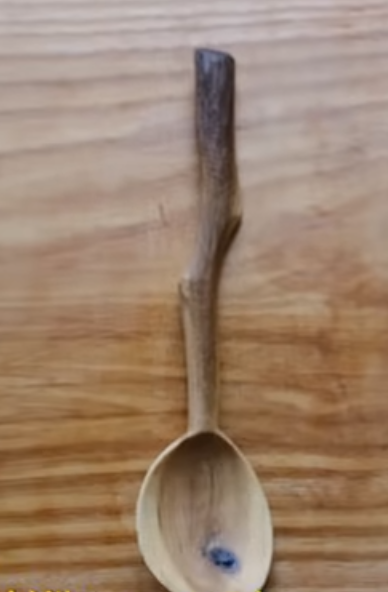
Your carving journey is now complete! In the image below, you can see the raw, finished wooden spoon showcasing an organic form that beautifully follows the natural curve of the original tree branch.
Essential Beginner Tips for Spoon Carving Success
Before you start shaving away your wood blank, keeping these expert-backed tips in mind will make your carving experience safer and much more enjoyable:
- Carve with Sharp Tools: It sounds counterintuitive to a beginner, but a dull blade is far more dangerous than a razor-sharp one. Dull knives require you to apply excessive force, which increases the likelihood of the blade slipping and causing injury. Keep a leather strop nearby and touch up your blades every 30 minutes of carving.
- Invest in a Carving Glove: When you are first learning blade control, your non-dominant hand (the one holding the wood) is at risk. A simple, inexpensive cut-resistant carving glove worn on your holding hand provides immense peace of mind and prevents painful mishaps.
- Always Carve Away From Your Body: As a general rule, ensure the path of the blade never points toward your fingers, lap, or torso. If a cut requires you to pull the knife toward you (like certain advanced chest-lever cuts), ensure your thumbs and fingers are completely tucked behind the blade's pivot point.
- Embrace the "First Spoon" Flaws: Your very first spoon will likely be thick, slightly asymmetric, and full of uneven facets. That is completely normal! Do not try to carve it down to paper-thin perfection, as beginners often accidentally poke right through the bottom of the bowl. Cherish the rustic look of your first attempt—it’s a badge of honor.
Conclusion
Spoon carving is a beautiful journey that forces you to slow down, connect with nature, and work with your hands. From the satisfying thud of the axe splitting open a fresh log to the magic moment the oil brings the hidden grain to life, it is a hobby that is as therapeutic as it is practical.
Don't worry about making a flawless masterpiece on your first try. Every piece of wood teaches you something new about grain direction, knife pressure, and patience. So, grab your sloyd knife, find a fresh branch, and start carving your story into wood one shaving at a time. Happy carving!


Leave a Reply
You must be logged in to post a comment.