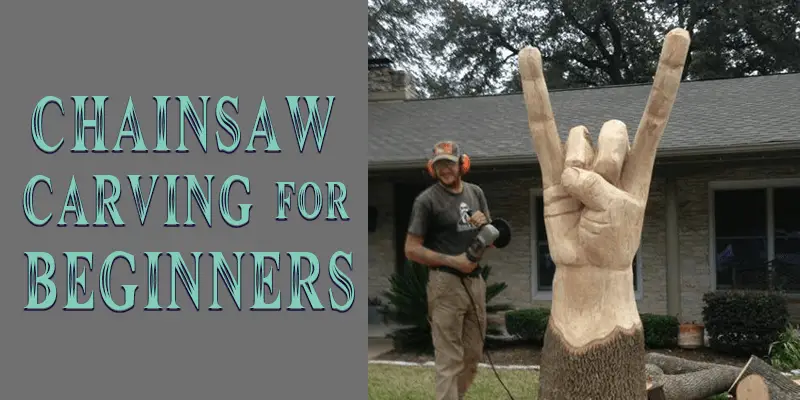
Chainsaw carving is a relatively new technique of carving. It is, however, very interesting and makes carving big wooden sculptures a walk in the park.
But chainsaws are also inherently dangerous. If you’re looking to start chainsaw carving, this article will inform you about all the 411s of chainsaw carving. Here is all you need to know about chainsaw carving for beginners
Chainsaw carving guide for newbies
Safety First
In general, chainsaw handling calls for the handler to have a reasonable degree of mental and physical fitness. This is not to necessarily exclude people with disabilities from working with chainsaws; nonetheless, medical advice may restrict the tasks they can do. They may also require an increased level of supervision.
Prospective chainsaw operators with health issues affecting their alertness, mobility, vision, and strength. Balance or manual dexterity should seek a doctor’s advice before operating a chainsaw.
To add to this, chainsaw exposure exposes operators to increased levels of noise and hand/arm vibrations, which may cause hearing loss and a condition known as the white finger.
Buying some Earmuffs will help protect your eardrums. When gear-hunting, purchase low-noise, low-vibration chainsaws.
Maintaining your chainsaw is also important and is regarded as a safety measure. When maintaining the chainsaw, don’t forget to check and maintain safety gear as well.
It is always important to wear safety gear when handling a chainsaw. The following is safety equipment for safe chainsaw carving.
Chainsaw chaps
I cannot emphasize enough how important chainsaw chaps are. If I was going to gift someone a chainsaw, I would also make sure I included chaps in the safety gear, so I wouldn’t have to be with him at the hospital. Chaps are made of threads that clog up the chain and stop it as soon as the chainsaw comes into contact with the chaps.
Gloves
Make sure to buy a good pair of chainsaw gloves. They can offer protection against chainsaw cuts. Most chainsaw gloves have a chainsaw stopper patch on the back of the left hand as it is identified as a high-risk area, but most brands today will also include both hands to account for left-handed people.
Boots
Safety boots are vital. Anything with a steel toe will do.
Read Next
- Best Woods for Chainsaw Carving
- Safest Chainsaw Choices for First‑Time Carvers
- What to Know Before You Sharpen a Chainsaw
- Chainsaw‑Carveable Pine: Pros & Cons
- Electric Chainsaw Options for Beginners
- Preparing Wood for Carving: Drying & Storage Tip
Face and head protection
The TR industrial helmet is the best protection we can recommend for your head, face, and ears. Yes, they include earmuffs too. A helmet with a mesh visor is always ideal for countering a chainsaw kickback headed for your face.
Many people will assume all the safety gear because they ‘don’t use the chainsaw that much’. Well, if you don’t use it that much, you are at a higher risk of getting into an accident than a person who uses it regularly. A regular operator has a better judgment of the dynamics as their experience expands.
Lastly, remember to read all the manuals and instructions of all machines before operation.
Chainsaw carving equipment and material
Chainsaw
Chainsaws are the main equipment for carving in chainsaws carving. Any chainsaw can carve, but I recommend you buy a chainsaw specifically designed for carving.
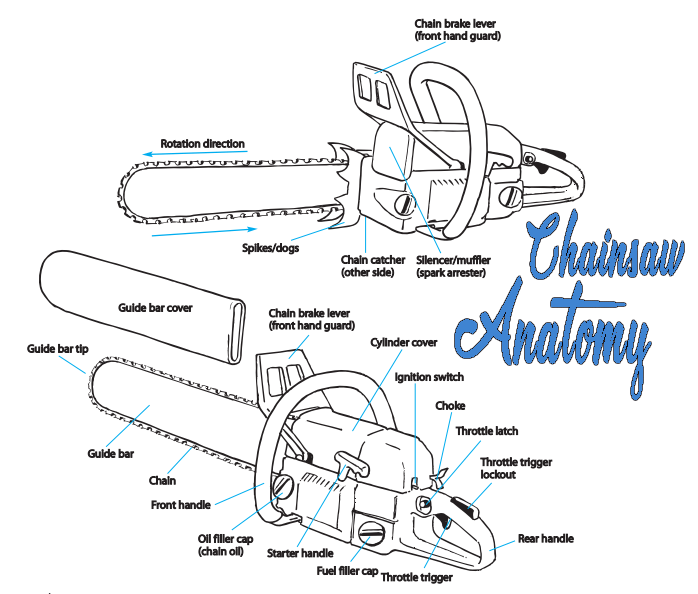
Such specialized chainsaws will be much easier on your health. Always remember there is a high risk associated with the use of chainsaws. With that said, look for a chainsaw that’s not too heavy and has low vibration and noise.
I have recommended two chainsaws from the Husqvarna brand. You may buy from any brand I just recommended those because those are the ones I have used and have confidence in them.
Other than chainsaws, chainsaw carvers use other tools to help enhance style and technique where the chainsaw cannot.
Angle grinders
Angle grinders are a great addition to your tool kit. They can be used with sandpaper to smoothen areas that need to be smoothed, like the beak when carving an eagle. An angle grinder can also be used for details to work tricky areas.
Rotary tool
A rotary tool with a diamond bur, eye tool, and V-wheel can all help in enhancing detail down to hair strands. All the extra tools can be bought gradually over time.
Where to learn
There are numerous places to learn about chainsaw carving. In the internet era, youtube and sites like improvewood.com can be good places to start. However, a hands-on approach is very important, given the dangers of using a chainsaw. Some institutions offer short courses on chainsaw operation and safety. You can quickly search to find if there are any in your locality.
If you are lucky, you may find institutions that not only give chainsaw operation courses but chainsaw art courses too. If this option is not available, you may still try and find someone who is an active chainsaw carver willing to offer classes.
Getting your first chainsaw
Selecting your first chainsaw may be kind of scary for a newbie. I mean, chainsaws are expensive, so you wouldn’t want to buy the wrong one. The problem is there are many makes and brands of chainsaws, so which one should you go for?
I can only recommend something I have personally used though there may be other brands with similar specs. My go-to wood carving chainsaw is The Husqvarna 346 XP. It’s an excellent lightweight, an all-rounded chainsaw with enough horsepower to support a bigger bar (a pretty important factor).
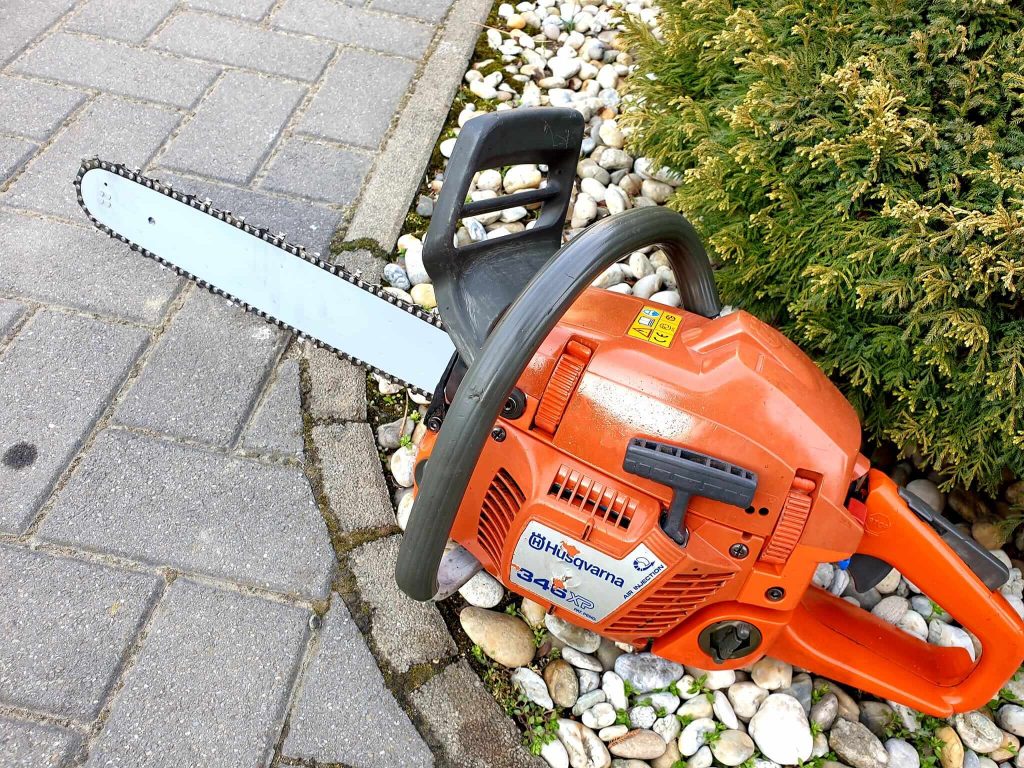
The Husqvarna is slightly over ten pounds and comes with a bar recommendation of around 13-20″ (33-50cm in SI units). The chainsaw is quite decent at blocking and roughing out.
However, the Husqvarna 346 XP is slightly bigger for details. For details, you need a smaller chainsaw.
The Husqvarna 336 is smaller than the 346XP, with a bar recommendation of about 13-16″ (33-40cm). Its small size and relatively light overall weight make the Husqvarna 336 a master at detail work and a must-have for chainsaw carvers. Some recommend buying one chainsaw and several bars to change for various carvings. I don’t recommend that approach.
If you were to buy only one chainsaw, I would recommend buying the Husqvarna 346 XP. However, if you’re taking chainsaw carving seriously, you will soon realize that you need more than one chainsaw, and when that time comes, don’t forget to look at the Husqvarna 336.
Another good brand I have come to like and recommend to many beginners is the STIHL MS 170. Read about this cheap but remarkable chainsaw in “best carving chainsaw for beginners.”
A Carving bar is important!
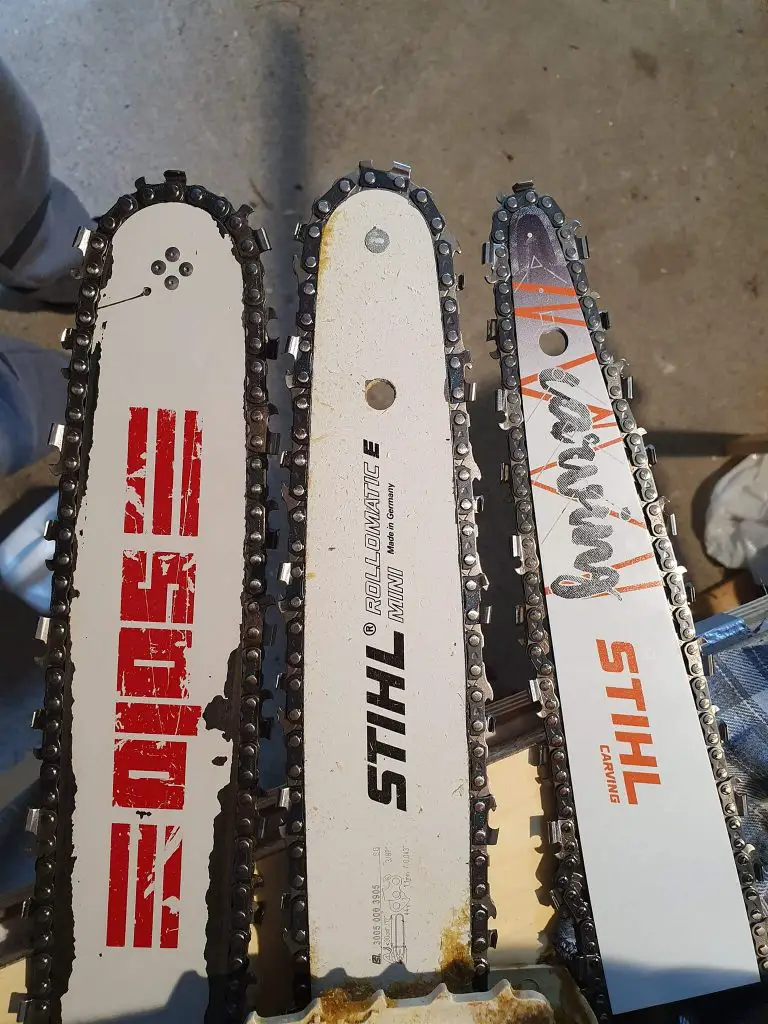
Consider buying a carving bar if you are already carving with your regular saw. With a carving bar, the cut is more precise, all thanks to the tiny tip of the bar.
The image below compares a carving bar with regular bars. Notice the difference.
Wood for chainsaw carving
Any wood can be carved with a chainsaw. Some woods are generally difficult and sometimes not worth the effort.
Such woods may have a rot problem (something you should consider for outdoor sculptures. Others may be too soft to hold any decent details. Some are just hard and seem to take forever and a lot of sharpening to complete.
Wood for carving in chainsaw carving is largely influenced by availability. Unlike whittling, where a few small basswood blocks are enough to keep you busy the entire summer, the chainsaw is a whole new ballgame, and big sculpture is the norm.
Small sculptures are still carvable but compared to whittling; they are still pretty big. So for wood, at some point, you’re going to consider locally sourced logs for chainsaw carving.
Below are some of the woods I have had a chance to work with. Under each, I will list a few characteristics I liked and favored chainsaw carving. The characteristics should give you a general idea of good woods and how to carve wood based on its characteristics.
Upper Midwest White Pine
White pine is soft and, therefore, can be carved pretty first. Carving speed is a factor if you plan to make a living through chainsaw carving. White pine carvings can also go indoors or outdoors. The wood is also hard enough to take detail well.
White pine is more rot-resistant than red pine and basswood and will take preservatives well. The only downside to using white pine is its structural integrity. White pine is not as strong as red pine. Therefore, it’s not a good choice where structural strength is required, for instance, in a crosstie in a log home.
Hardwoods are good for chainsaw carving.
Most hardwoods are good for chainsaw carving, though they tend to be a little harder. They take details remarkably well and will also accept finished work quite well.
Here are a few deciduous species in my area, including red and white oak, willow, elm, cottonwood, catalpa, walnut, box elder, basswood silver, and sugar maple.
Check Best Chainsaw for oak trees
All these hardwoods can be carved. However, the maples, willow, elm, and cottonwood have a high moisture content, which, if not careful, will result in rot. For more info on more suitable woods, check out Best woods for chainsaw carving
Chainsaw carving basic techniques
angle cut
Also called slopping cuts, angle cuts are necessary for most woodwork. To achieve these cuts, the saw is held at some tilted angle, say 30 or 60 degrees from the horizontal or vertical position. These cuts are typically used in curving when it is needed to cut out large pieces.
curving cut
Similarly, the best method to archive curving cuts using a chainsaw involves first being able to mark the wood piece with an outline to guide the cutting action. Once the desired shape is inscribed on the wood, the chainsaw is moved along the outline to achieve the desired curving cut
horizontal cut
Horizontal cuts involve placing the saw at a parallel position to the ground. The chainsaw is then cut out a piece of the main wood. This cut is also utilized to achieve a flat surface by blocking out undesirable parts that may be uneven.
piercing cut
In this type of cut, the saw is moved in such a way as to keep it inside the wood. Piercing the wood with the saw-like one would with a nail. This type of cut is typically employed when making blocks of wood.
vertical cut
Precise and level vertical cuts are hard to achieve when using a chainsaw. However, vertical cuts can be achieved by using specialized mounts that hold the chainsaw at the level, and the only action needed is to glide the chainsaw along the mount to cut the piece say a log, from a vertical position.
sweeping cut
As the name of this cut suggests, the saw is moved along the piece to be curved in a sweeping motion. The saw should be operated at a fast rate of speed and moved at the desired angle to achieve the various carve sizes
Other techniques for chainsaw carving
texturing
In this technique, the purpose is to add details to the surface of the wood piece. It is achieved by the tip of the saw being moved along the saw following the desired design
veining
Similarly, in veining, the objective is to add details to the surface of the wood. The resulting patterns on the wood surface resemble a bird’s feather. The saw is moved in a sideways motion to achieve this carve.
smoothing
A chainsaw can be used to achieve smooth surfaces. To achieve this, the saw is placed flat on the wood piece and one side is slightly tilted upwards so that only one side touches the surface. The saw is then moved along the surface in a sweeping motion.
beginner chainsaw carving ideas
Carving a bear
Carving a bear using a chainsaw may sound like a wild idea, especially as a beginner project. However, with the right preparation and tools, it is achievable.
To begin, it is important to have the desired design well understood. The first step after having the safety and tools necessary is to sketch the desired bear on a piece of paper to guide the actual curving. Also, it is important to draw the major lines of the wood to help guide the carving.
For a beginner, it is easier to begin with the head. Carve the back of the head and the neckline. Proceed to cut the back following the outline. On the head, shape the ears and snout.
Once the desired shape of the head and back are achieved, you can move to the legs of the bear. Here a drawn outline is important to guide cutting out the legs.
Once the legs are done, move to cutting the belly and blocking out the undesired wood.
Once all the parts are carved, move to shape them to look more real. Detailing can be achieved using smaller tools such as a chisel to shape parts where a chainsaw can’t reach, such as inside the ears or the eyes.
Carving an eagle
The first steps are similar to that observed when carving an eagle: getting set up with the type of wood you need and observing safety precautions. With the woodblock suitably placed, outline the back of the eagle and cut out the unwanted piece.
The next part of the bird carving is the sides of the bird. These are drawn, and the wanted sides are blocked out. Once the back and the wings are carved, you move to the top part to carve the head and neck sections. The next parts of the eagle to carve are the shoulders and the chest.
Once the unwanted sections from the chest area are cut out, you can move to carve the wings; a piercing cut is suitable to cut the outlines of the wings on both sides. At this stage, the bird’s shape has taken, and unwanted parts can be removed so that the lower sections are suitable for the tail and legs.
At the section set out for the legs, cut out a triangle across the side section and another from the front section so that the leg parts are left.
With a combination of the various cutting methods described, such as sweeping cuts, texturing, and smoothing, the bird is carved following the model curved to achieve a more realistic-looking eagle. Smaller specialized tools can achieve the finishing.
Carving a bench/chair
To carve a bench as a beginner, you will need one long log and two short logs. Set the logs on the ground to mimic a bench with two legs across. With a horizontal cut, smoothen the upward-looking side of the bench to obtain a flat surface to sit on.
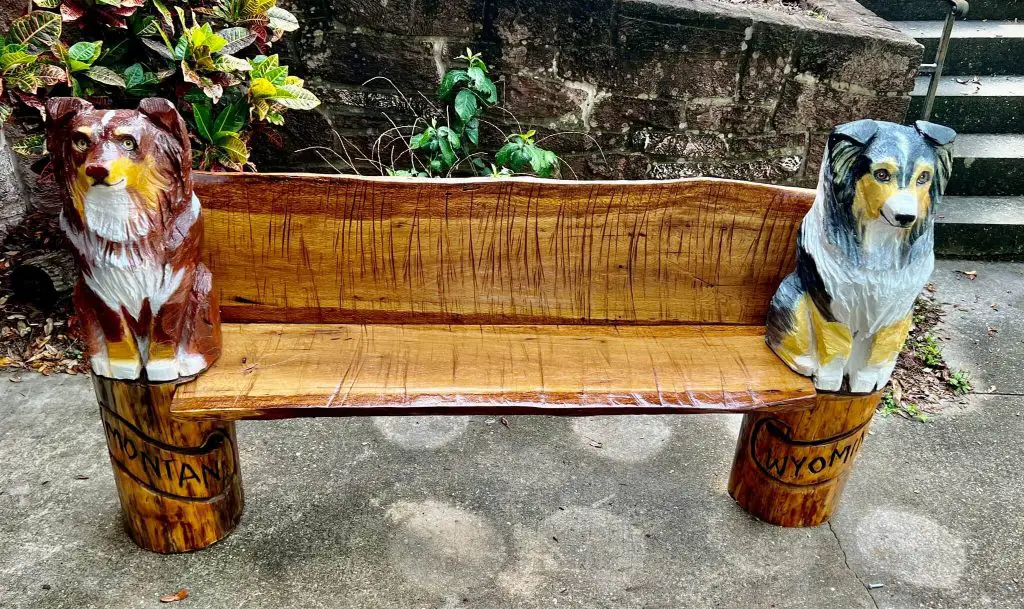
Turn over the long log and cut out V-shaped sections for the smaller logs to be laid in the cut section. Now place the small section on the ground and turn the long log over on top of the smaller ones. The Short logs are the bench’s legs.
Woodcarving with a chainsaw: a summary
Chainsaw carving is a fun way to complete your DIY projects and also create colossal wooden sculptures as art. However, this method requires serious safety considerations due to the inherent danger of handling a chainsaw. Learn about chainsaw kickback.
Once the precautionary steps are followed, it is always handy to have a model of the intended design to guide the carving process. Chainsaw carving can produce various wood products, such as benches or art pieces.
