Planning wood is one of the most important processes you can never skip especially if you are doing joinery work. It is a step of preparing rough wood by making it smooth and achieving a uniform thickness across the entire board. For faster and more efficient work, we use a planner. It has a rotating cutter head adjusted to change the machine's depth of cut, which you can set with dials or levers on either side of the bed. However, if your planner breaks or you don’t have one on hand there are still ways to plane your wood down to size without too much hassle. In this article, we have outlined simple ways you can plane wood without a planer.
Read Next
- How to Straighten Wood with Water
- Best Hand Plane for Beginners
- Guide to Woodworking Hammers
- Hand Saws for Woodworking
- How to Select and Store Lumber
- Seasoning Wood for Carving
How to Achieve Straight, Smooth Edges without a Planer
1. using hand woodworking planes
Using hand planes is one of the perfect traditional manual ways to get things done. Using a hand plane however will get you out of your comfort zone but with practice and patience, it is one of the best ways in making your wood smooth, flat and square. In fact, it is one of the best alternatives for planners.
We use different hand planes to get the work done. However, we have 2 planes that are mostly used in many woodworking projects;
Bench plane
Bench planes come in different sizes. The common ones can be as short as 9 inches and as long as 22 inches or even longer. The length of the plane is important because the longer it is, the better it can straighten out the edges of a board. This is because the long body of the plane can easily bridge any dips and rises on the board's surface.
The blade, or iron, of a bench plane, is usually angled at 45 degrees, with the bevel side facing down. This angle cuts through the wood more efficiently and leaves a smoother finish. To stiffen the blade and direct the shavings away from the opening or mouth, a cap iron is used.
Make sure you understand the different parts and features of a bench plane to assist you in achieving a high-quality woodworking project.
When using a bench plane — also called a foreplane or jackplane — start by running it across the grain in short strokes wherever you want to remove shavings from the surface. When using vertical grain, you may wish to alternate directions so that the edge doesn't dig into the wood and spoil your smooth finish. With horizontal grain (along boards, for example), you can use long strokes from side to side.
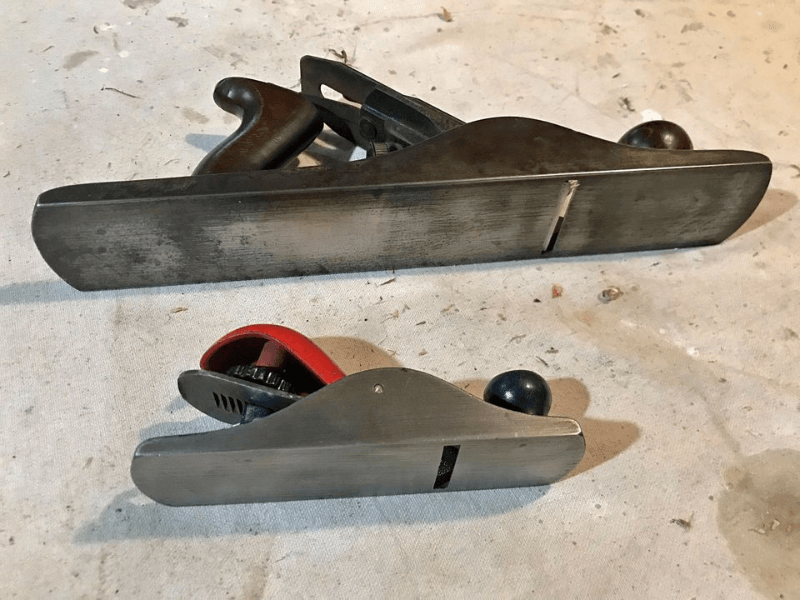
Block Planes
The block plane is the perfect tool for trimming small areas. However, it may not be the best choice for straightening boards due to its short length. The blade is always positioned with the bevel side up, and higher-end models often have an adjustable mouth for creating super-thin shavings. There are two types of block planes: standard, which has a blade pitched at 20 degrees, and low-angle, which has a 12-degree pitch.
When using a block plane, make your first cut with the edge of the plane against the grain. Then move the block plane around in small circles as you guide it using one hand on top and another on the bottom. Make sure that you plant both hands on the plane to avoid slipping or sliding while using this technique. This process might not produce a perfectly smooth surface, but using your other hand (or even an additional tool) to sand out any rough spots should yield good results.
Once you have achieved a desired level of smoothness — whether using a bench plane or block plane — use either one to finalize the job by running it along the grain in short strokes using a light touch.
The critical point to note: When using a block plane, always use the same side that you used to rough out the surface. With very fine sandpaper or steel wool, remove any minor scratches after using the other side tool to finish smoothing it out. Using this technique will give your woodworking project a clean and professional look.
Using hand planes can be intimidating at first, primarily if you've never used one before. It's essential to keep in mind that using hand planes is just like using any other power tool; they're simply a different kind of power tool — so get started today! You'll soon find yourself shaving away slivers of wood faster than ever before using this time-tested woodworking tool.
The critical point to note: When using your hand plane to smooth boards, always start using the longer side of it, using only short strokes at first, checking your progress frequently to make sure that you're not taking off more than you need as you go. This technique will ensure that you don't take off too much. But you'll need to work your way up using more and more pressure, using the shorter edge of the plane as you go once you get a feel for using the long edge; this will help you shave off slightly thicker pieces with each stroke.
2. Using a table saw
A freshly cut board will have rough, splintering edges. Using a table saw, and sandpaper will help get the edges smooth to create straight boards for furniture or other projects. This method is best suited for larger pieces of wood. To work effectively, start by balancing the blades well, and designing the jig that will hold the wood firmly in the desired position. Set the table saw to be at 90 degrees with the blade to avoid uneven and rough patches on the surface of the wood. Finally, make sure that you move your wood smoothly back and forth towards the blade, or fail to that there will be burn marks on your board.
3. Using a saw; sand any rough edges with a handsaw
If you don't own a table saw but still need to make something out of wood that has lots of flat surfaces on it (like shelves), use your handsaw as if it were a planer: instead of pushing away from yourself with the blade-like in standard cutting, move the handle towards yourself until it meets resistance--this way when you push down against your workpiece again, not only will you be cutting off thin slices but also smoothing those sharp edges left behind by your previous cuts.
4. Using a router
You will need two pieces of wood clamped together to achieve the desired effect from this technique. The first piece should be from ¼”- ½" thick, and the other should be about as wide as you want your finished edge.
The router will run against the side of the ¼" thick wood's side and create a deep groove to allow for your desired finished edge depth. It's important to remember that you can also use this technique on thicker pieces, but you may need more than one clamped together to weaken it too much while using the router. This method doesn't take off all of the material as sanding does. However, if you want a specific profile or look from your edges, this might be worth checking out!
How to use a router
Start by clamping a straight, squared edge of the board to your bench. Using a router with an edge guide and bearing-guided bit is best for this step, as you get more control over how much material you remove on each pass.
The key here is that you should be removed only about half the thickness of what remains in one go - so if it's ¾" thick stock, then remove ½." Make sure that when moving from side to side along the length of the board (known as 'ripping'), you don't move past where you started or overlap onto previously cut areas until you reduce by 50%. Once you've gotten the first side done, please remove it from your bench and repeat on the opposite side.
See: Best Routers for flattening large slabs
5. using sandpaper
This technique requires that you have some form of rough or medium-grit sandpaper. The coarser the grit, the quicker it will take off the material. Clamp your piece down onto a workbench and carefully smooth out any bumps or imperfections that are visible or felt when you run your hand through your piece of wood.
For a good and smoother surface, make sure that you exert some pressure while sanding. It's important not to go too fast because this can cause excessive heat build-up, which might lead to scorching your board's surface and ruining them (heat also makes glue start melting). Also, be aware that planning with sandpaper will produce a lot of dust, so you should equip yourself with a face mask.
6. use a drum Sandler
This option isn’t relatively easy (and requires some patience) -drum sanders are great for smoothing down any bumps or imperfections left behind by less-than. However, they need more work than other methods because you have to sand the edges by hand.
The drum sander features two round drums which spin around one another at high speeds while pushing outwards onto pieces of wood positioned between them. It would be best if you set your board so that all faces are perpendicular to the surface.
Side Note: This technique doesn't take off all of the material as sanding does. However, if you want a particular profile or look from your edges, then this might be something worth checking out! I've found it helpful when using these tools is keeping an extra set of hands around (someone who can hold your piece in place while you run the router or drum sander back and forth over the edge will make it much easier on both of you).
An important thing to remember is that if your piece has many angles, this technique might not be worth going through all the trouble.
Another downside of using these tools instead of a planer is that they don't do as well at smoothing out uneven surfaces. There are some extra steps involved with making sure every surface is flat before sanding them down because there's no flattening mechanism as there would be with a planer. The upside, though? These pieces can come out looking unique and different (in comparison) to any woodwork you've seen before.
Safety Precautions:
-Watch your fingers: Always wear gloves when handling rough or thinned boards because they can splinter easily.
-Make sure the wood is dry: If it's humid, wait for a sunny day to do any planning. The wait will allow moisture from inside the wood to evaporate and prevent the cracking of your pieces.
A final thought on planning wood without a planer
The best thing to do is probably experiment with these methods and see which one you like the most. If you want smooth edges, there are options for that, but it will take a lot more work (and time) than using a planner.