A wood-turning tool must have the proper shape to work effectively. It also needs to be sharp enough. Unfortunately, some of the tools available in the markets today are not properly shaped or sharpened. Thus, they don't work as effectively as they are supposed to.
Woodturning should be easy if you have the right tools at hand. This article will discuss the shapes you should look for in wood-turning tools. It will also highlight how you can sharpen various tools. This knowledge will help you select tools that effectively get your job done.
But before that, let's first understand how different turning tools are made.
How Are Wood-Turning Tools Made?
Woodturning tools are made up of either of the following materials.
· High-Carbon Steel
Most traditional turning tools were made of high-carbon steel. They contained iron carbon as the alloying element. These tools get damaged when heated higher than 430 ° F.
· High-Speed Steel (HSS)
High-Speed Steel is a combination of tungsten, cobalt, molybdenum, and carbon alloyed together. Tools made of HSS hold an edge longer and require less frequent sharpening.
Unlike high-carbon steel, High-Speed Steel maintains its hardness even at high temperatures. As such, HSS tools are more immune to damage from overheating. These tools are more expensive compared to those made of high-carbon steel.
· Powdered Metal Technology Steel (PMTS)
Powered Metal Technology Steel contains up to 15% vanadium. Tools made from PMTS are highly resistant to wearing and hold an edge better.
They are, however, much more difficult to machine. Here's why: alloying elements are mixed in molten form in steel-making. They are then poured into a mould to form an ingot. If vanadium carbide levels exceed 4%, hard stringers form on the surface of the ingot. The stringers make it difficult to machine or grind a PMTS tool.
Like high-carbon tools, some PMTS tools can't handle high temperatures. Therefore, before grinding PMTS tools, check the manufacturer's instructions on grinding temperatures.
Alternatively, you can conduct a spark test before grinding the tool. If you get a white starburst, the tool is not High-Steel Speed and shouldn’t be overheated. If you get an orange ball that resembles a meteor, the tool is HSS and can handle high temperatures.
Before we go any further, it's important to remember that the right wood is necessary for these tools to function properly. Check out this article on the Best Woods for Turning if you're unsure which wood is best for a particular tool.
Read Next
- Beginners Guide to Woodturning Projects
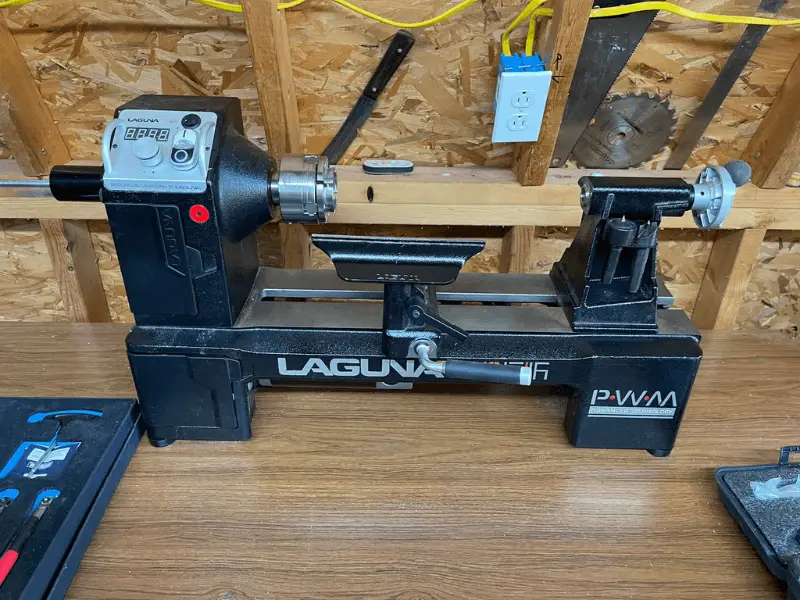
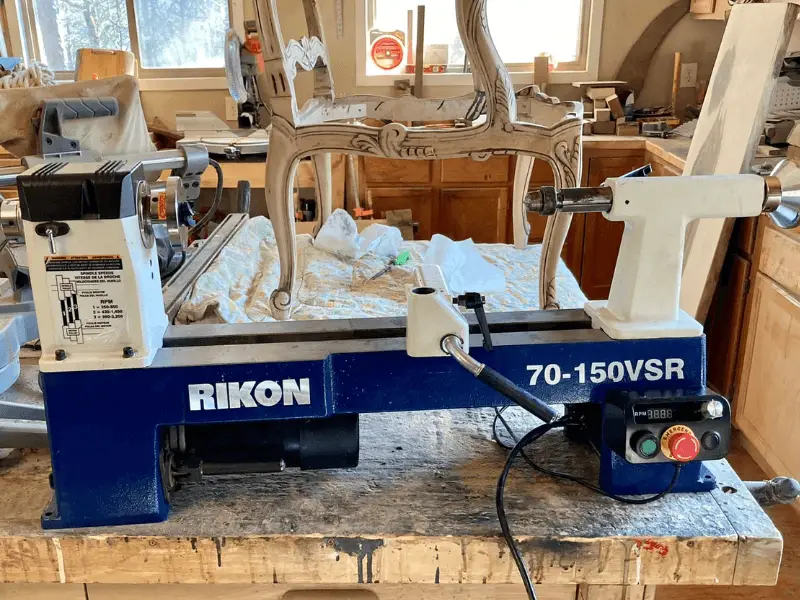
- Choosing the Best Wood Lathe for Your Workshop
- Top Woodturning Tools Every Carver Should Have
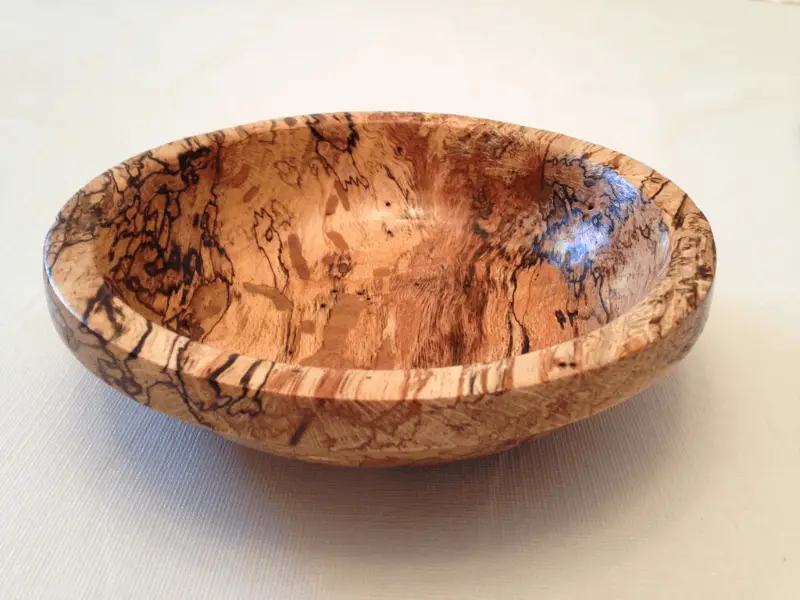
- Best Woods for Turning Bowls and Small Projects
- How to Turn Large Bowls on a Lathe
- Selecting Carving Gouges for Precision Work
Types of Wood-Turning Tools
1. Gouges
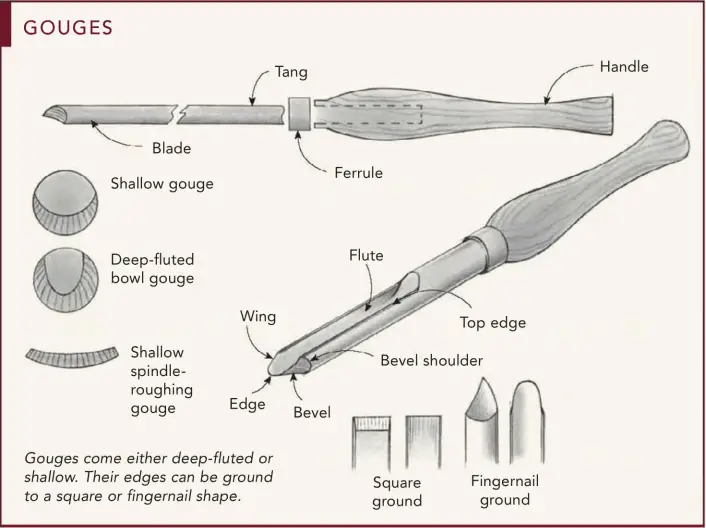
Gouges are the most basic wood-turning tools. They can be used for either spindle or faceplate work.
Gouges in the past were made by forging. It entailed heating steel in a forge and hammering it to the correct shape. Forging was either done by a local blacksmith or wood turners themselves. They'd carry out this process using an anvil and a hammer.
Following the industrial revolution, the forging process nowadays is done in drop forges. Instead of using an anvil and a hammer, manufacturers use a set of shaped dies. Below are some examples of gouges available in the markets today.
· Spindle Gouges
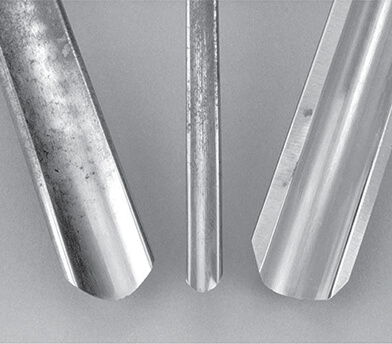
Traditional spindle gouges were made of a heavy section, with the bottom nearly semicircular. Over time, manufacturers started using shorter and thinner blanks of steel. They also made the handles shorter.
Today, spindle gouges have a flat cross-section. The downside to this shape is that spindle gouges cannot roll beads or cut deep coves well.
A gouge with a round cross-section tends to work better than one with a flat section. This is because the rounded section allows the contact area with the tool to rest under the centre of the force where cutting occurs. This makes the tool more stable and easier to use. Additionally, with a rounded section, you can easily achieve a better-shaped fingernail that conforms to the shapes of beads and coves.
You can sharpen a spindle gouge by following these simple steps;
- Place your spindle on a simple bar-type rest.
- Touch its nose and start swinging it either to the right or left.
- As you swing it, ensure that you are tipping the gouge upward and rotating the handle simultaneously. If you're swinging your spindle gouge to the right, you'll need to rotate its handle in a clockwise direction. If swinging it to the left, rotate the handle in an anti-clockwise direction.
- Repeat this process for the other half of the tool.
When grinding a spindle gouge, the Oneway Sorby and Tormek jigs are better options than ordinary pocket jigs. They enable you to fix your spindle gouge in an adjustable gooseneck resulting in a perfect fingernail grind.
· Roughing Out Gouges
A roughing-out gouge removes large amounts of materials faster than round billets. It’s also used to cut cylinders and tapers.
Traditionally, turners left a bit of a fingernail on roughing-out gouges. The tools resembled large forged gouges and were used to cut large coves. Today, however, most turners prefer to grind roughing-out gouges square. The modern roughing-out gouges are mostly made of High-Speed Steel.
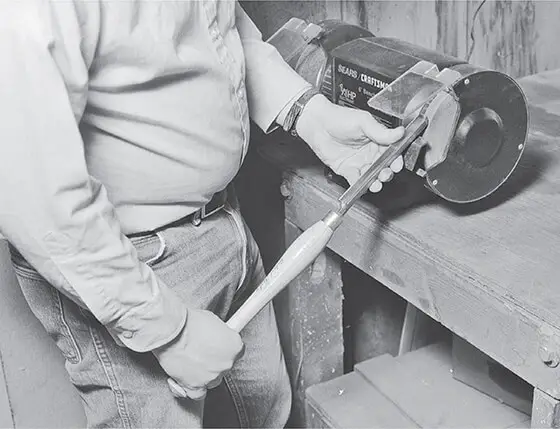
You can use a platform rest when sharpening a roughing-out gouge. It allows you to achieve better consistency from gouge to gouge.
You don't need a pocket jig when grinding a roughing-out gouge. You can place your feet before a grinder and place the gouge's handle on your thigh. Your leg will act as a pocket jig.
· Bowl Gouges
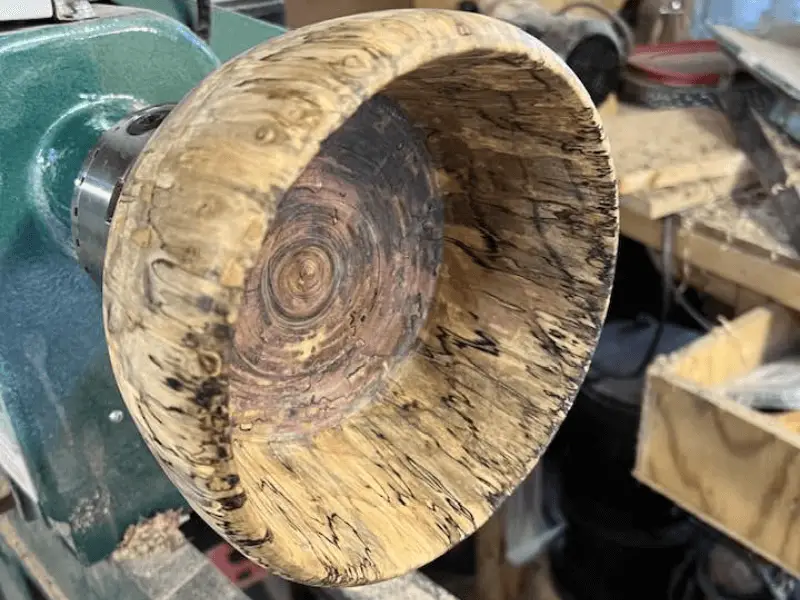
In faceplate turning, the grain of the wood runs across the lathe's axis. A bowl gauge is the most effective tool for this turning.
A bowl gouge has a short bevel and can be cut at right angles to the axes of rotation. This cutting position allows the bottom half of the flute to do all the cutting while the nose bevel rides on the cylinder produced by the cut. This produces a nice cut and prevents the gouge from following a reverse grain.
Traditional bowl gouges had deep U-shaped bevels. Today, they are machined from High-Speed Steel and have parabolic-shaped flutes.
Bowl gouges are ground to around 45°. However, most turners think the tool works better when modifying the factory grind. The modification is done by racking the face of the gouge back at least 15° but retaining the 45° bevel.
· Combination Gouges
These are long High-Speed Steel gouges with medium flutes. They are ground to a medium bevel angle, allowing them to do faceplate work effectively.
A combination gouge is better suited for faceplate work and not spindle work. It is an excellent tool for making final light cuts in faceplate work. However, its bevel is too short and cannot produce high-quality spindle work.
2. Chisels
A standard chisel is 1-2 inches wide and about 20 inches long. A woodworker's chisel has only one bevel, while that of a turner has a double bevel. Here are some of the most common chisel types.
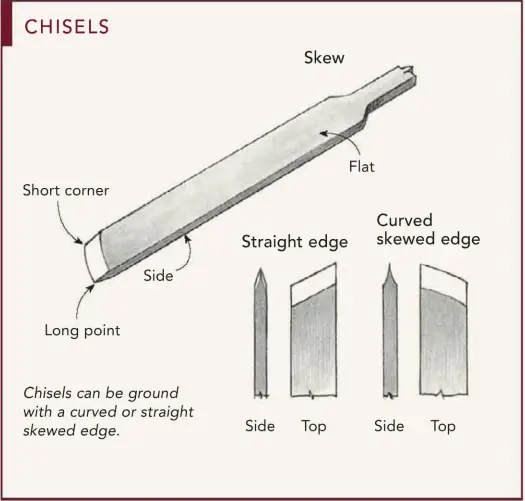
· Skew Chisels
A skew chisel is also known as a long-corner chisel. A skew chisel's handle can be brought at nearly right angles to work. As such, you can stand directly behind the tool's shank when using it. Unlike a traditional chisel, a skew chisel doesn't require to be tipped at a high angle from where its edge contacts the rest. These two features make the skew chisel easier to use than the traditional chisel.
If you're new to woodturning, consider using a 1-1 ½ inches wide skew. The ½ to ¾ inches skews are too narrow and are sometimes difficult to control.
Skew chisels today are one of the tools that are delivered with the correct bevel angle and grind. However, they have their fair share of faults. The rectangular section of a skew chisel is achieved through Blanchard grinding. The grinding process sometimes leaves the corners of the rectangle sharp. This makes the tool unpleasant to use, as the sharp corner don't slide along the tool rest.
You don't need to grind a skew to start, but it's necessary to regrind it if it has a hollow grind. Although grinder manufacturers don't recommend this, you can grind a skew chisel on the side of a wheel to obtain a flat bevel. However, for safety reasons, you must use moderate pressure against a wheel that is ½ inch or wider. The cutting edge of a skew chisel also needs to be honed; a roller jig comes in handy for this job.
· Oval Skews
Oval skews are easier to use compared to rectangular ones. With a rectangular skew, the centre of gravity is not under the downward movements of force as only one edge of the chisel comes into contact with the rest. On the contrary, an oval skew creates a centre of gravity nearly under the center of force (the center of gravity created is usually free to change as the tool is used).
Oval skews today are delivered with a long bevel of about 26°. It might be difficult for a beginner to use it effectively. Fortunately, the tool can be fixed by shortening the bevel to about 42°.
· Cutoff Tools
The cutoff tools are also known as parting tools. They are two types of cutoff tools; diamond-shaped and rectangular-shaped cutoff tools. Among the two, the diamond-shaped ones are the most effective. They present less area to rub, thus creating less friction in a deep cutoff.
A diamond-shaped tool also cuts a narrower kerf in faceplate cutoffs. The only advantage of a rectangular-shaped cutoff tool is that it sells at lower costs.
A cutoff tool can be hollow grounded to a long double bevel of 42° or less. You can also increase the workability of this tool by honing it on a fine stone.
If you're using cutoff tools for the first time, here's how you go about it
- Place the cutoff tool vertically on the tool rest.
- Present it at a high angle so that the edge does the cutting while the bevel does the rubbing.
- Rock the tool down until the cutting edges are at the centre of the work.
In deep cutoffs, ensure to take overlapping cuts to keep the kerf wider than the tool. For faceplate cutoffs, place the tool slightly above the centerline and push it forward to the centre.
· Cone Separation Tools
A cone separation tool is a bigger version of the cutoff tool. It is used to cut away the interior of bowls. A cone separation is used similarly as the cutoff tool. However, you must ensure to make overlapping cuts to keep the kerf wider than the tool's shank.
· The Bedan and Beading and Parting Tool
These, too, belong to the chisel family. A Bedan resembles a ⅜-inch-wide bench chisel and is used for sizing tenons. Besides hollow-grinding, this tool must be honed to a razor-sharp edge.
The beading-and-parting tool resembles a ¼-inch wide traditional chisel. Like the Bedan, this tool is used for sizing tenons. A beading-and-parting tool with a flat bevel can also be used for rolling beads.
3. Scrapers
A gouge is the most popular way to cut wood as it leaves the best finish. However, using a gouge requires you to have a considerable amount of skill. A gouge also doesn't reach blind areas effectively.
If you have trouble using a gouge, you can switch to using a scraper. It cuts wood handily in all situations are require little skill.
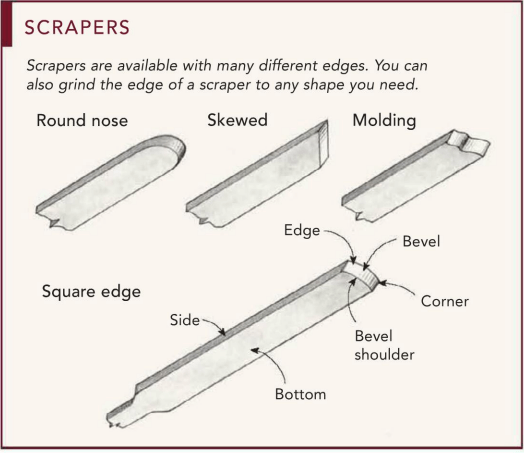
A scraper functions differently from other wood-turning tools. When using other tools to shear-cut, you must keep the tool's bevel rubbing on the work surface. With a scraper, you must point the tool downhill and drag its burred edge for it to cut properly.
There are two methods of sharpening scrapers. The first and easiest method is grinding. Here's how you go about it;
- Set the grinding rest so the bevel will be ground to about 75°.
- Place the scraper flat on the rest and push it into the wheel.
- Swing it until you achieve the desired shape. Ensure to keep firm pressure on the tool here.
The second and most effective method of sharpening a scraper is burnishing. This method creates a better burr than the one created by grinding. A burnish is an oval bar of hard polished steel. Here are a few steps to help you burnish a scraper correctly;
- Start by grinding or filing away the work-hardened area.
- Use an oil stone to finish the bevel and the top surface of the scraper.
- Rub the burnish along the bevel edge with a considerable amount of force. You can wax or oil the burnish to reduce friction.
While burnishing works well, it's not worth the trouble on small scrapers. But burnishing is advantageous for large scrapers, like those used for heavy faceplate work. A burnished burr takes heavier shavings and can hold its edge longer than a grounded one.
4. Hook and Ring Tools
Hook tools are designed for low speeds and can be dangerous when used at high turning speeds. They can only handle slightly higher speeds when working in hollow spindle work. Hook tools are used for turning the insides of eggcups, goblets, and scoops.
Ring tools are similar to hook tools but more suited for modern manufacturing methods. These tools shouldn’t be too small since a small ring prevents the chips from clearing through the ring well. This results in chip backup that causes the tool to stop functioning.
When grinding hook and ring tools, focus on the inside surface only. You can mount a small grinding wheel on a Dremel tool when these tools are.
5. Chatter Tools
A chatter toll is a small, round-nose, or V-shaped scarper. It is made up of thin stock that vibrates when the tool is brought to play. The vibration creates decorative patterns that are cut into end grain.
A chatter tool is used for decorating box lids and adding fun embellishments on knobs. The tool only works well on the end grain of fairly substantial wood.
The frequency at which a chatter tool vibrates is determined by how far the tool is extended out of the handle and the lathe's speed. For instance, shorter extensions and greater lathe speed result in high-frequency vibrations.
6. Chasers
If you want to cut screw threads classically, consider investing in a set of chasers. Chasers are sold in pairs, one for internal threads and the other for external threads.
In the past, chasers were available in numerous thread pitches. Today's most common pitch available in the markets is 16, 18, and 20.
To achieve great results with a chaser, you must set the lathe to a low speed of about 5rpm to 10rpm. You must also tip the scraper up so that the edge of its teeth engages the wood.
Finally, these tools work well when you have the right wood lathe. Therefore, consider checking this article on the best wood lathes.
Conclusion
If you’re just getting started on wood-turning, here are the important tools you need;
- Gouges include the spindle, roughing-out, bowl, and combination gouges.
- Chisels include skew, oval chisels, and the Bedan and beading-and-parting tools.
- Scrapers
- Hook and ring tools
- Chatter tools
- Chasers
For the above tools to work well, they must be of the correct shape and size. They must also be sharpened well.