Wood splits can be infuriating and demotivating for any woodworker. They can turn a promising project into a source of frustration and disappointment. However, by incorporating some practical tricks and techniques into your woodworking practices, you can minimize the occurrence of wood splits and ensure a smoother and more enjoyable woodworking experience. Here, we present a comprehensive guide, born out of personal experiences and lessons learned, to help you circumnavigate this vexing issue and preserve the integrity of your woodworking projects.
Before we delve into the solutions, let’s first understand the common causes of wood splits. By gaining a deeper understanding of these factors, we can quickly identify the issue and implement effective preventive measures. Here are the primary causes of wood splits:
What Causes Wood to Split?
Moisture Content Changes:
Wood is a hygroscopic material, meaning it absorbs and releases moisture to reach equilibrium with its environment. Rapid or uneven changes in moisture content can lead to internal stresses within the wood, resulting in splits. When wood absorbs moisture, it swells, and when it loses moisture, it contracts. These changes in size and volume can cause the wood fibers to separate and ultimately result in splits.
Improper Drying and Seasoning:
If wood is not properly dried and seasoned before use, it retains excess moisture. When this moist wood is subjected to drying conditions, such as exposure to heat or low humidity, the outer layers dry faster than the interior, creating stress and increasing the likelihood of splits.
Environmental Factors:
Wood is highly responsive to environmental conditions. Exposure to excessive heat, direct sunlight, or low humidity can cause the wood to dry out too quickly, leading to shrinkage and the formation of splits. On the other hand, high humidity can cause the wood to absorb excessive moisture, resulting in swelling and potential splits.
Internal Wood Stresses:
Certain wood species naturally contain internal stresses, such as tension or compression wood. These inherent stresses can cause the wood to warp, twist, or develop splits, particularly when subjected to changes in moisture content or temperature.
Poor Wood Selection:
Not all wood species are created equal when it comes to their resistance to splitting. Some species, like oak or mahogany, have more stability and are less prone to splitting characteristics. Choosing the wrong type of wood for a particular application or using wood with inherent weaknesses, such as knots or defects, increases the chances of splits.
Improper Joinery Techniques:
Inadequate joinery techniques can create stress concentration points in the wood, leading to splits. For example, driving nails or screws too close to the edge of the wood without pre-drilling pilot holes can cause the wood to split under pressure.
Mechanical Stress and Impact:
Excessive mechanical stress, such as heavy loads or impacts on the wood, can contribute to splits. Dropping or mishandling wood, subjecting it to excessive pressure, or placing heavy objects on unsupported areas can lead to stress-induced splits.
Simply put if wood is constantly moving its bond to develop splits thats the case most of the time. Unlike in the case of mechanical stress all other incidences of wood splits can be associated with moisture change. It therefore no surprise that if we were to control this moisture movement that distubilize the wood then we would have no split problems.
How to Prevent Seasoned Wood from Splitting:
Controlling Moisture Movement to Prevent Wood Splits:
Ensure that the wood is properly seasoned and has reached an appropriate moisture content for its intended use. Seasoned wood has a lower moisture content, making it less prone to splitting. Use a moisture meter to measure and confirm that the wood has reached the desired moisture level.
Acclimation:
Allow the seasoned wood to acclimate to the environment where it will be used. This step helps the wood adjust to the surrounding humidity and moisture levels, minimizing moisture content changes that can lead to splits. Give the wood sufficient time to acclimate before starting your woodworking project.
Protective Coatings and Finishes:
Apply protective coatings or finishes to the wood surfaces. These coatings act as a barrier, reducing moisture exchange between the wood and its environment. Sealants, such as polyurethane, shellac, or varnish, penetrate the wood fibers and provide protection against moisture absorption. Finishes like paint or stain also create a layer of defense against moisture-related issues.
Humidity Control:
Maintain consistent humidity levels in the environment where the seasoned wood will be placed. Fluctuations in humidity can cause the wood to expand and contract, increasing the risk of splits. Use humidifiers or dehumidifiers to regulate the humidity and create a stable environment for the wood.
Regular Monitoring and Maintenance:
Continuously monitor the moisture content of the seasoned wood, especially in environments with significant humidity fluctuations. Use a moisture meter to assess and ensure the wood remains within the recommended moisture range. If needed, reseal or refinish the wood periodically to maintain its protective barrier against moisture.
By implementing these strategies and maintaining proper moisture control, you can effectively control moisture movement within the seasoned wood and minimize the occurrence of splits. Remember, prevention is key, and by being proactive in managing moisture, you can ensure the longevity and beauty of your woodworking projects while avoiding the frustrations of wood splits.
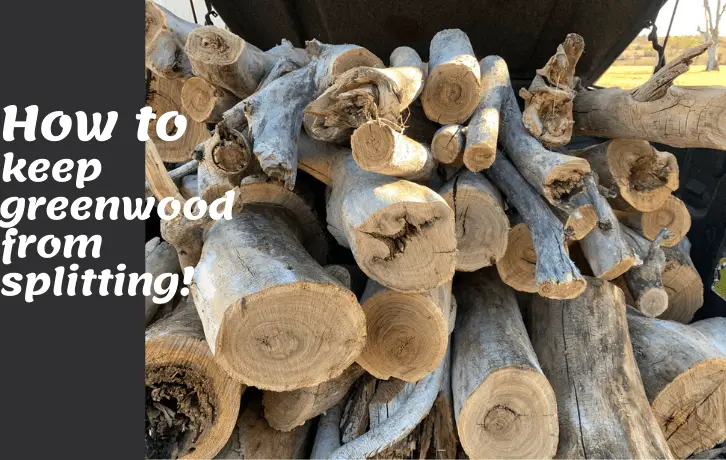
How to Prevent Green Wood from Splitting:
Proper Drying and Seasoning:
Ensure that the greenwood is properly dried and seasoned before use. This process involves removing excess moisture from the wood to achieve a balanced moisture content suitable for the intended application. Depending on the wood species and thickness, drying methods may include air-drying or kiln-drying. Proper drying and seasoning help stabilize the wood and minimize moisture-related stresses that can lead to splits.
Sealing the Ends:
Seal the ends of freshly cut green wood to slow down moisture loss. Apply a wax or commercial end-sealing product to the cut ends to prevent moisture imbalance between the ends and the rest of the wood. This helps maintain a more uniform moisture content throughout the wood, reducing the likelihood of splits.
Proper Storage and Handling:
Store green wood in a dry, well-ventilated area to maintain its moisture content. Avoid exposing the wood to direct sunlight, extreme temperature changes, or excessive moisture. Handle the wood with care to prevent unnecessary stress and damage that could lead to splits.
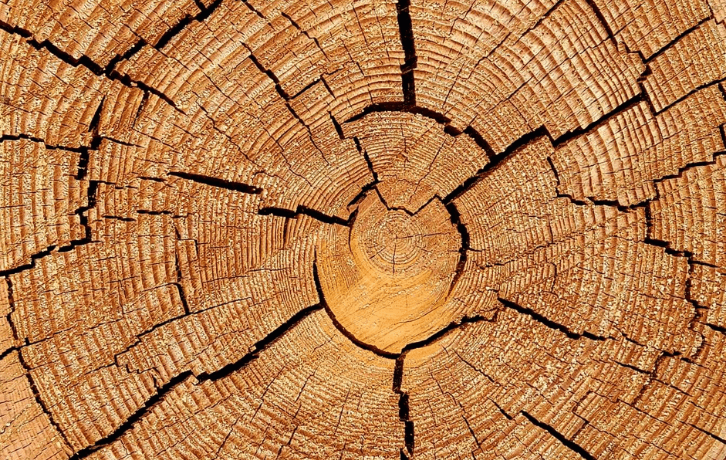
Splitting Logs:
To minimize the risk of splitting in greenwood, consider halving the logs. This technique helps release tension within the wood and reduces the likelihood of splits as it dries. Choose a method such as a chainsaw halving or traditional splitting with wedges and a sledgehammer. Properly store the halved logs in a dry, well-ventilated area, allowing for even drying and reducing the chances of splitting.
Will linseed oil stop wood from cracking?
Linseed oil is often used as a wood finish and can provide some level of protection against cracking or splitting. However, it is important to note that while linseed oil can help slow down the drying process and add moisture to the wood, it may not completely prevent cracking on its own.
Here are a few points to consider regarding the use of linseed oil to reduce the risk of wood cracking:
- Moisture Content: Linseed oil can help maintain the moisture content in the wood, which can contribute to reducing the likelihood of cracks. By slowing down the drying process, the wood has more time to adjust to environmental conditions and minimize stress-induced splits.
- Penetrating and Sealing: Linseed oil penetrates into the wood fibers, enhancing their strength and elasticity. It forms a protective layer on the surface, reducing the impact of moisture changes and offering some level of protection against cracking.
- Regular Maintenance: Linseed oil finishes require regular maintenance to maintain their effectiveness. Over time, the finish may wear off, leaving the wood more susceptible to moisture changes. It is essential to reapply the linseed oil periodically to ensure ongoing protection.
- Additional Factors: While linseed oil can provide some level of protection, it is crucial to consider other factors that contribute to wood cracking, such as wood species, grain orientation, and environmental conditions. Proper wood selection, grain orientation, and moisture control are also important aspects to consider in preventing cracking.
To maximize the effectiveness of linseed oil in preventing wood cracking, it is recommended to combine its use with other preventive measures, such as proper wood selection, controlling moisture content, and maintaining a stable environment for the wood. Additionally, using appropriate joinery techniques and taking care when handling and storing wood can further reduce the risk of cracks.
Remember that wood is a natural material, and some degree of cracking or splitting may still occur over time, even with preventive measures in place. However, by implementing a comprehensive approach and utilizing linseed oil as part of your wood finishing routine, you can help minimize the occurrence of cracks and maintain the overall quality of your wood projects.
Read Next: Wood cuts an overview