Wood carving is one of those skills that looks intimidating from the outside and feels completely natural the moment you make your first cut. All you need to start is a block of wood, one good knife, and a rough idea of what you want to make. The rest comes with practice.
This guide walks you through everything a beginner needs to know — the main carving styles, the tools that actually matter, how to choose your wood, and a clear step-by-step process for completing your first carving. By the end, you will know exactly where to start and what to carve first.
What Is Wood Carving?
Wood carving is the art of cutting away material from a block, branch, or plank of wood to reveal a shape, pattern, or figure. Unlike other woodworking disciplines, carving requires very few tools to get started — in many cases just a single knife — which makes it one of the most accessible crafts you can pick up.
The craft spans an enormous range of styles, from small pocket figures whittled on a park bench to large-scale relief panels carved with chisels. As a beginner, you are not committing to one path. Start simple, and the style that suits you best will become obvious quickly.
The 4 Main Types of Wood Carving
Before you start, it helps to understand the four main carving styles. Each one uses different tools, produces different results, and suits different skill levels. You do not need to master all four — most carvers spend years focused on just one or two.
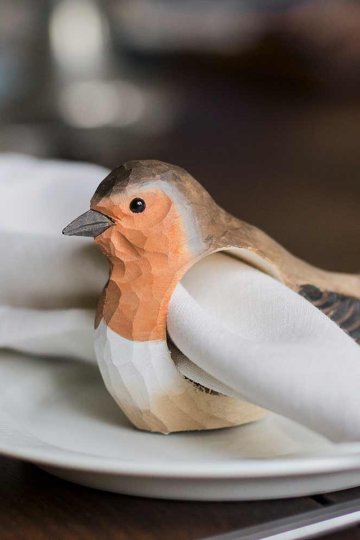
Whittling — Best for Beginners
Whittling is the simplest form of carving. You work with a single knife, removing thin slices of wood to gradually shape a three-dimensional object. Most beginner projects — animals, figures, spoons, small toys — fall under whittling.
Why it is the best starting point: The tools are inexpensive, the technique is learnable in an afternoon, and projects can be finished in a single sitting. Basswood blocks are widely available and carve cleanly with a sharp knife.
Best first project: A simple mushroom, bear, or gnome. All three have forgiving shapes that do not require precise anatomy.
Chip Carving — Geometric Patterns on Flat Surfaces
Chip carving involves removing small, precise 'chips' of wood from a flat surface using pointed chip-carving knives or a small chisel. The result is a geometric or decorative pattern carved into the face of a board — common on box lids, frames, and decorative panels.
Skill level: Beginner to intermediate. The cuts themselves are small and controlled, but consistency and accuracy matter more than in whittling.
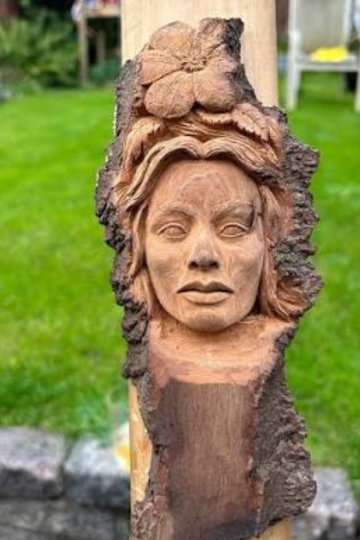
Relief Carving — 3D Depth on a Flat Background
Relief carving creates three-dimensional images that project from a flat wooden background. The carver removes material from the background, leaving the subject raised. Think of decorative wall panels, portrait plaques, or nature scenes carved into a board.
Skill level: Intermediate. Requires chisels, gouges, and a mallet in addition to knives. More planning required before the first cut.
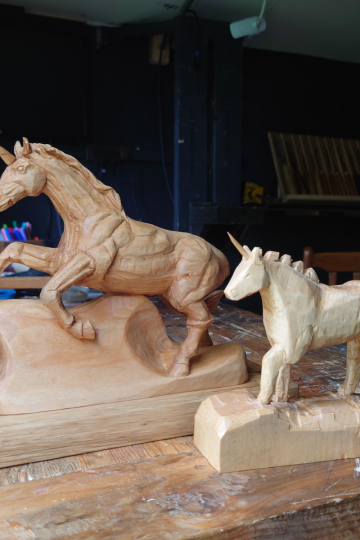
Carving in the Round — Full Sculptures
Carving in the round means sculpting an object that can be viewed and appreciated from all sides — a fully three-dimensional figure rather than a flat or relief piece. This is what most people picture when they imagine wood carving: a bear, a human figure, an animal.
Skill level: Beginner to advanced depending on the subject. Simple rounded shapes like animals are accessible for beginners. Realistic human figures require considerably more experience.
What You Need to Get Started
You do not need a workshop full of tools. Most beginners start with three things and add more as they go.
The Right Wood
Start with basswood. It is the most beginner-friendly carving wood available. Basswood is soft, close-grained, and cuts cleanly in all directions without splintering. It also holds fine detail well, which means your work will look intentional even at the early stages.
Pine is harder and more prone to splitting along the grain, which makes it frustrating for beginners despite being cheap and widely available. Once you have some knife control, pine and other woods are worth exploring. For your first few carvings, stick to basswood.
Your First Knife
Buy a dedicated carving knife — not a kitchen knife, not a craft blade. A proper carving knife is designed to hold a sharp edge, give you control over thin slices, and fit comfortably in a cutting grip for extended sessions.
You do not need an expensive set. One good knife is better than six mediocre ones. Look for a knife with a short blade (around 1.5 to 2 inches), a comfortable handle, and good steel that takes and holds a sharp edge.
- → See our pick: Best Woodcarving Knife for Beginners
- → Also useful: Best Whittling Kits for Beginners
Safety Gear
A carving glove is not optional for beginners. The most common carving injury is a slip of the knife across the non-dominant hand. A cut-resistant carving glove costs very little and eliminates most of the risk. Wear it on the hand that holds the wood, not the knife hand.
A Strop for Sharpening
A sharp knife is a safe knife. Dull blades require more force, which leads to slipping and injury. A leather strop (with stropping compound) is the easiest sharpening tool for beginners — a few passes before each session keeps the edge keen without the learning curve of whetstones.
Wood Carving for Beginners: 8 Steps to Your First Carving
These steps follow the process for a simple whittled figure — the most accessible entry point for new carvers. The same principles apply to any beginner carving project.
Step 1 — Choose Your Wood
Start with a small basswood block, roughly 2 × 2 × 4 inches. Basswood is soft enough to cut with light pressure, holds edges cleanly, and will not split or splinter under normal knife work. You can buy pre-cut blanks online or from carving suppliers.

Avoid pine for your first carving. Despite being cheap and easy to find, pine is harder than basswood and has a pronounced grain that can catch and redirect your blade in unexpected directions.
Step 2 — Pick One Simple Project
Choose something with a forgiving shape — a rounded form that does not require precise proportions. A mushroom, a simple bear, a small gnome, or a basic human figure are all excellent choices. Avoid faces, hands, and anything with symmetrical features until you have some knife control.
Need inspiration? Start here → 30 Weekend Whittling Projects
Step 3 — Draw Your Design on the Wood
Use a pencil to sketch the rough outline of your subject on the wood. You do not need an artist's drawing — just a simple silhouette showing the major shapes: head, body, base. This pencil line acts as a reference as you carve, preventing you from accidentally removing too much material from an important area.
For flat-sided carvings, draw the front view on the front face and the side view on the side face.
Step 4 — Make Your Stop Cuts First
A stop cut is a straight cut made perpendicular to the wood surface along a boundary line. It acts as a wall that prevents the wood from splitting past the intended edge when you make the following removal cut. Stop cuts are fundamental — skipping them leads to tearout and lost detail.
Technique tip: Make the stop cut first along any boundary you want to protect, then angle your removal cuts towards it from below. The wood will pop out cleanly.
Step 5 — Remove Material in Passes, Not Chunks
Work gradually. Take thin slices of wood — roughly the thickness of a fingernail — rather than trying to remove large sections in one cut. This gives you control, preserves your options if you make a mistake, and keeps the knife from jumping or skipping.
Always cut away from your body and in the direction of the grain wherever possible. Carving against the grain tears the wood fibres and leaves a rough surface that is harder to clean up.
Step 6 — Refine the Shape with Detail Cuts
Once the major form is established, switch to smaller, more controlled cuts to define details — the curve of a nose, the base of a hat, the texture of fur. At this stage, less pressure and more precision matter more than speed.
Rotate the carving frequently to check all angles. A shape that looks correct from the front often reveals problems from the side. Keep refining until the form reads clearly from every direction.
Common mistake: Rushing detail cuts before the major form is correct. Get the overall shape right first, then add detail.
Step 7 — Sand Smooth
Start with 120-grit sandpaper to remove any visible tool marks or rough patches, then move to 180-grit and finish with 220-grit for a smooth surface. Sand with the grain of the wood to avoid cross-grain scratches that show up under finish.
Not every carving needs sanding — many whittlers deliberately leave knife marks visible as part of the aesthetic, particularly on figures and animals. If you want a polished, smooth result, sanding is the step that gets you there.
Step 8 — Apply a Finish
A finish protects the wood, brings out its natural colour, and gives the carving a completed look. Three common options for beginners:
- Linseed oil or Danish oil — soaks into the wood, enhances the grain, gives a natural matte finish. Easy to apply.
- Beeswax or carnauba wax — applied by hand, gives a soft sheen with good protection. Ideal for small carvings.
- Acrylic paint — if you want colour, seal first with a thin coat of gesso, then paint with acrylics. Seal again once dry.
- → Full guide: Best Finishes for Wood Carving
- → Related: Should You Stain or Seal Your Wood?
The Best First Projects for Beginners
The best first carving is one that teaches you something and keeps you engaged enough to finish it. Here are four reliable starting points, ordered from easiest to slightly more challenging:
1. A Simple Mushroom
A mushroom is the most forgiving first carving there is. The cap is a rounded dome, the stem is a cylinder, and there are no fiddly details like faces or hands to get right. Most beginners finish a mushroom in a single afternoon session. A set of mini mushrooms makes a great shelf display.
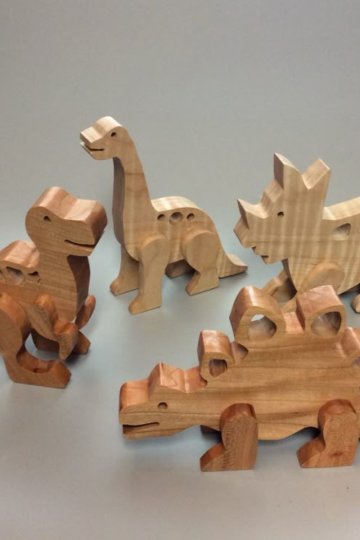
2. A Small Animal Figure
Bears, otters, foxes, and cats all have rounded, compact bodies that translate well to small basswood blocks. Avoid ears and tails at first — carve a simple, chunky version of the animal and add details once the body reads correctly.
3. A Gnome
A gnome is essentially a hat, a nose, and a beard — three simple geometric forms that beginners can execute well. The tall hat means most of the figure is a cone, which is easy to carve. Gnomes also look charming when left rough and rustic rather than polished.
4. A Wooden Spoon
If you want to carve something functional, a simple spoon or spatula is an excellent first project. The long handle gives you plenty of material to practice straight cuts, and the bowl gives you practice with curved cuts and hollowing. Use green wood (freshly cut) if possible — it is softer and easier to shape.
Wood Carving Safety: 5 Rules Every Beginner Needs to Know
Wood carving is genuinely safe when you build good habits from the start. Most injuries happen to beginners who skip basic precautions.
- Always cut away from your body. Every cut should move the blade away from your finger
- s and body, not toward them.
- Keep your tools sharp. A sharp knife cuts cleanly with light pressure. A dull knife requires force, which causes slipping.
- Wear a carving glove on your holding hand. The hand holding the wood is the one most at risk from a slip. A cut-resistant glove is inexpensive and eliminates most of the danger.
- Secure your workpiece. Use a carving vice, clamp, or non-slip mat to hold your work steady rather than gripping it tightly in your palm while cutting toward yourself.
- Strop your knife before every session. Stropping realigns the edge and removes micro-burrs. It takes two minutes and makes every cut safer and cleaner.
Frequently Asked Questions
Is wood carving hard to learn?
No — the basics of whittling can be learned in an afternoon. Holding a knife correctly, making controlled slices, and reading the grain of the wood are all intuitive once you start. Like any craft, getting consistently good results takes time, but beginners regularly produce satisfying work on their very first project.
What wood should a beginner start with?
Basswood, every time. It is soft, consistent, and widely available in pre-cut carving blanks. Butternut and white pine are reasonable alternatives once you have some experience, but for a first project basswood gives you the best chance of a satisfying result.
Do I need an expensive knife to get started?
No, but you do need a proper carving knife — not a kitchen knife or craft blade. A dedicated carving knife with a short, fixed blade and a comfortable handle can be bought for under $30 and will outperform an expensive knife that is not designed for carving. One good knife is enough to start.
How long does it take to carve something?
A simple beginner project — a mushroom, small animal, or gnome — takes between one and three hours. More detailed figures take a full day or weekend. Most weekend whittling projects are designed to be completed in a single sitting.
How do I keep my carving from splitting?
Use dry, seasoned wood (not green wood for decorative carvings), apply a thin coat of wood glue or sanding sealer to end grain before carving, and avoid leaving the carving in direct sunlight or near heat sources once finished. Store it somewhere with consistent humidity.
Can I use any knife for whittling?
Technically yes, but practically no. A kitchen knife is too long and too thick for controlled carving. A craft blade is not strong enough and snaps under carving pressure. Use a knife made for carving — the difference in control and safety is significant.
Read Next
Ready to keep going? These are the most useful next steps:
- 30 Weekend Whittling Projects — Start this weekend
- 60 Easy Wood Carving Projects for Beginners — The complete idea list
- 30 Easy Animal Carvings — Perfect beginner subjects
- 8 Beginner-Friendly Gnome Carving Ideas
- Best Wood Carving Gloves
- Best Carving Knife for Beginners
- How to Prepare Wood for Carving
- Wood Carving Tips for Beginners
- Best Finishes for Wood Carving
- How to Keep Your Carving from Splitting